Starting point
-
You have created the necessary controls and devices, basic actions and routines and uploaded them to your installation at least once.
-
Your computer is connected to the installation.
-
You are in the Create overview window.

Procedure
-
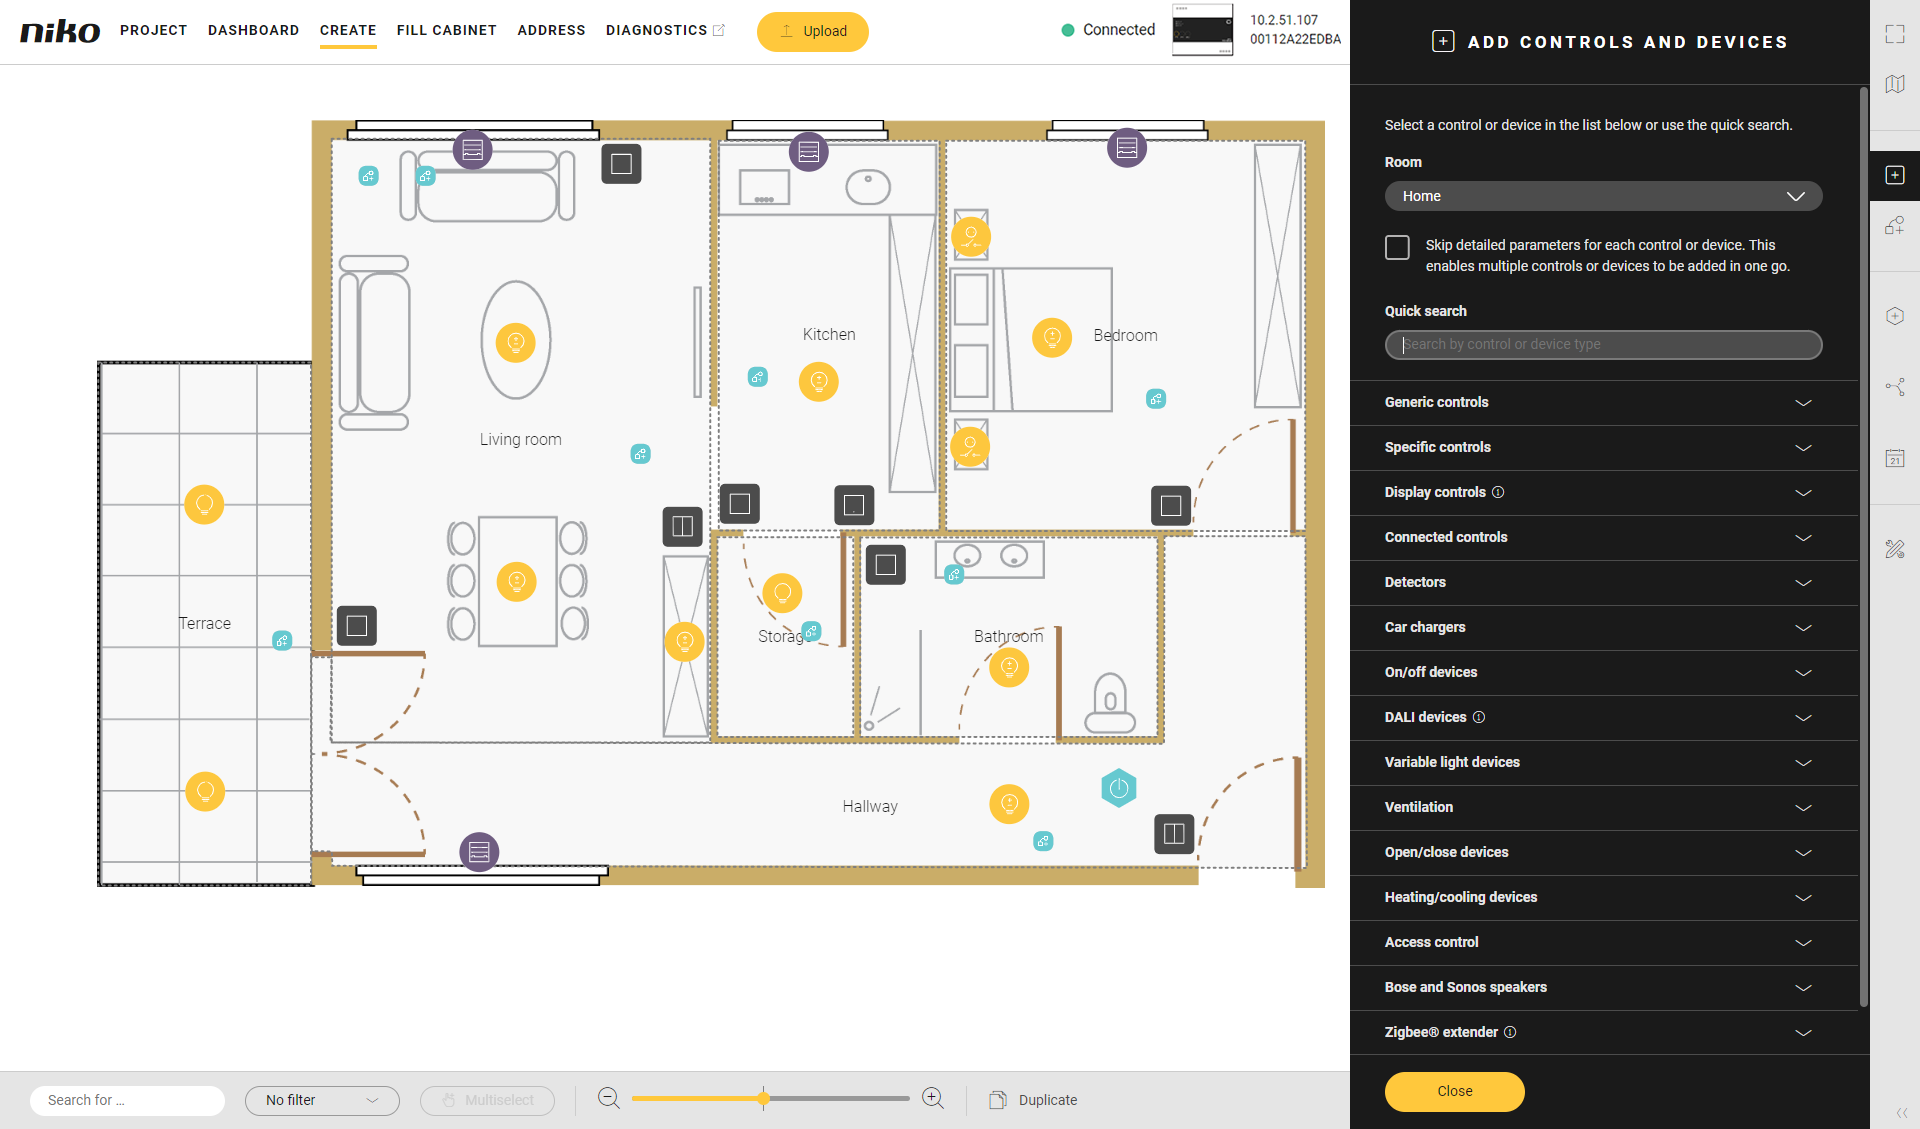
In the right-hand button bar, click on the Add controls and devices button.
Result:
The Add controls and devices pane appears and shows the categories into which the controls and devices are subdivided.
-
You now have the choice:
-
If you tick the selection box Skip detailed parameters for each control or device, you can quickly add several controls or devices by clicking on them. However, you will then need to enter the name and parameters for each control or device afterwards.
-
If you untick the selection box Skip detailed parameters for each control or device, you can set the name or parameters for the current control or device immediately.
-
-
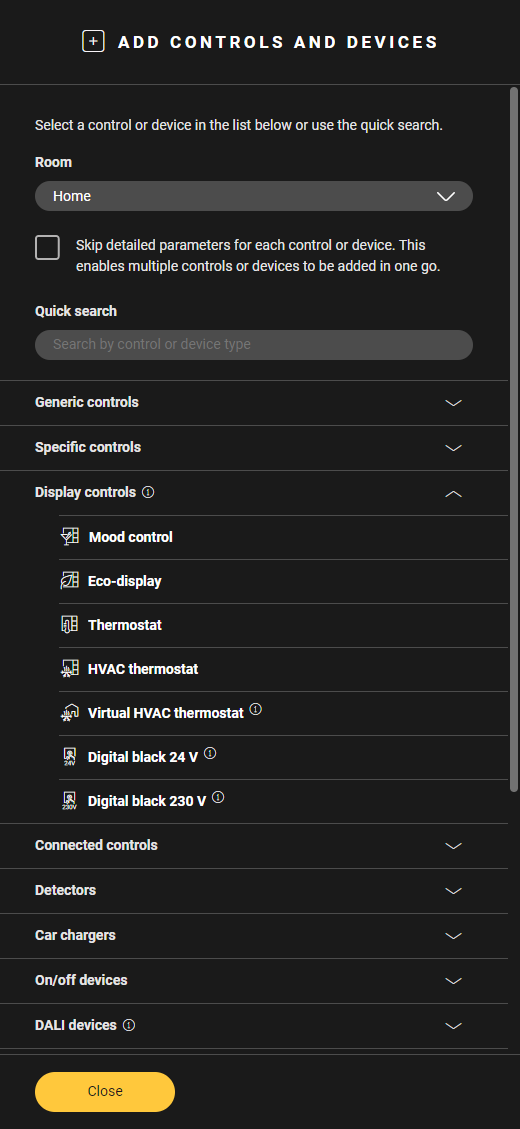
Click on the arrow next to the category Display controls.
-
Select the desired room at the top of the pane, or click inside the room where you want to place the Digital Black 24 V/230 V.
-
Select the desired Digital black 24 V or 230 V.
Result: The Digital black is placed in the selected room. The device settings are greyed out and marked in red.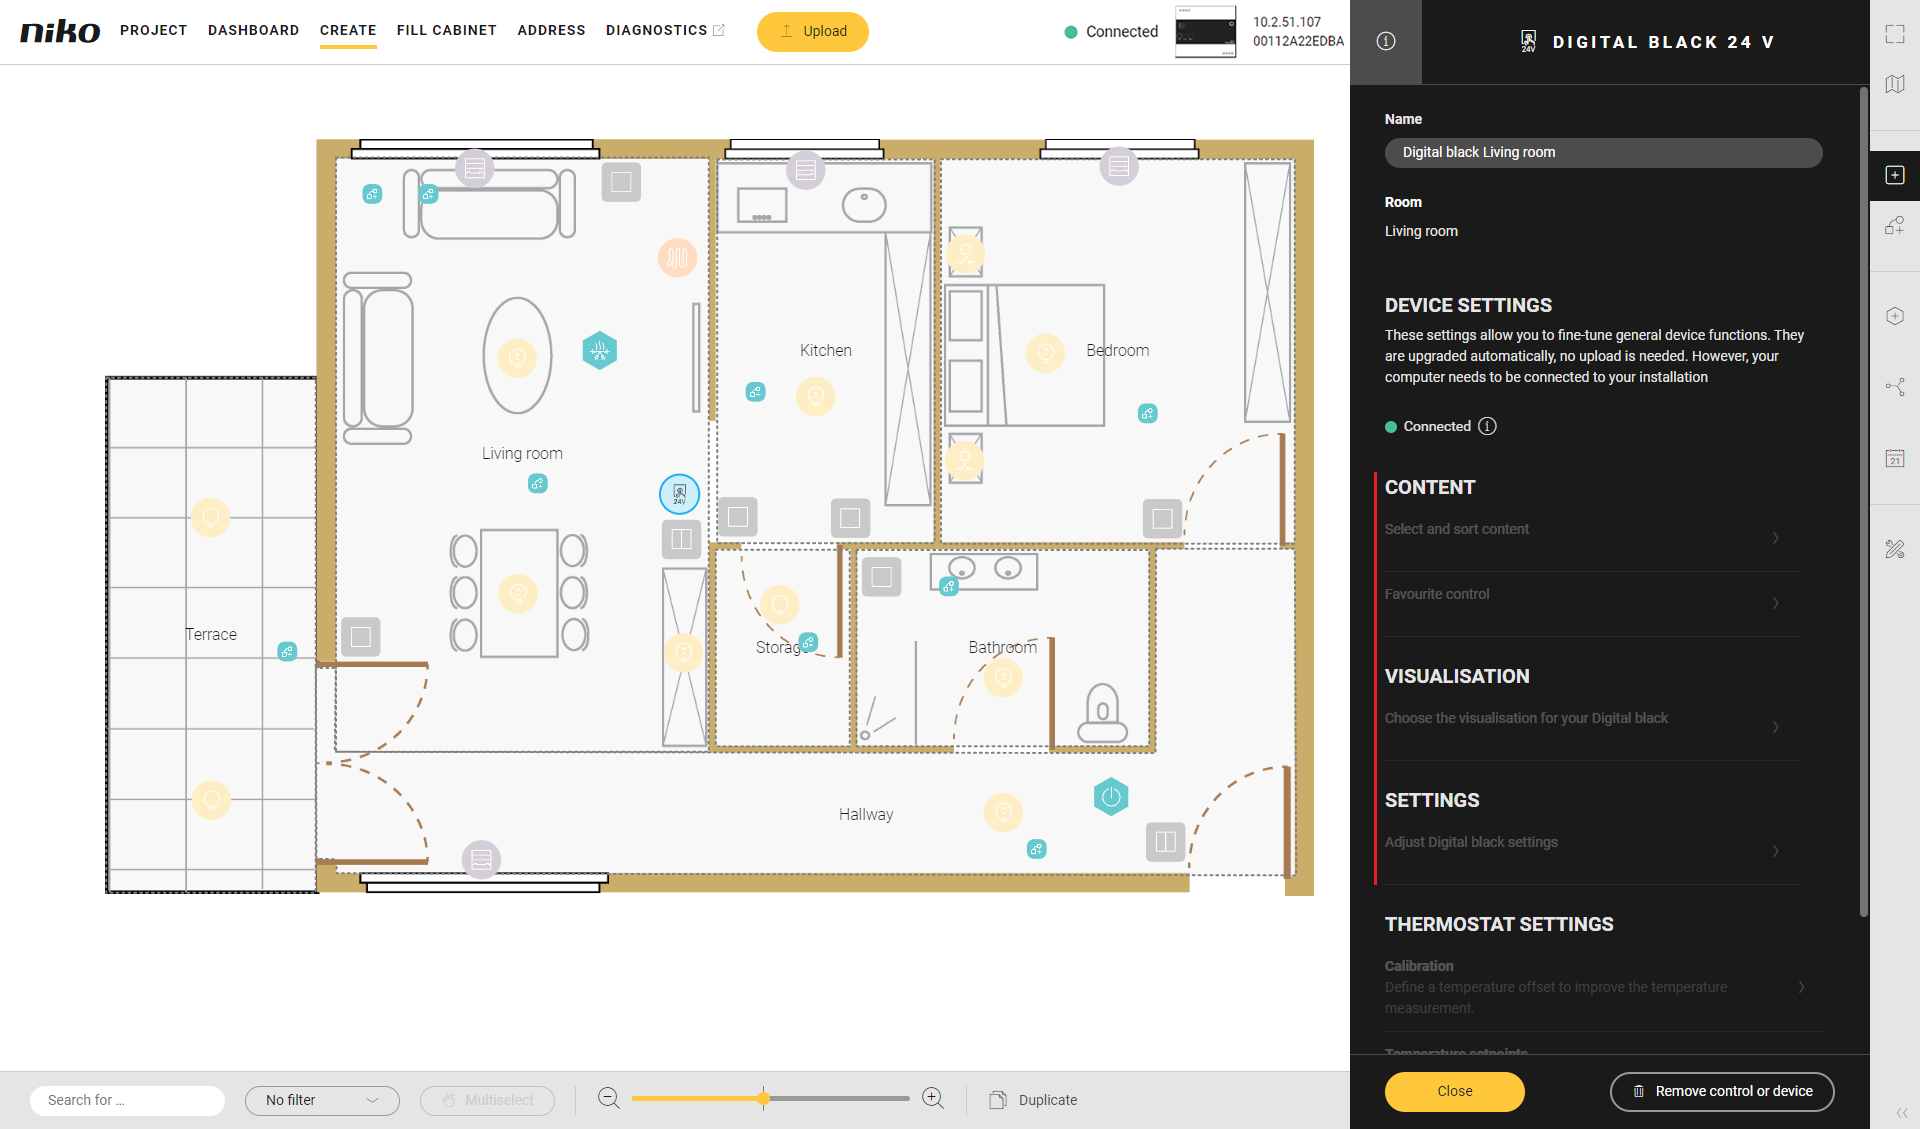
-
If you wish, you can modify the name of the Digital black.
-
Drag the control to the correct location on the floor plan.
-
Click on the Close button.
-
Address the Digital black.
-
Upload the configuration file to your installation.
-
In the Create overview window, select the Digital black on the floor plan.
Result: The device settings pane of the Digital black appears. The device settings are no longer greyed out and no longer marked in red.
-
Configure the device settings. An extra upload of the configuration file afterwards is not necessary.
-
For Content > Select and sort content, you can add the desired basic actions and routines (max. 12) to be shown on the Digital black and sort them using the arrows.
-
For Content > Favourite control, you can select which control is shown by default when the Digital black lights up.
-
For Visualisation, you can choose how the controls are shown, in carousel black or grid black (max. 4 per grid).
-
For Settings, you can turn the built-in proximity sensor on or off. This sensor has a fixed range of 0 –30 cm in a cone shape. When it is set to ON and you approach the screen in this range, the Digital black will light up. When it is set to OFF, you have to touch the Digital black to make it light up.
-
-
Only for Digital black, 24 V, configure the Thermostat settings. An extra upload of the configuration file afterwards is not necessary.
-
For Calibration, you can adjust the calibration offset.
For a more accurate temperature reading, you can measure the room temperature with a classic thermometer (preferably in the middle of the room at 1,5m height) and set the delta between the actual measured temperature and displayed temperature on your Digital black.
To set the value, use the formula "calibration offset = measured temperature - displayed temperature". -
For Temperature setpoints, you can adjust the default temperature to your desired temperature level for each of the set points.
-
For Weekly programs, you can configure two heating programs and one cooling program. Select a program to adjust the default provided time schedules to your needs.
-
Add, change and remove set points.
-
Change activation times per set point.
-
Copy a day program to the next day.
-
-
-
Click on the Close button to return to the Create pane.
If you drag a control or a device to a different room, the Room field in the pane will automatically be updated.