| Sv translation | ||||||||||||||||||||||||||||||||||||||||
|---|---|---|---|---|---|---|---|---|---|---|---|---|---|---|---|---|---|---|---|---|---|---|---|---|---|---|---|---|---|---|---|---|---|---|---|---|---|---|---|---|
| ||||||||||||||||||||||||||||||||||||||||
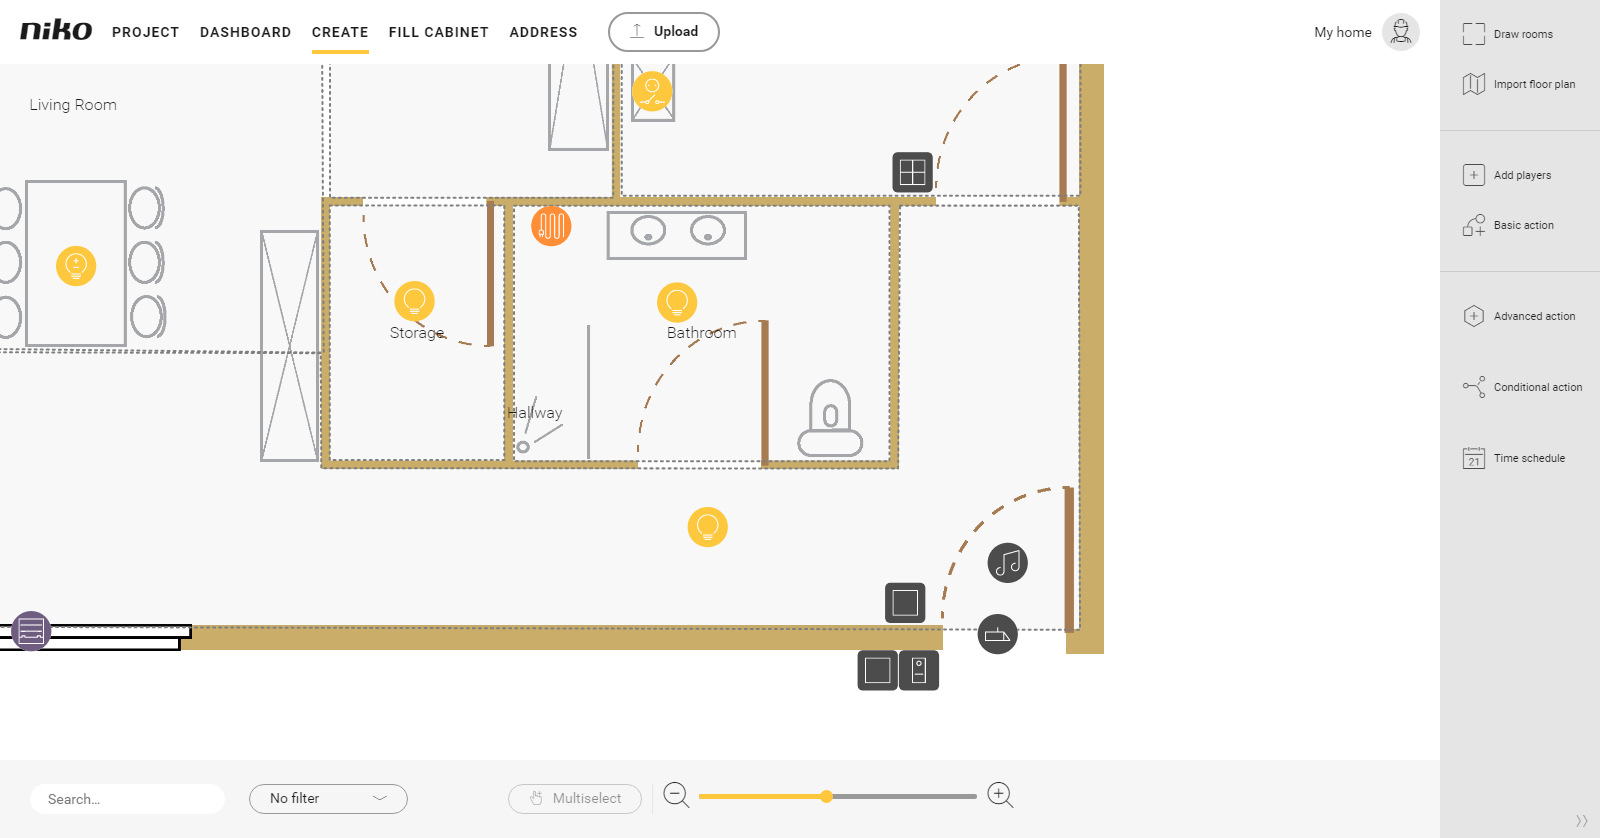
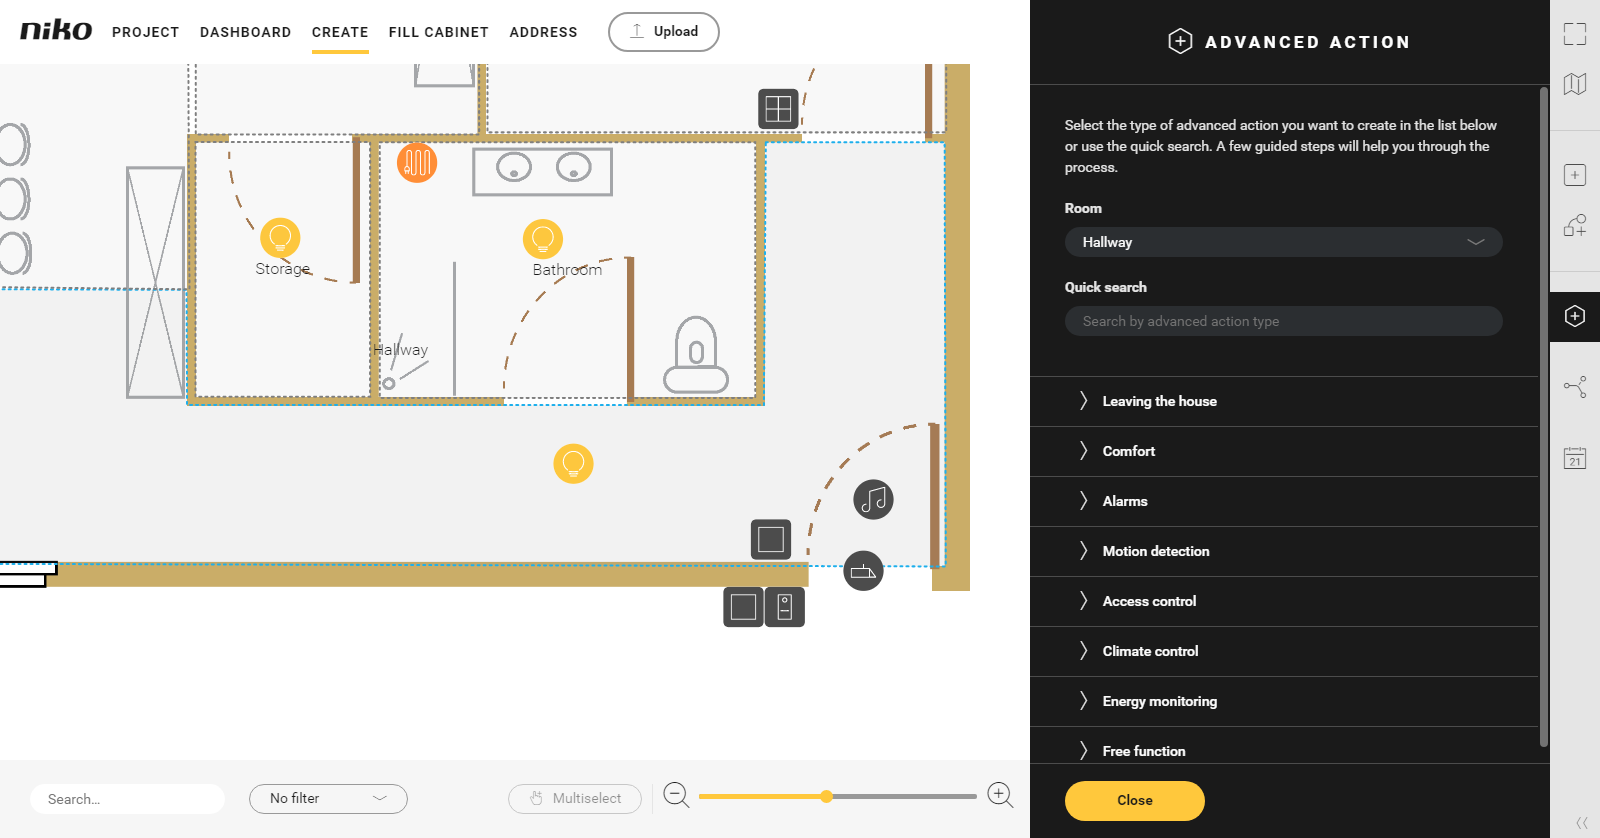
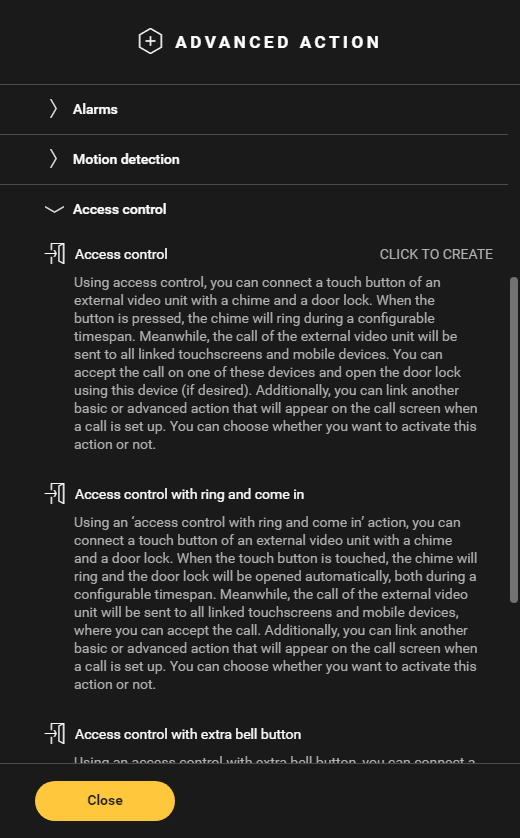
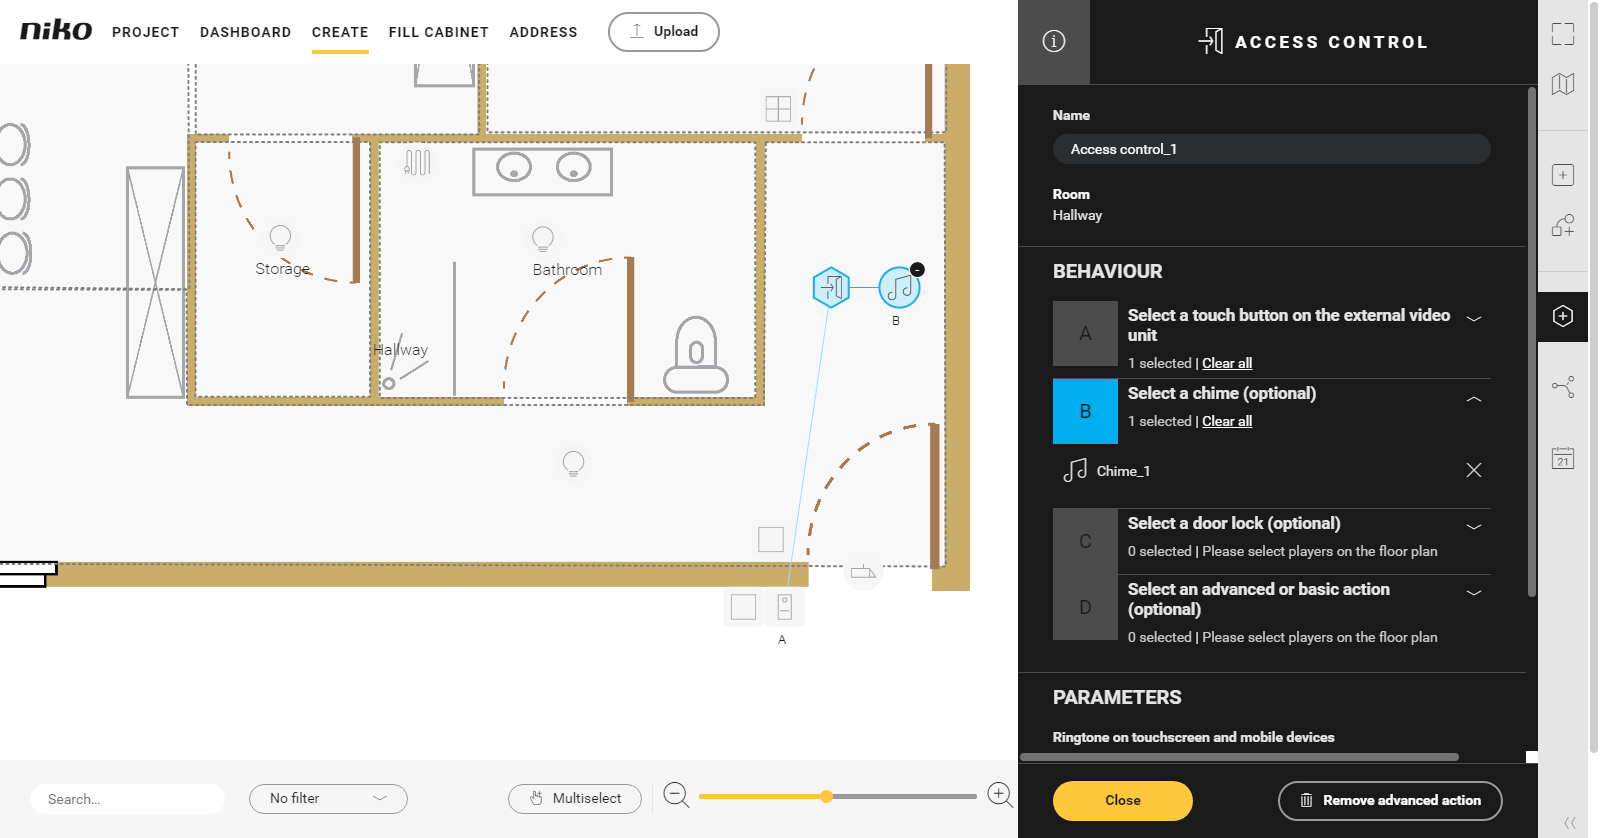
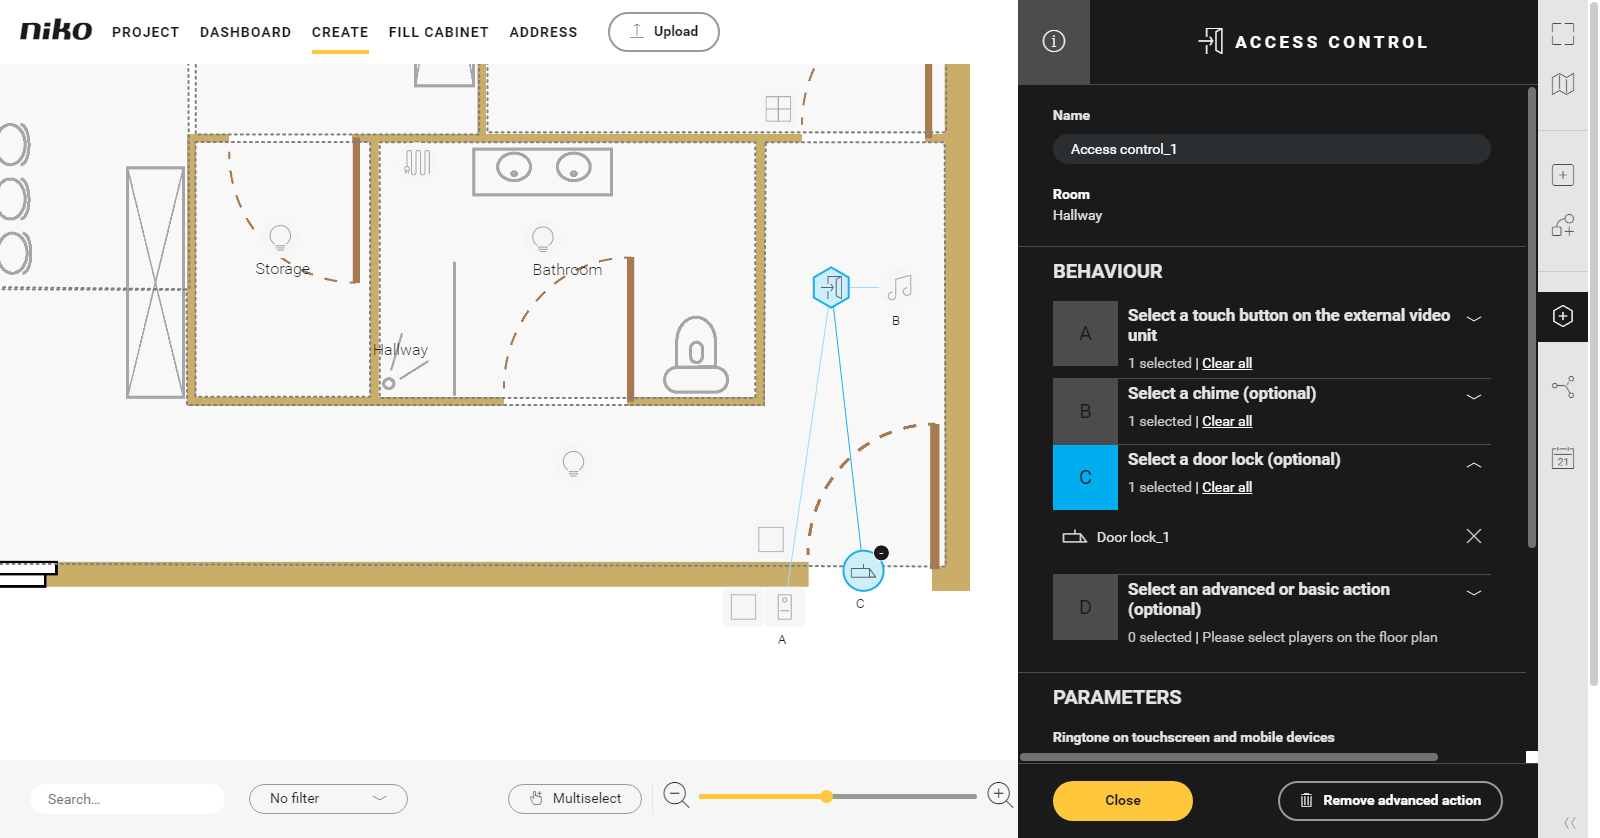
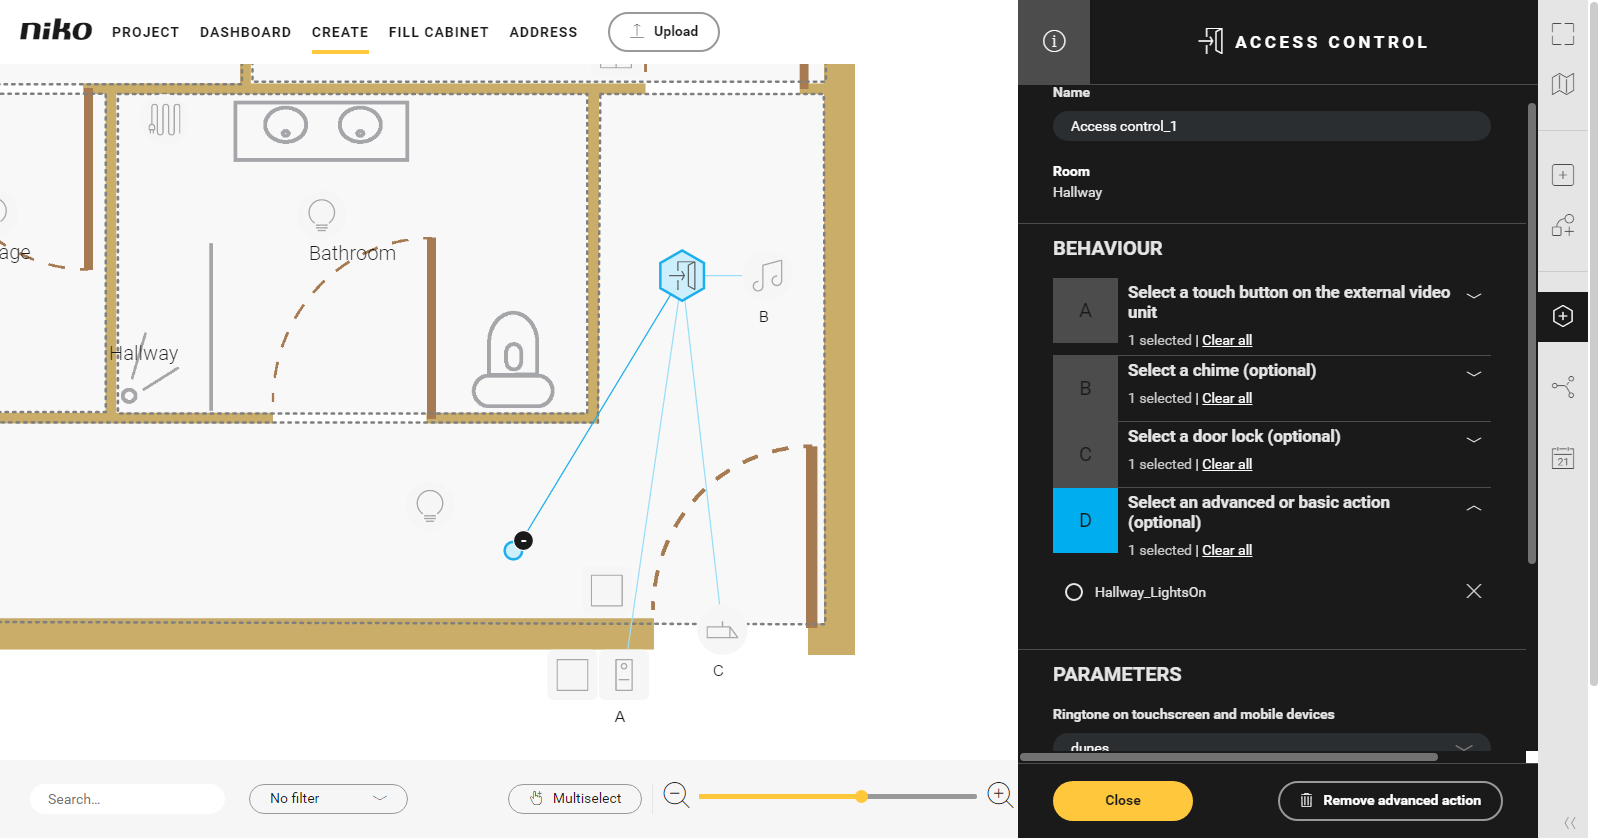
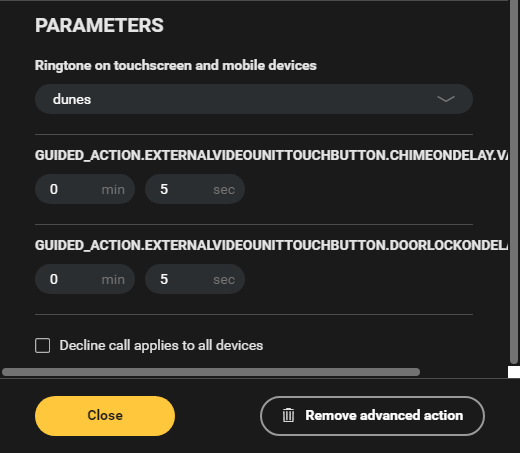
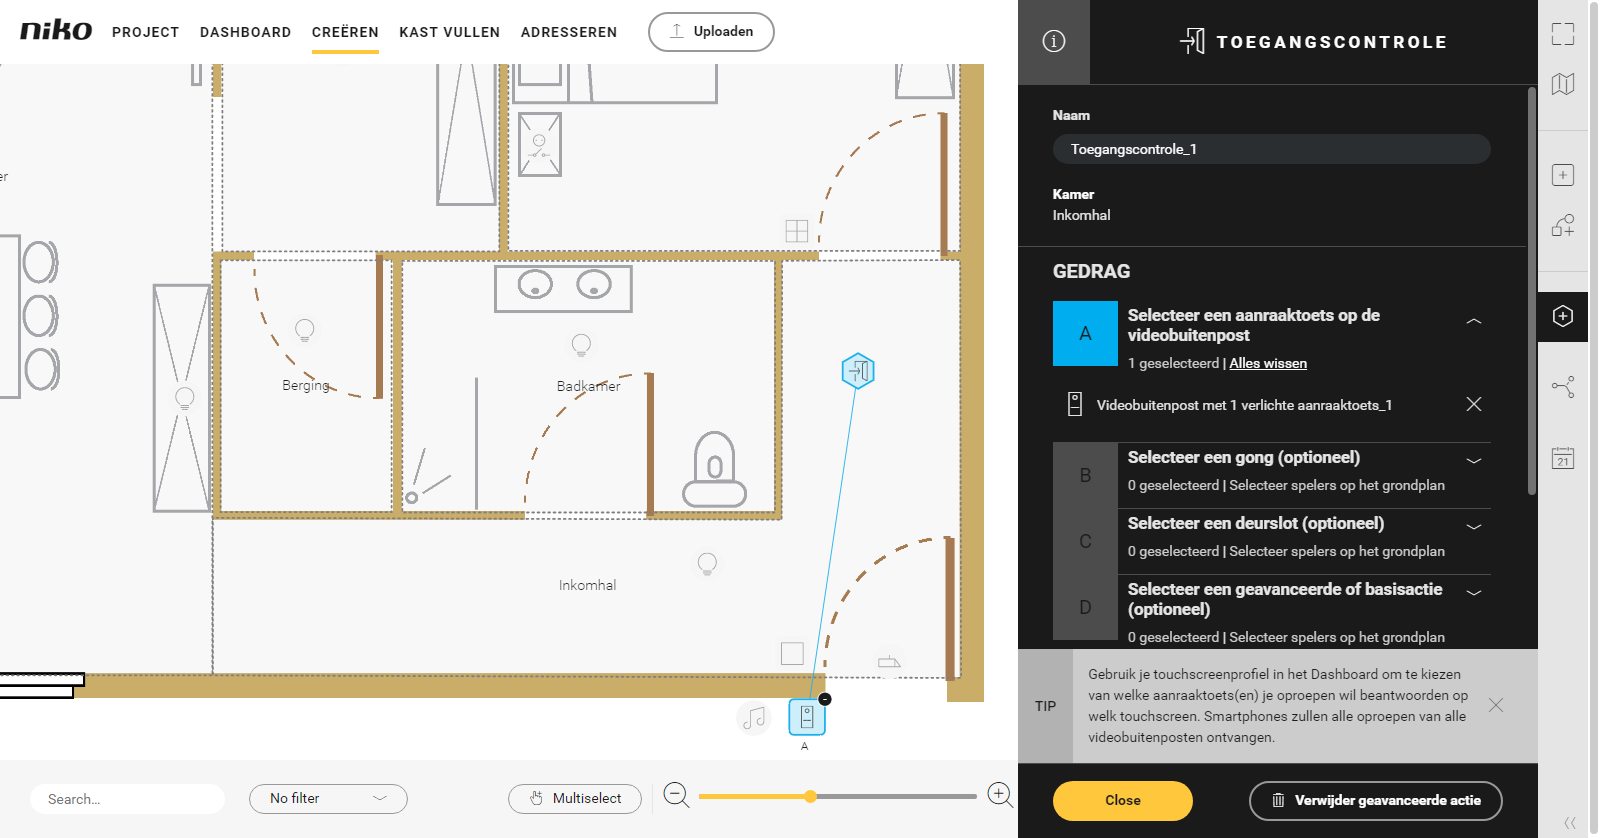
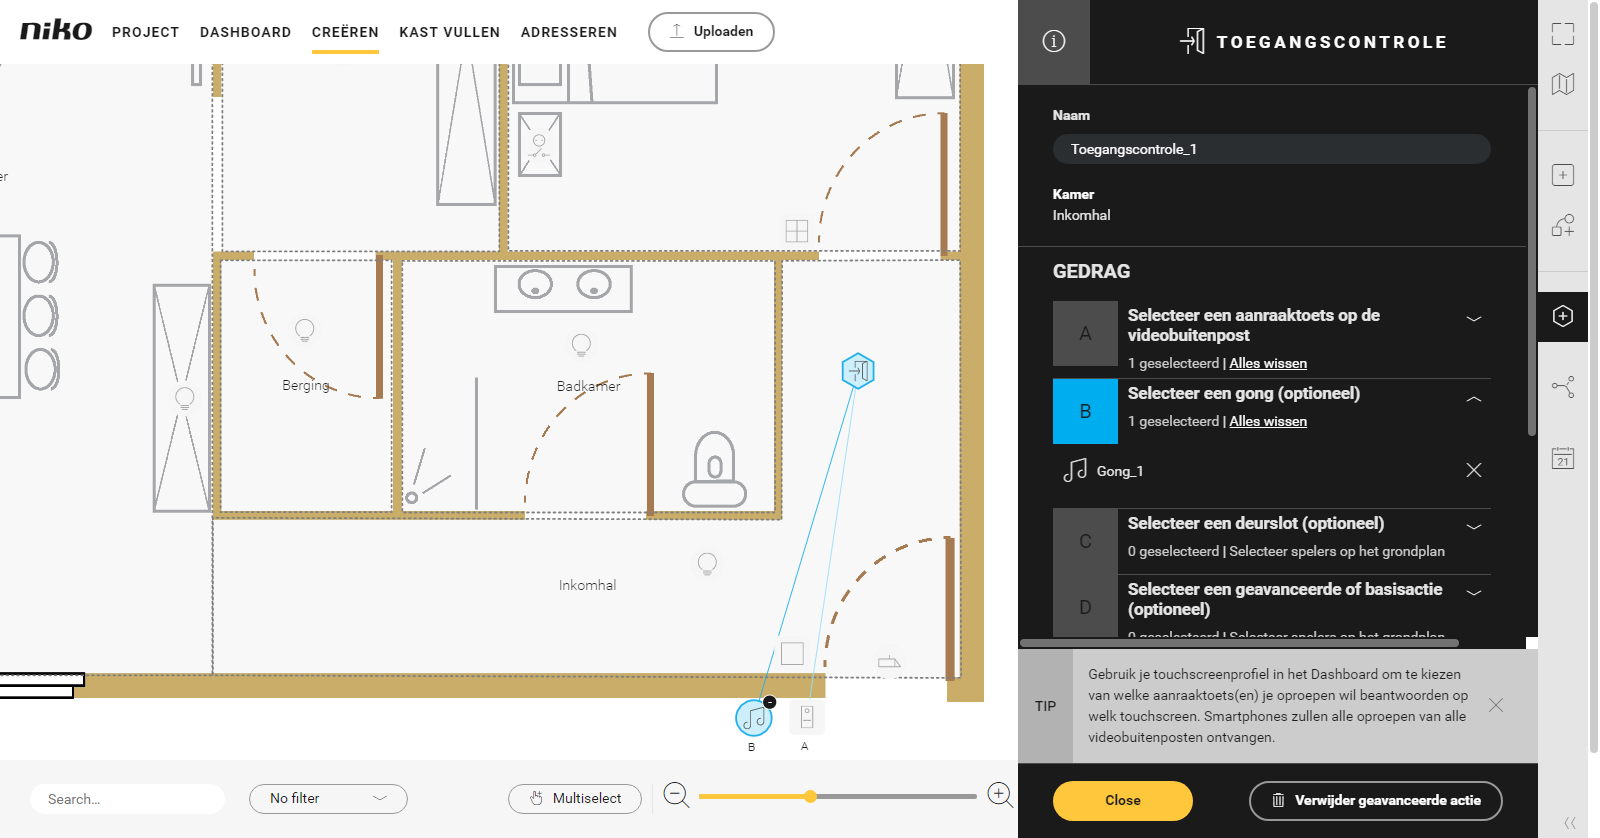
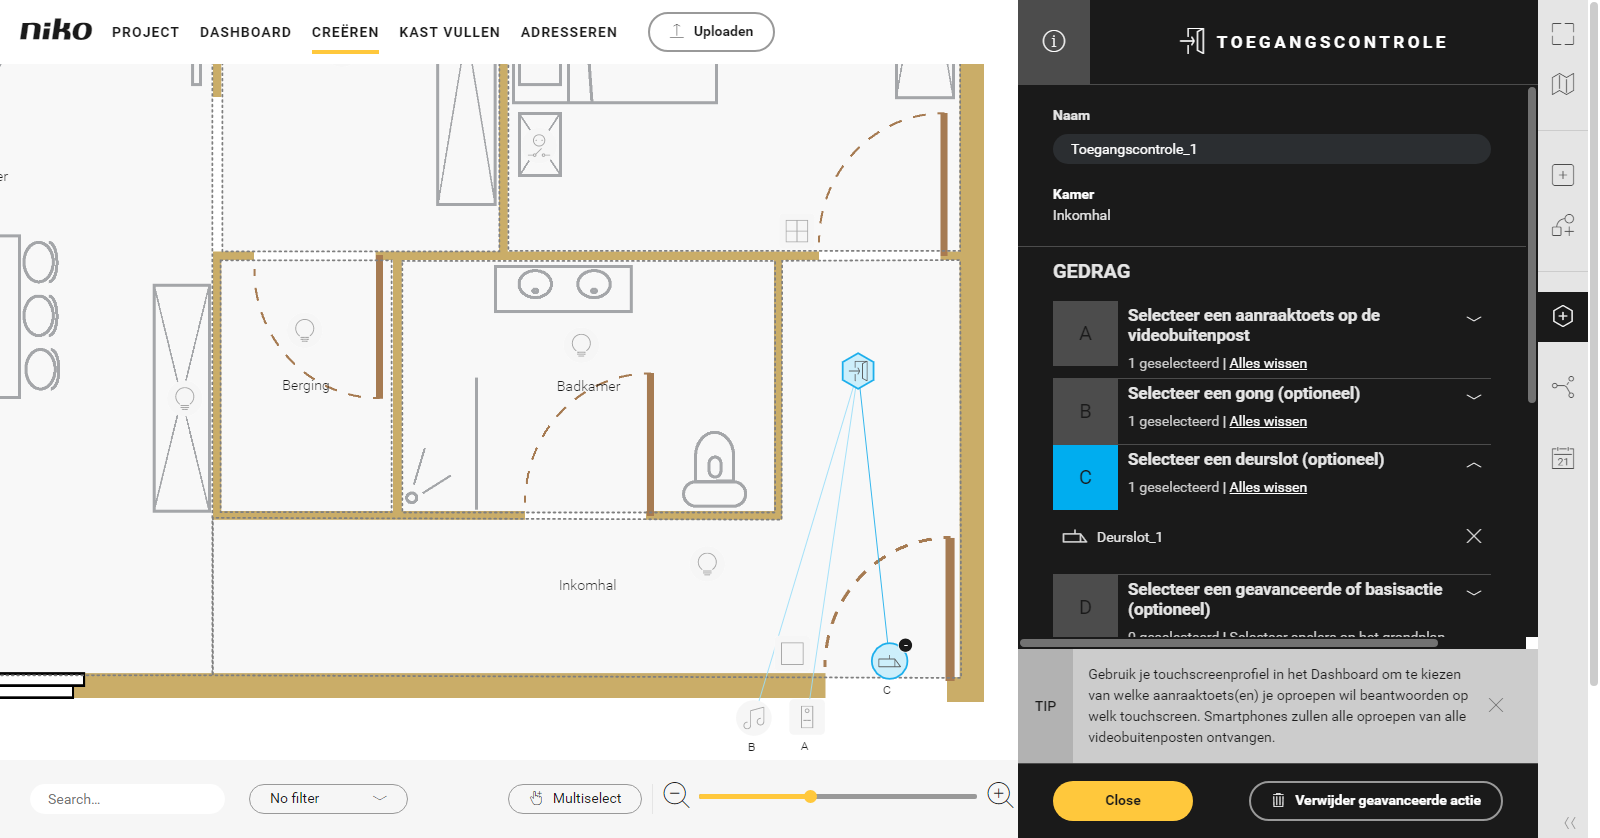
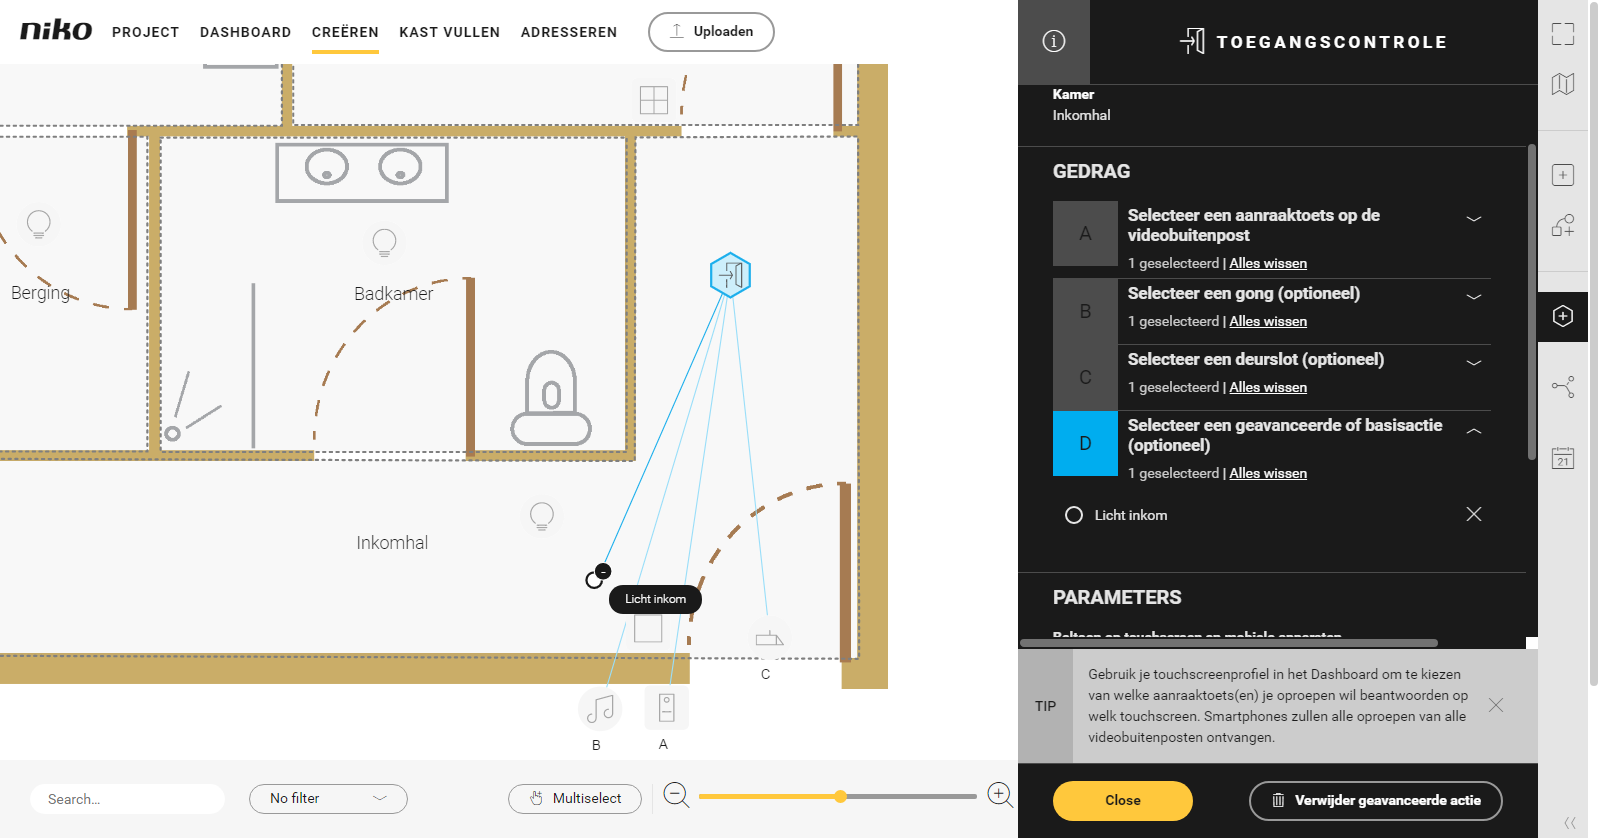
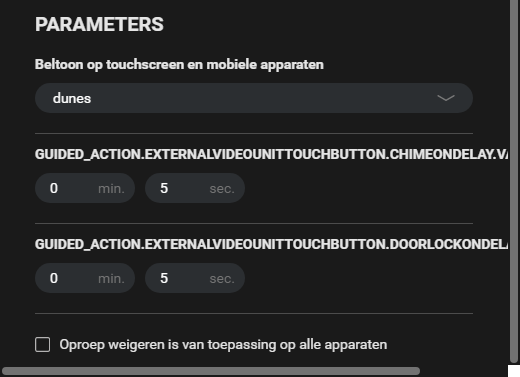
What is access control?With the advanced action Access control you can link a touch button of an external video unit to a touchscreen, a chime or a door lock. When the button is touched, the chime sounds for a programmable amount of time. Meanwhile, the call will be sent from the external video unit to all linked devices: touchscreens, smartphones and tablets. If desired, you can answer the call and unlock the door using this device. You can also link a basic or advanced action and decide when a call comes in whether you want to activate that action or not. Starting point
Procedure
VideoSee an example here. Turn on the sound to watch the video.
|


| Sv translation | ||||||||||||||||||||||||||||||||||||||||
|---|---|---|---|---|---|---|---|---|---|---|---|---|---|---|---|---|---|---|---|---|---|---|---|---|---|---|---|---|---|---|---|---|---|---|---|---|---|---|---|---|
| ||||||||||||||||||||||||||||||||||||||||
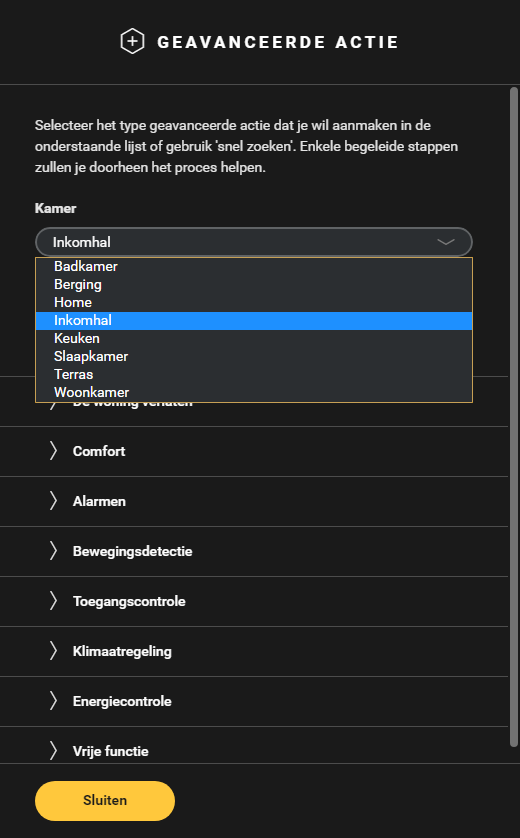
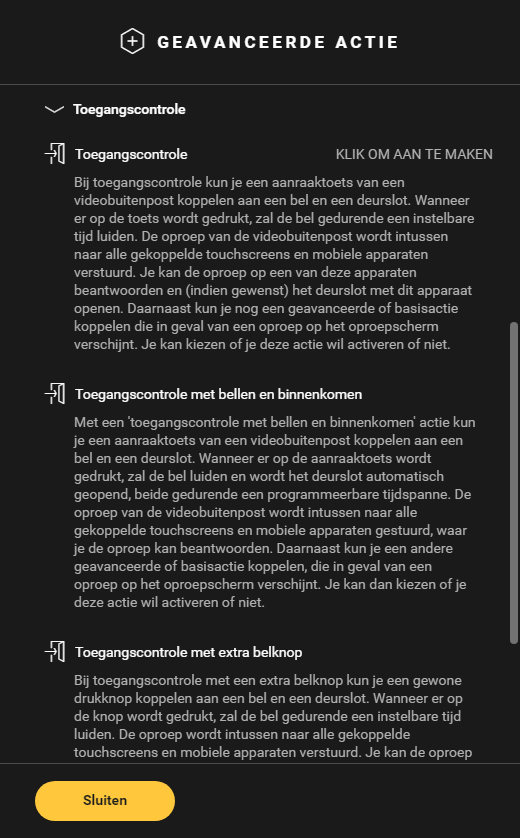
Wat is toegangscontrole?Met de geavanceerde actie Toegangscontrole kun je een aanraaktoets van een videobuitenpost koppelen aan een touchscreen, een gong of een deurslot. Als de toets aangeraakt wordt, dan luidt de gong gedurende een instelbare tijd. Ondertussen wordt de oproep van de videobuitenpost naar alle gekoppelde apparaten gestuurd: touchscreens, smartphones en tablets. Indien gewenst, kun je de oproep met dit apparaat beantwoorden en het deurslot ontgrendelen. Je kunt ook een basisactie of een geavanceerde actie koppelen en bij een oproep beslissen of je die actie al dan niet wilt activeren. Startpunt
Procedure
VideoBekijk hier een voorbeeld. Zet je geluid aan om de video te bekijken.
|

| Sv translation | ||||||||||||||||||||||||||||||||||||||||||||
|---|---|---|---|---|---|---|---|---|---|---|---|---|---|---|---|---|---|---|---|---|---|---|---|---|---|---|---|---|---|---|---|---|---|---|---|---|---|---|---|---|---|---|---|---|
| ||||||||||||||||||||||||||||||||||||||||||||
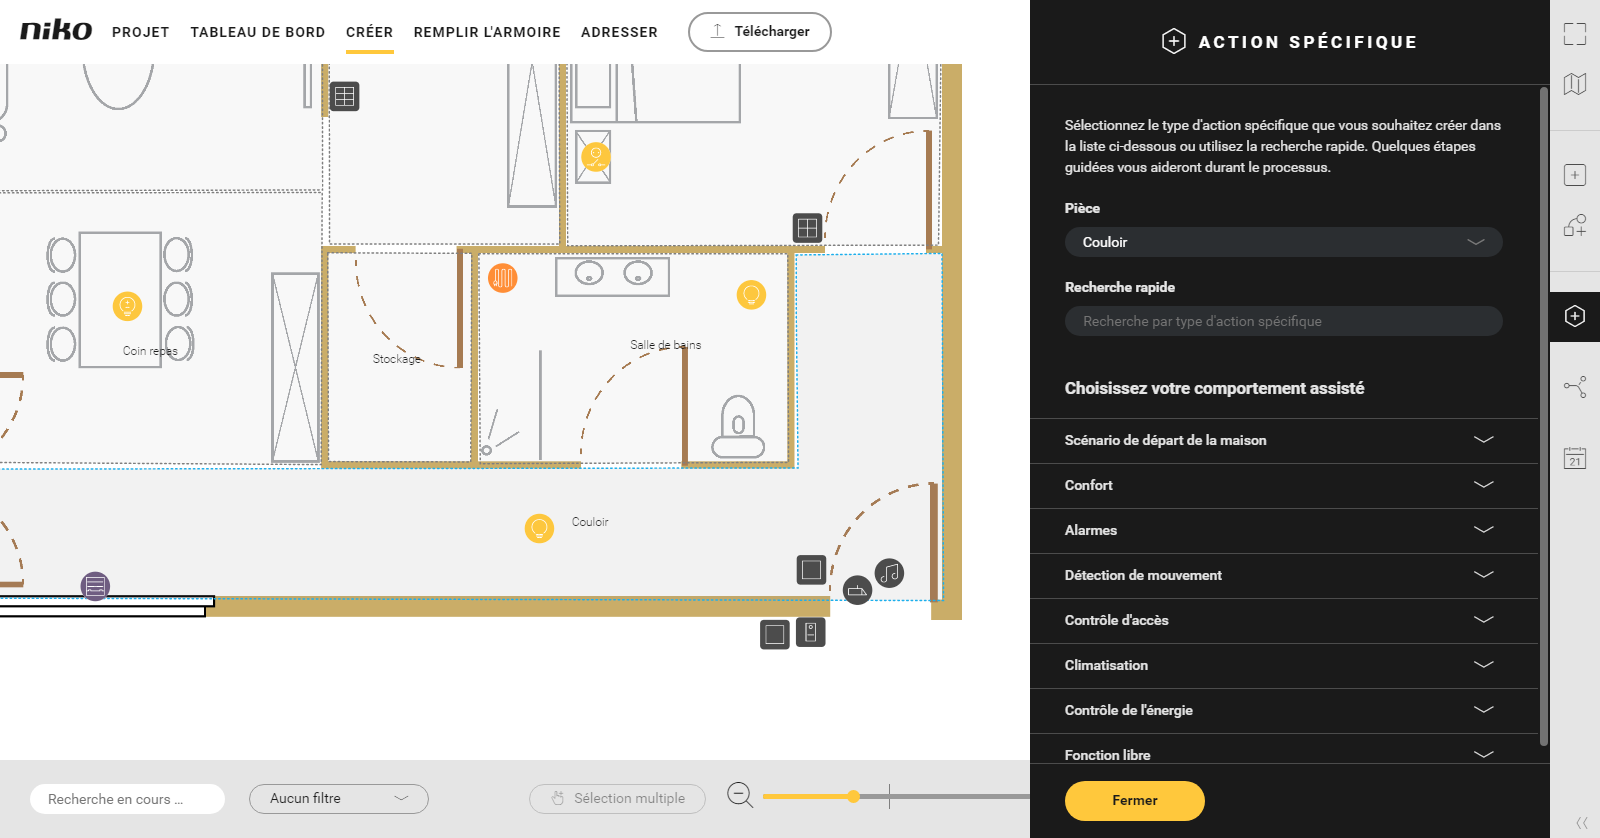
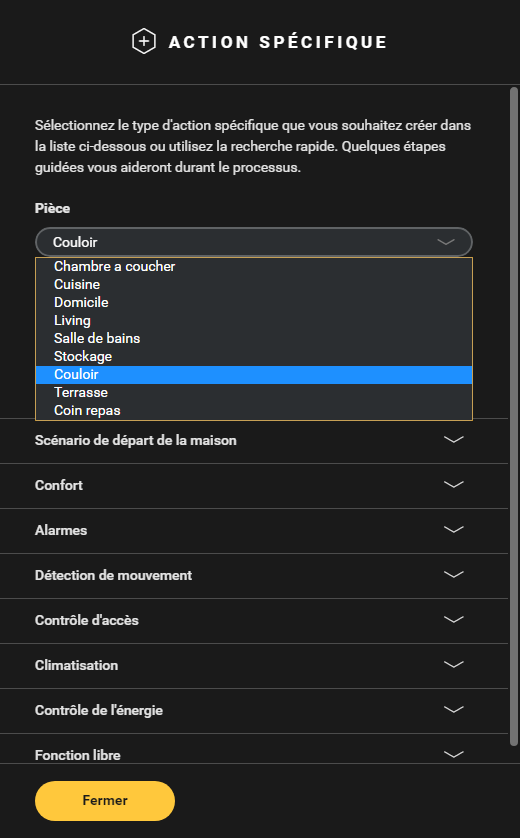
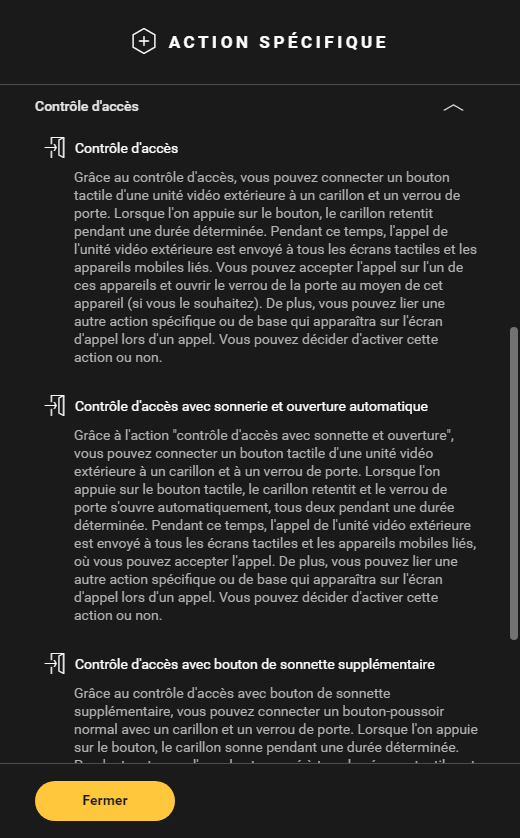
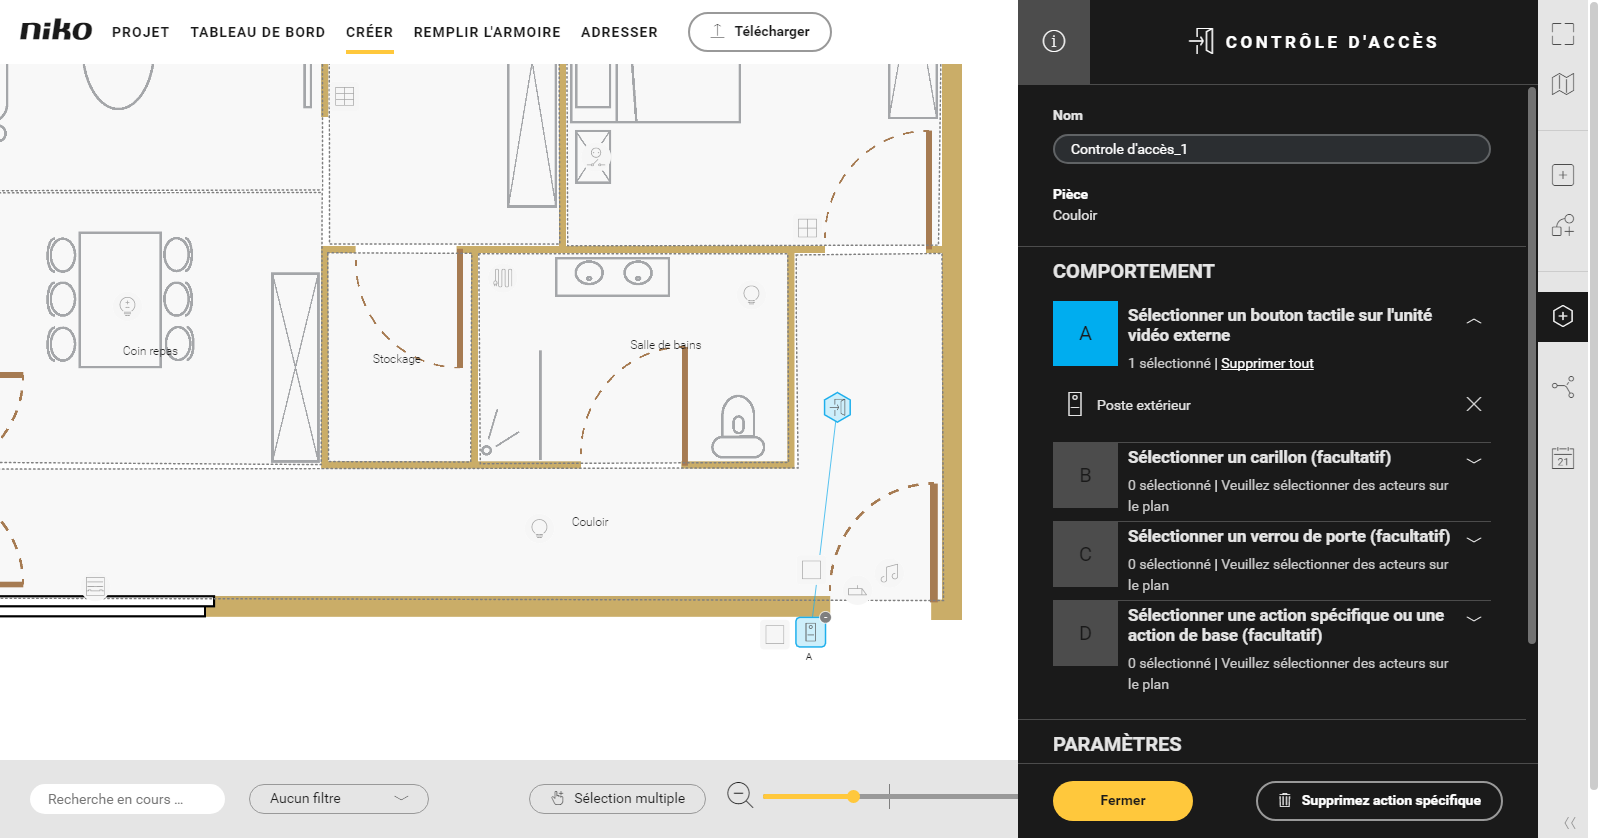
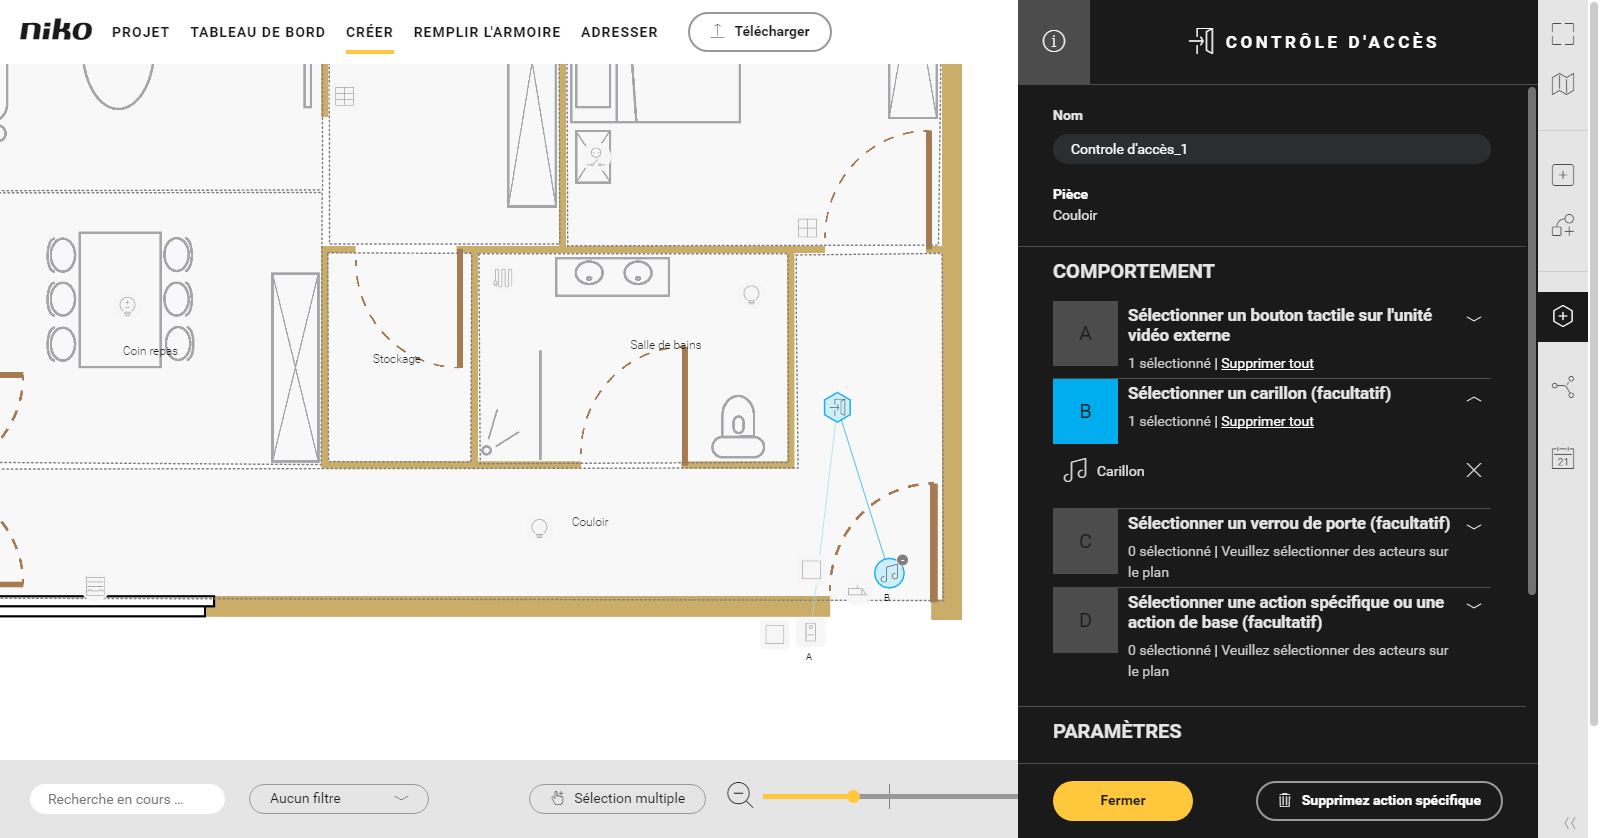
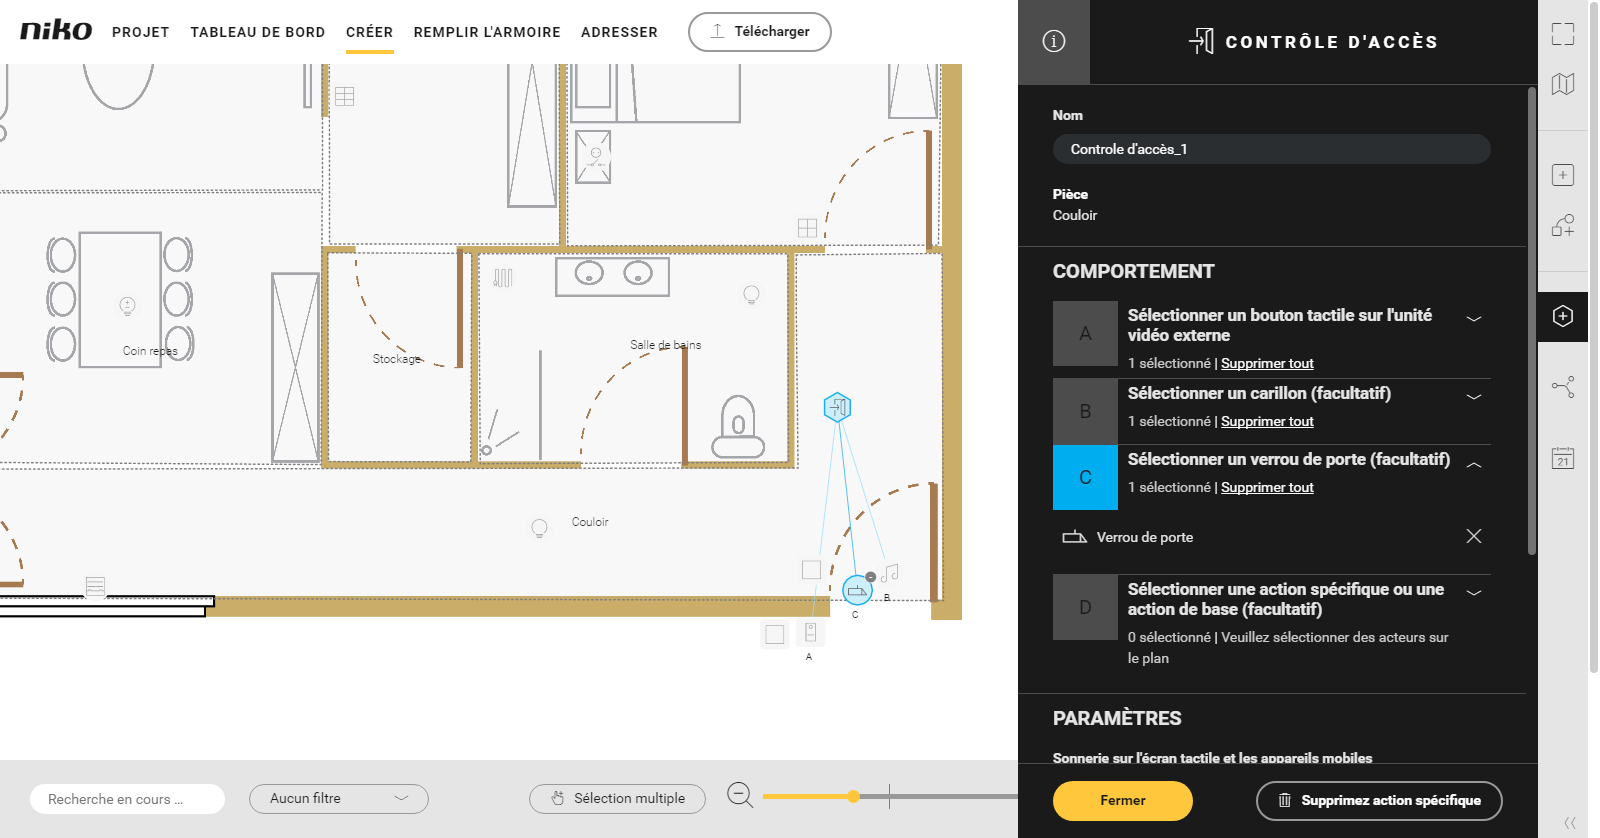
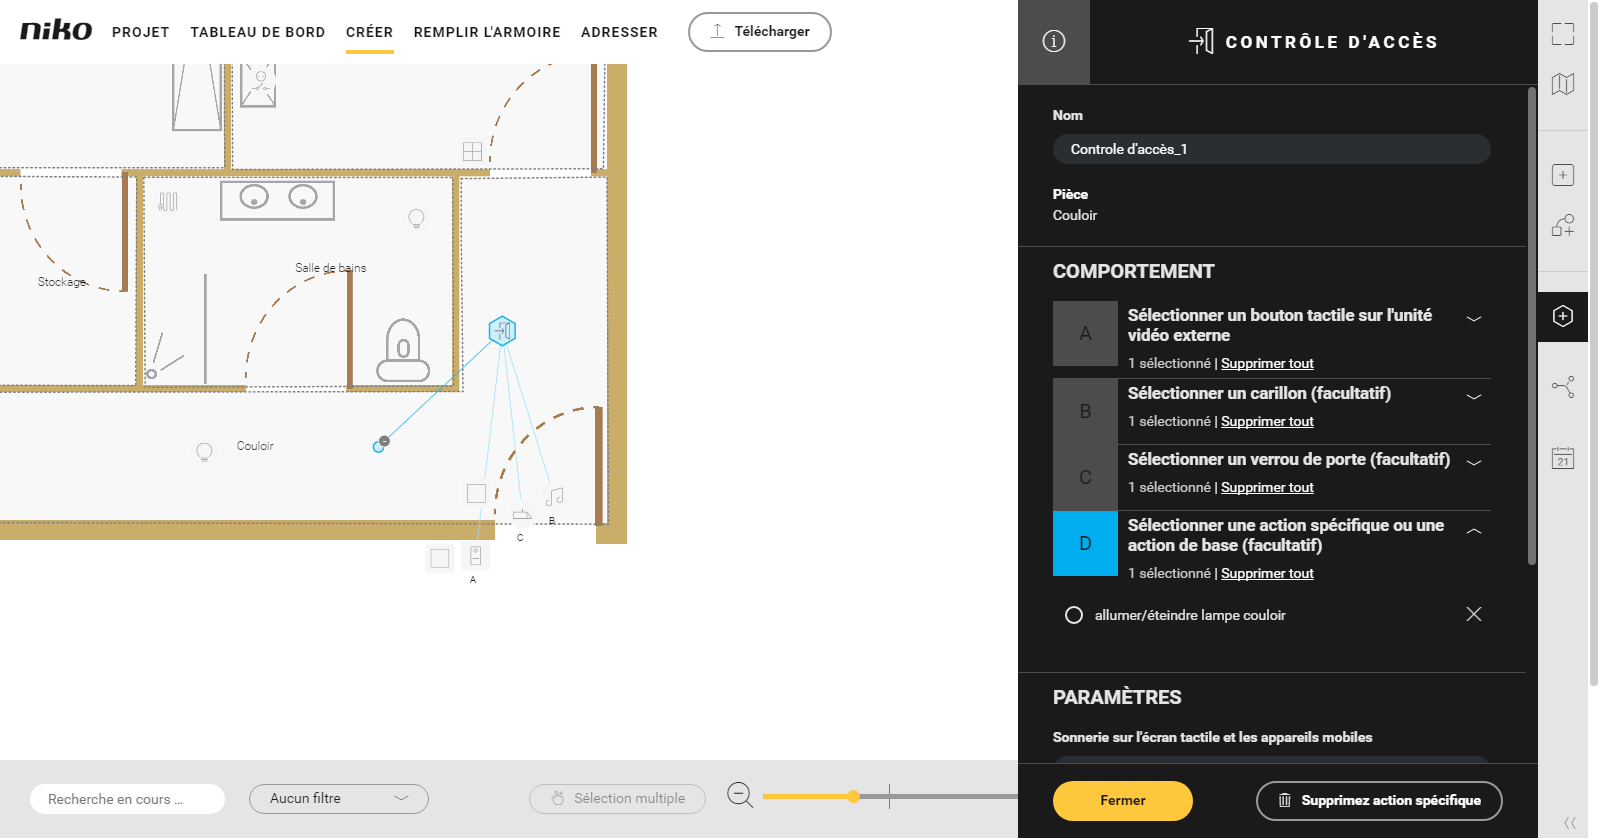
qu'est-ce-que le contrôle d’accès ?L'action avancée Contrôle d'accès vous permet de connecter un bouton-poussoir tactile d'un poste extérieur vidéo à un écran tactile, un carillon ou un verrou de porte. Lorsqu'on appuie sur le bouton, le carillon sonne pendant un temps réglable. Dans l'intervalle, l'appel du poste extérieur vidéo est envoyé à tous les appareils connectés : écrans tactiles, smartphones et tablettes. Si vous le souhaitez, vous pouvez répondre à l'appel avec cet appareil et déverrouiller le verrou de porte. Vous pouvez aussi associer une action de base ou avancée et décider, en cas d'appel, si vous souhaitez activer ou non cette action. Point de départ
Procédure
VidéoVisionnez ici un exemple. Activez le son pour visionner la vidéo. | Importer plan au sol | Importer plan au sol | nopanel | true

| HTML |
|---|
<iframe width="1200" height="700" src="https://youtube.com/embed/fOzBePBWkTQ?rel=0&controls=0&showinfo=0" frameborder="0" allowfullscreen></iframe> |