It is very important to download the Niko Home Control 1.x configuration file from your installation and save it on your computer. You will need this configuration file to rebuild the same configuration in the Niko Home Control 2.x software.
Step 1
Install the Niko Home Control I programming software on your computer:
Step 2
Connect your computer to the controller:
|
Type of controller |
Instructions |
|---|---|
|
Controller

|
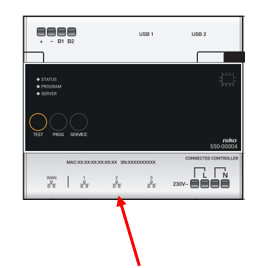
Use an Ethernet cable to connect directly to the controller. The network port is located on the front of the controller. It is only accessible if you open the door of your electrical cabinet. |
|
Connected controller
|
You have two options:
|
Step 3
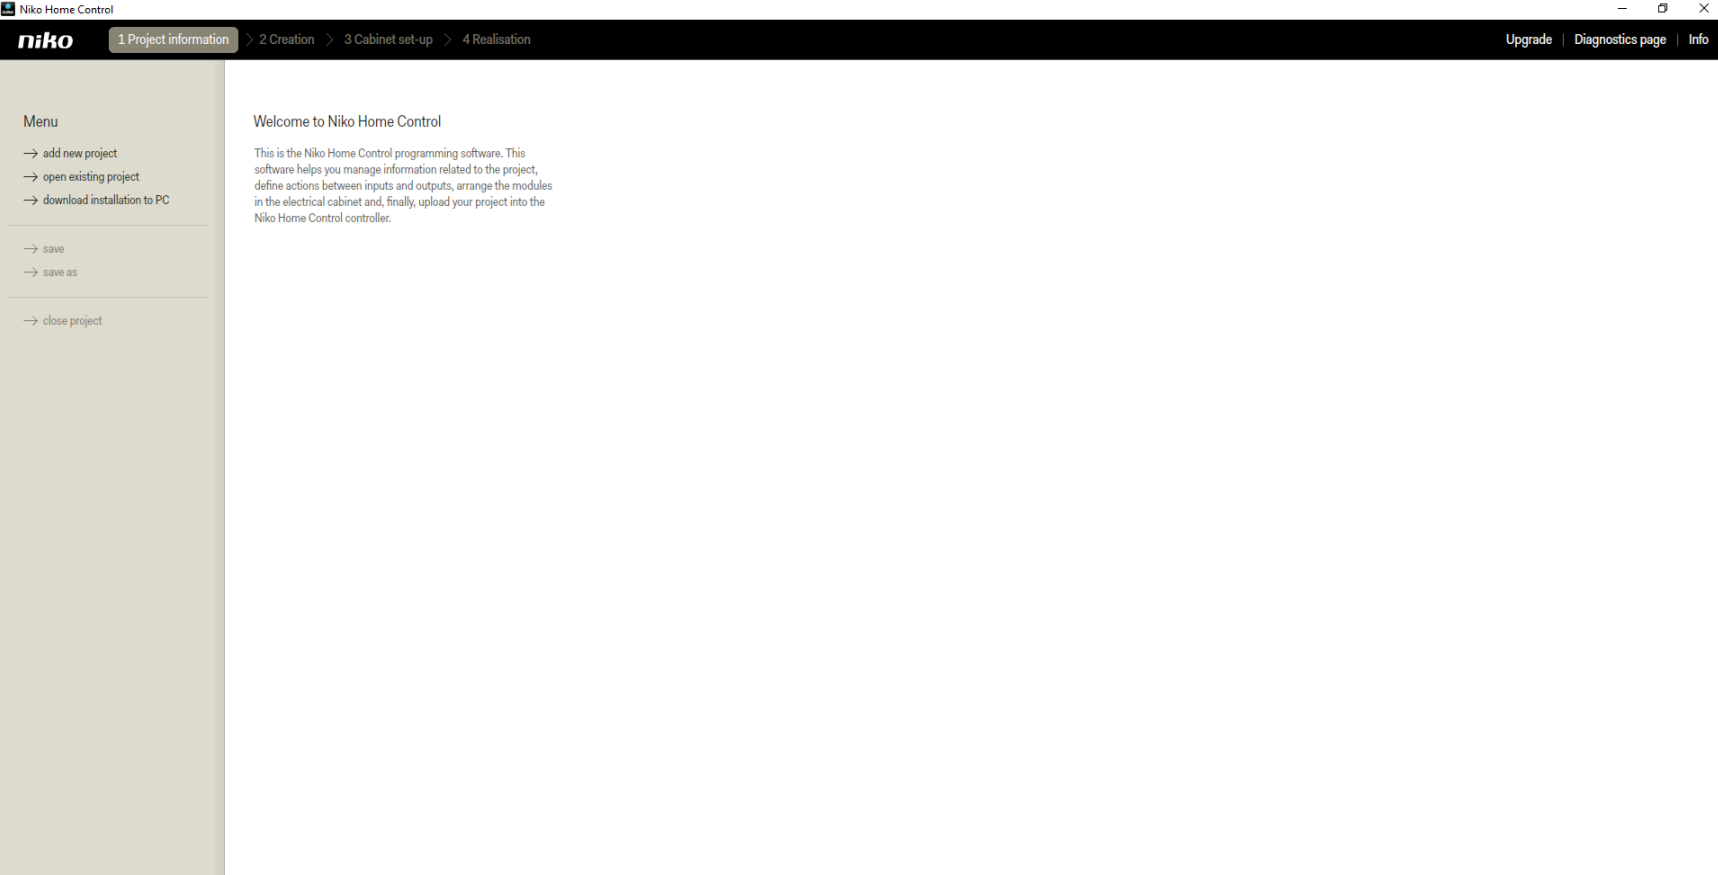
Open the programming software for Niko Home Control I (which you have installed in step 1).
Programming software icon:

The following screen will be opened:
Step 4
Download the configuration of your Niko Home Control installation to your computer by selecting "download installation to PC":
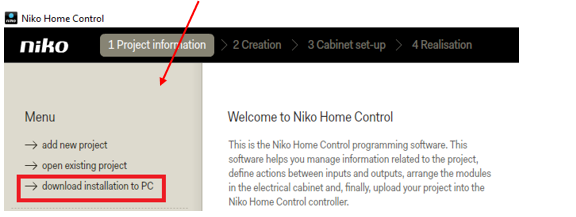
The following screen will open:

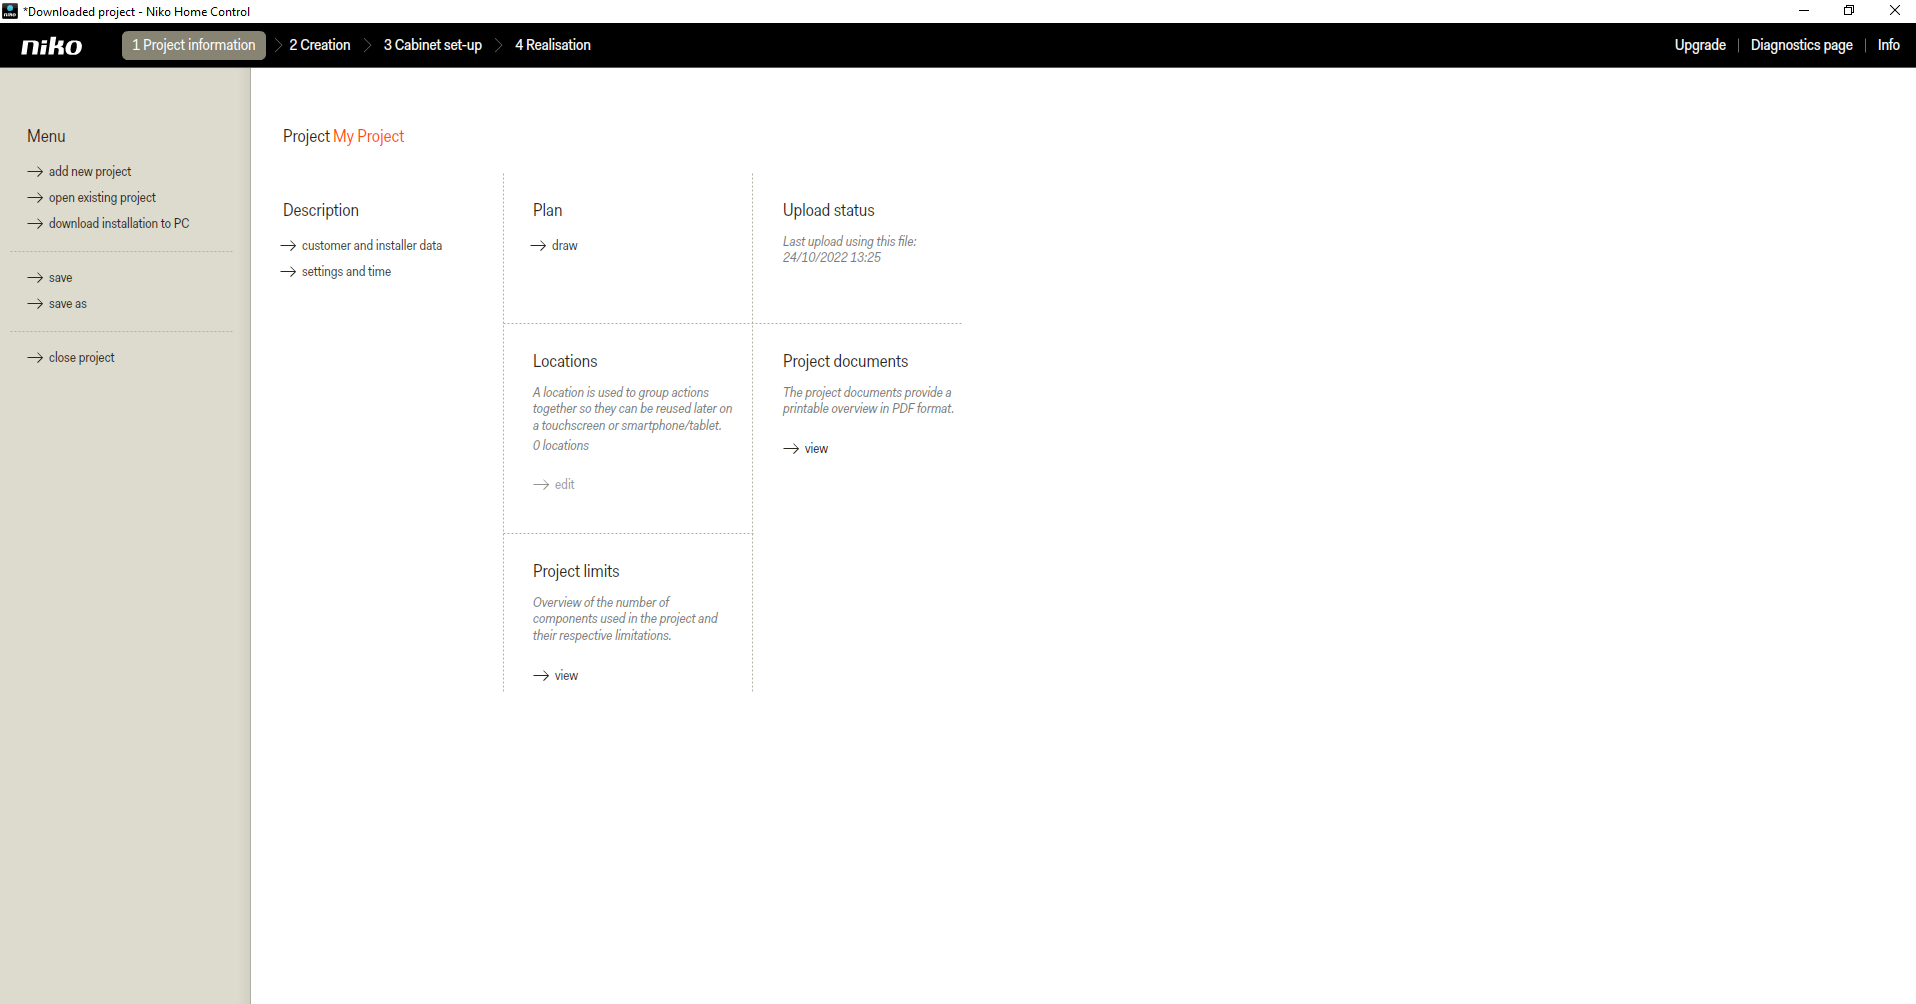
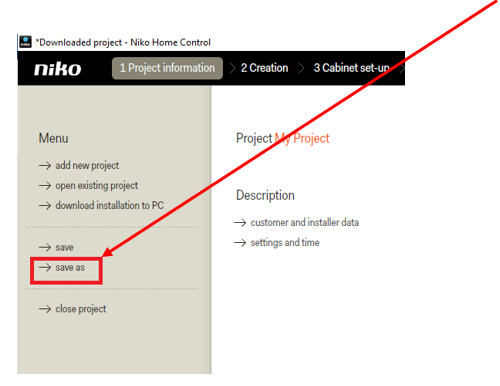
If the project download was successful, you will see "downloaded project" in the upper left corner:
Step 5
Save the project to your computer by clicking "save as"
A file browser window will open. Choose a location and a name for your project and save this file on your computer.