Situation
This step-by-step plan explains how to make sure the lights in different rooms in your home are switched on and off at random intervals during your absence.
Starting point
The starting point for this step-by-step plan is a project that already encompasses Project information and for which a plan was already drawn up or uploaded.
Run through the steps in Adding a new project and then Drawing a plan or Upload a background image if there is no existing project.
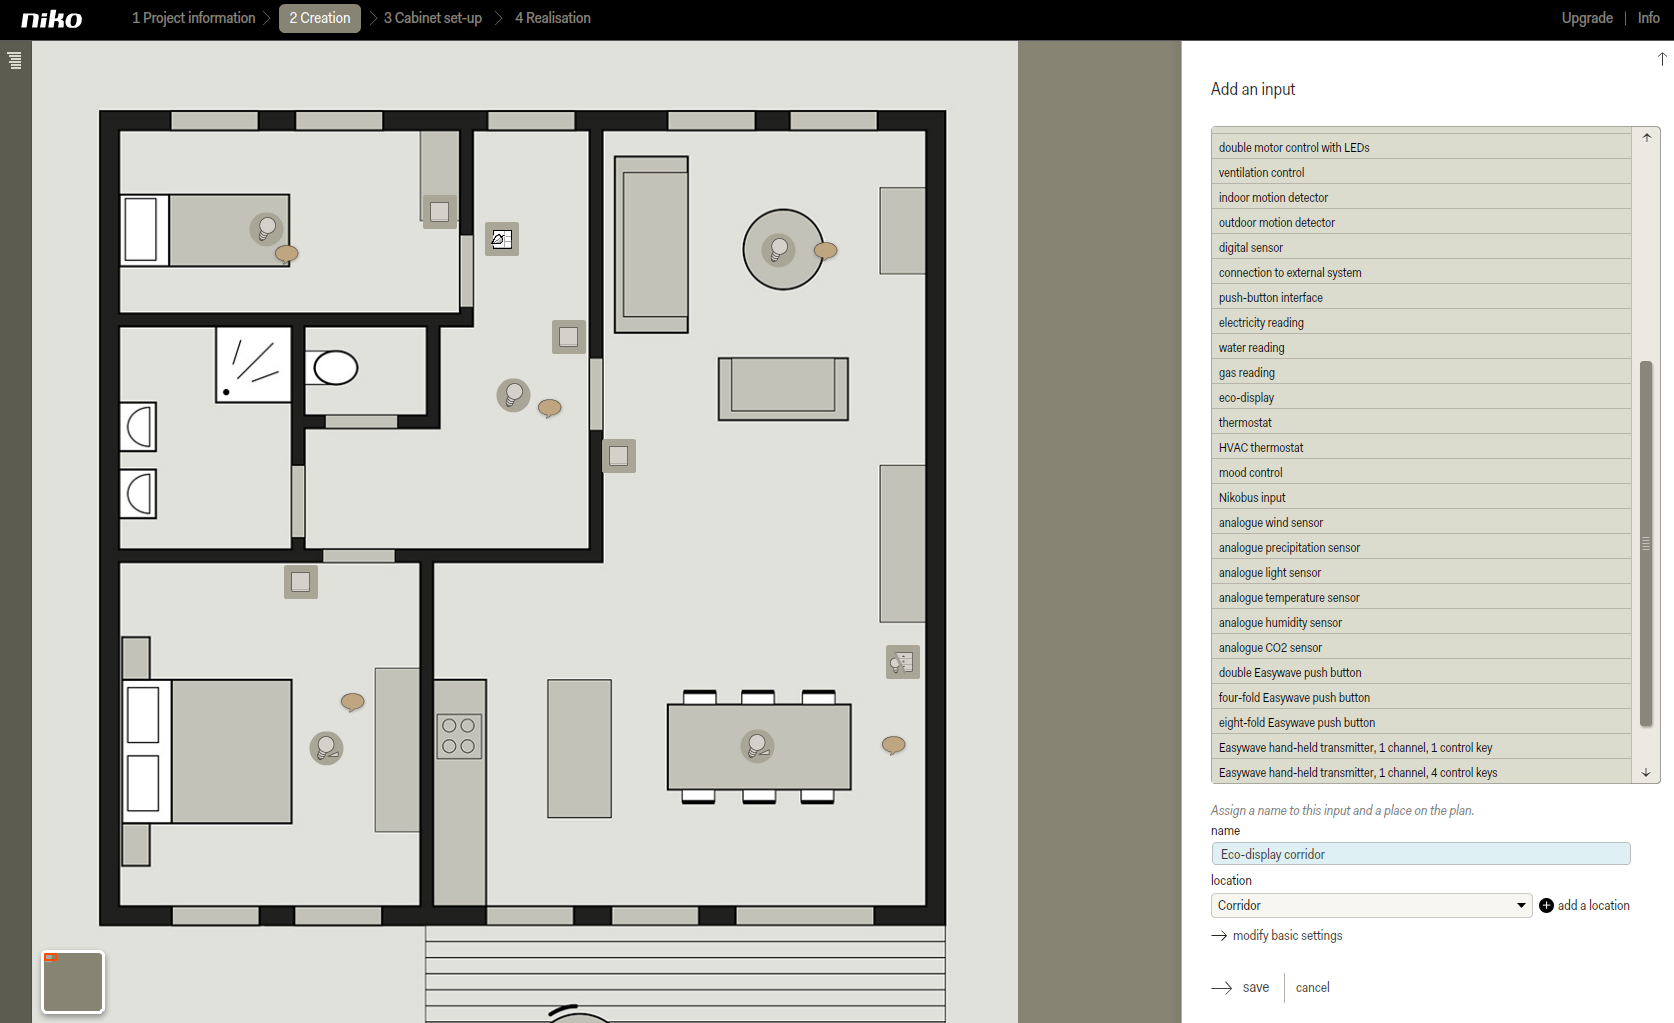
Step 1: Add an eco-display
-
Go to Creation in the menu bar at the top.
-
Click on add an input. On the left side of the screen you will now see the plan of the home and on the right side a list of options.
-
Click on eco-display.
-
Drag the icon to the correct place on the plan.
-
Give the input a name (e.g. eco-display corridor).
-
Choose a location from the list of options or add a location if the location has not been previously defined (e.g. Corridor).
-
Click on save to return to the Creation start screen.
Step 2: Add a virtual output: ‘Am I absent?’
-
Click on add a virtual output. The virtual output appears as a flag on the plan of the home.
-
Drag the icon to a logical and appropriate place on the plan.
-
Give the virtual output a clear name, for example "Am I absent?".
Tip: use yes/no questions like "Am I absent?" or "Are the children asleep?".
-
Choose the same location from the list of options as for the eco-display (e.g. Corridor).

-
Click on OK to return to the Creation start screen.
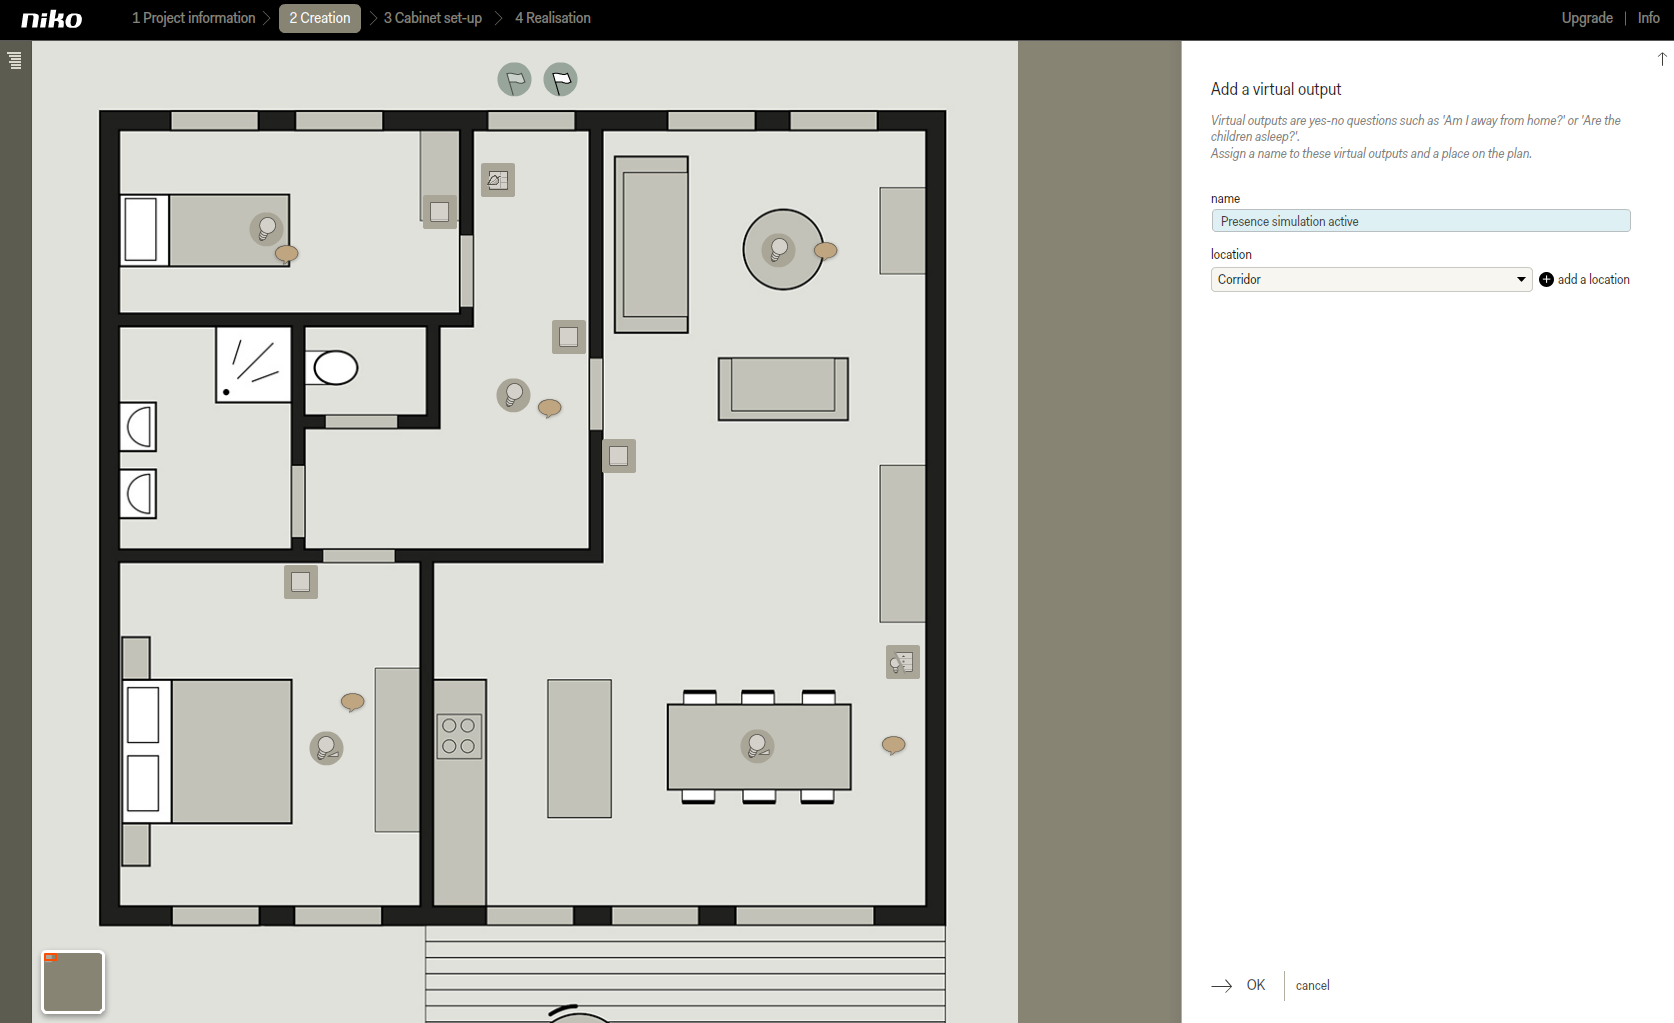
Step 3: Add a virtual output: 'Presence simulation active?'
-
Click on add a virtual output. The virtual output appears as a flag on the plan of the home.
-
Drag the icon to a logical and appropriate place on the plan.
-
Give the virtual output a clear name, for example "Presence simulation active?".
Tip: use yes/no questions like "Presence simulation active?" or "Are the children asleep?".
-
Choose the same location from the list of options as for the eco-display (e.g. Corridor).
-
Click on OK to return to the Creation start screen.
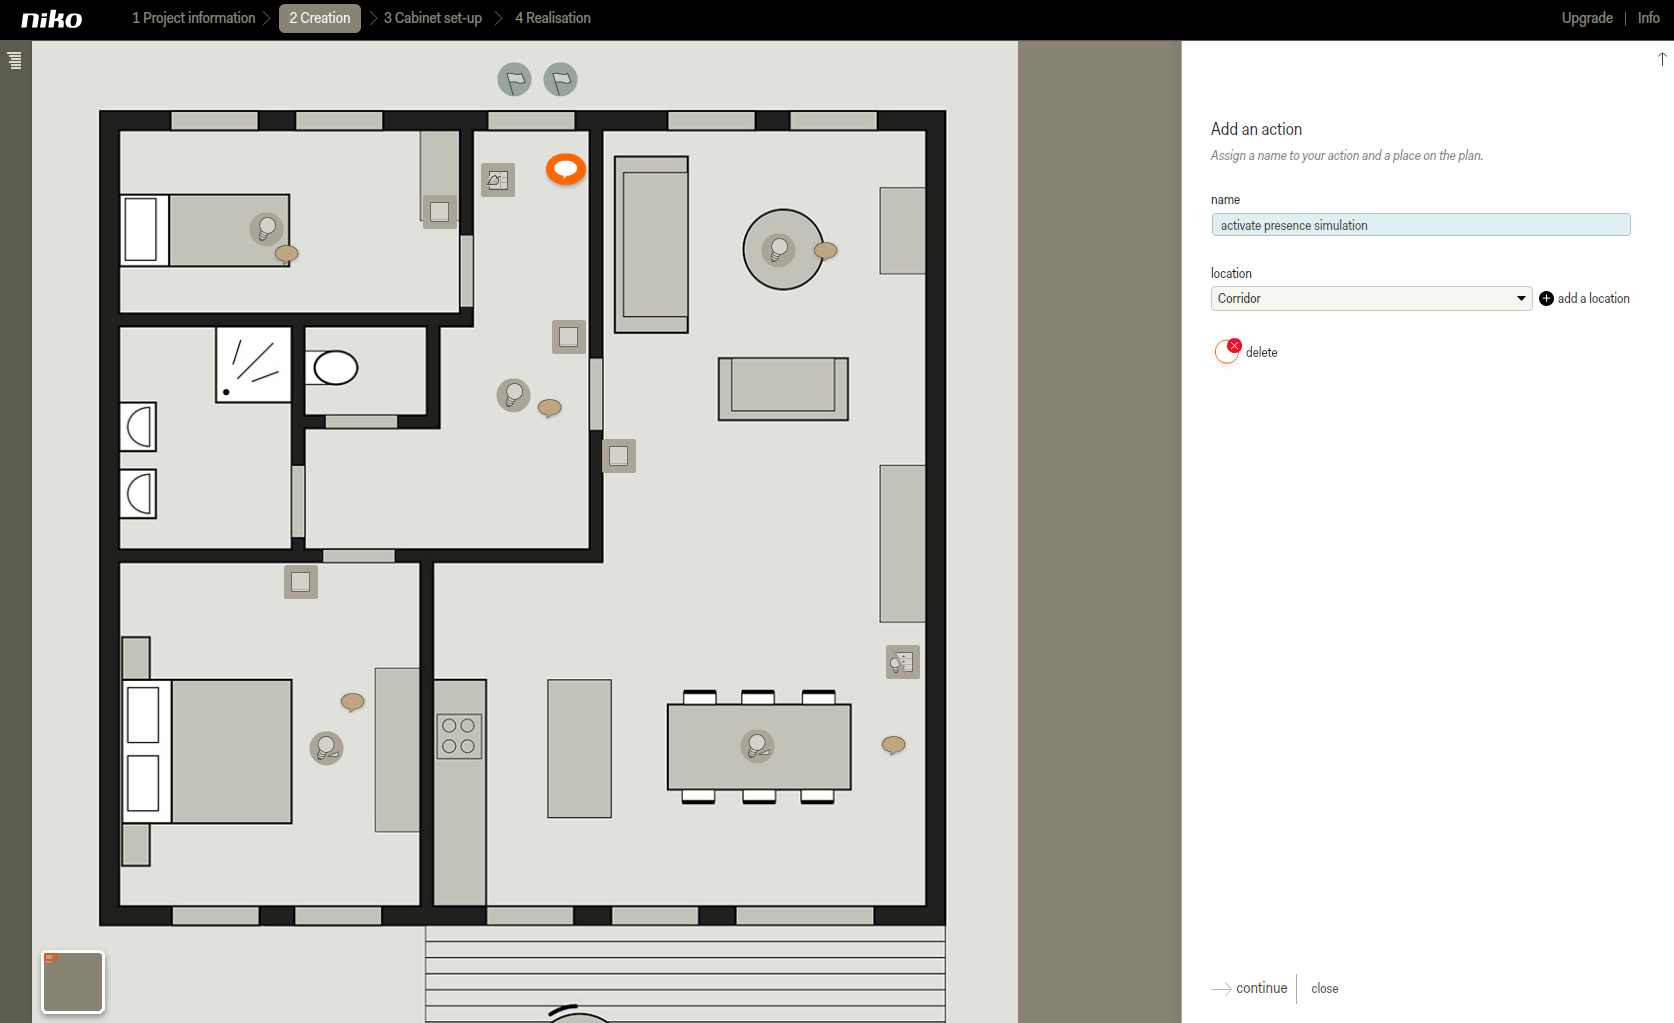
Step 4: Create an action 'Activate presence simulation'
-
Click on add an action. The action will appear as a text balloon on the plan.
-
Drag the icon to a logical and appropriate place on the plan.
-
Give the action a clear name, for example "Activate presence simulation".
-
Choose the same location from the list of options as for the eco-display (e.g. Corridor).
-
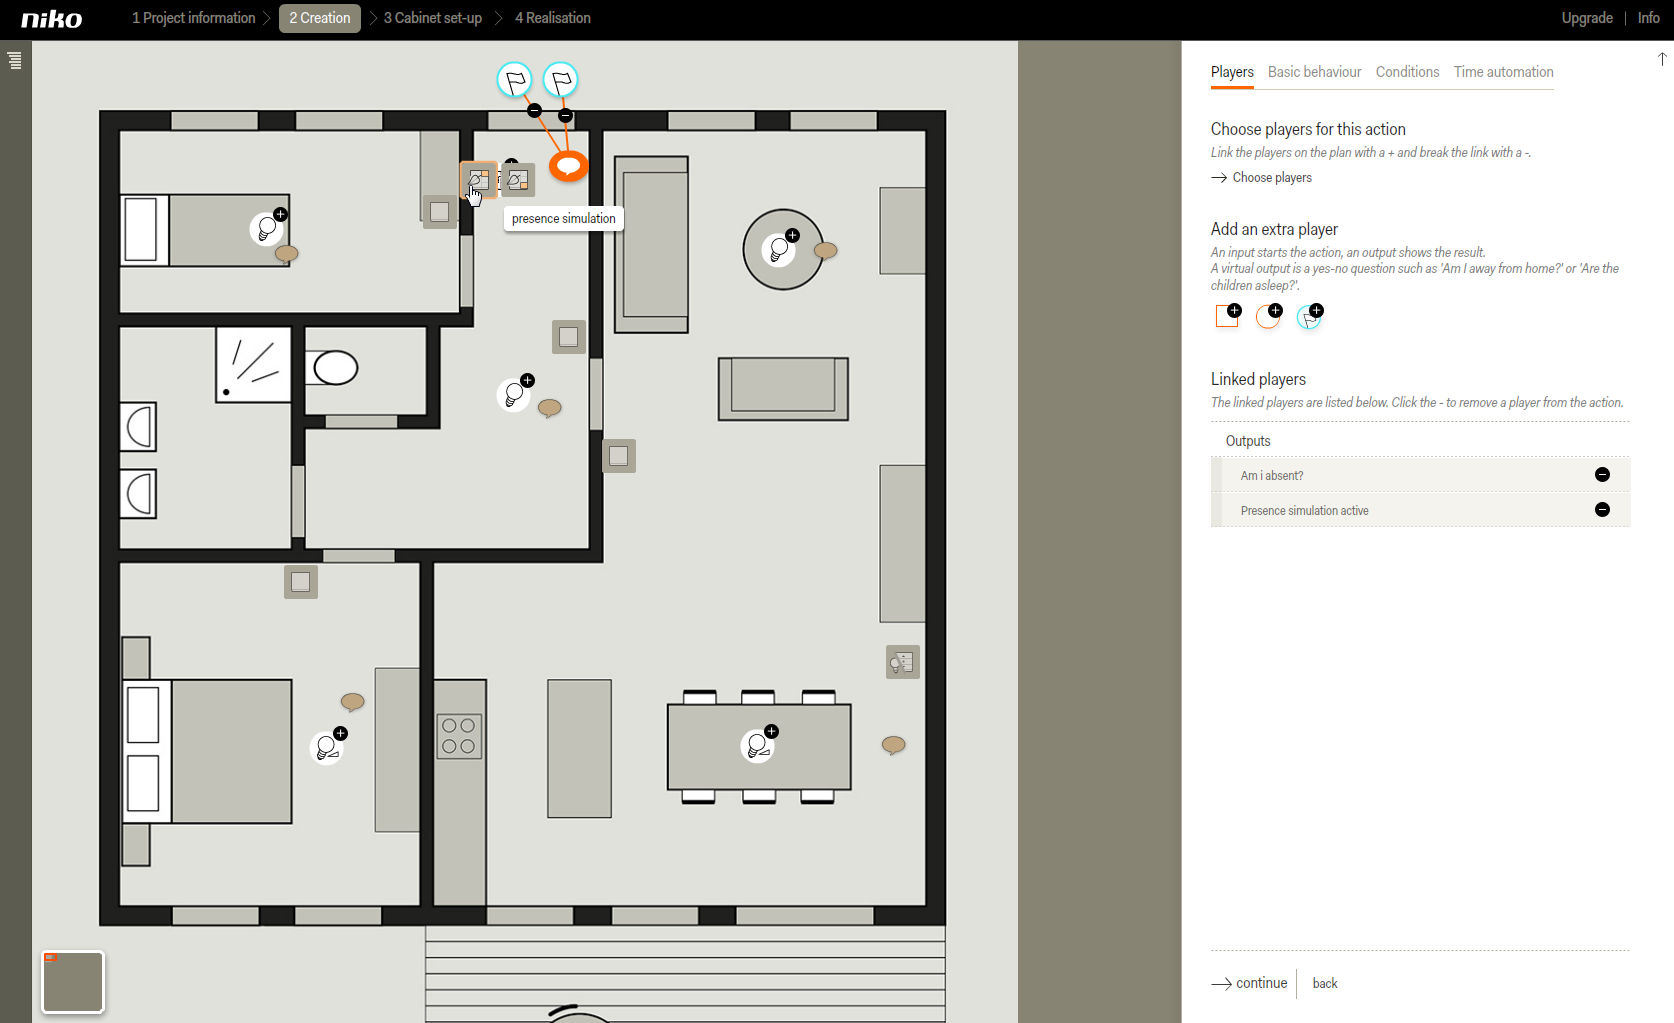
Click on continue to go to the Players tab.
-
Choose the virtual output Am I absent? as first player.
-
Choose the virtual output Presence simulation active? as second player.
-
Choose the eco-display as input. The action buttons will be enlarged.
-
Choose the left action button Presence simulation. The upper button of the eco-display is now linked to the action.
-
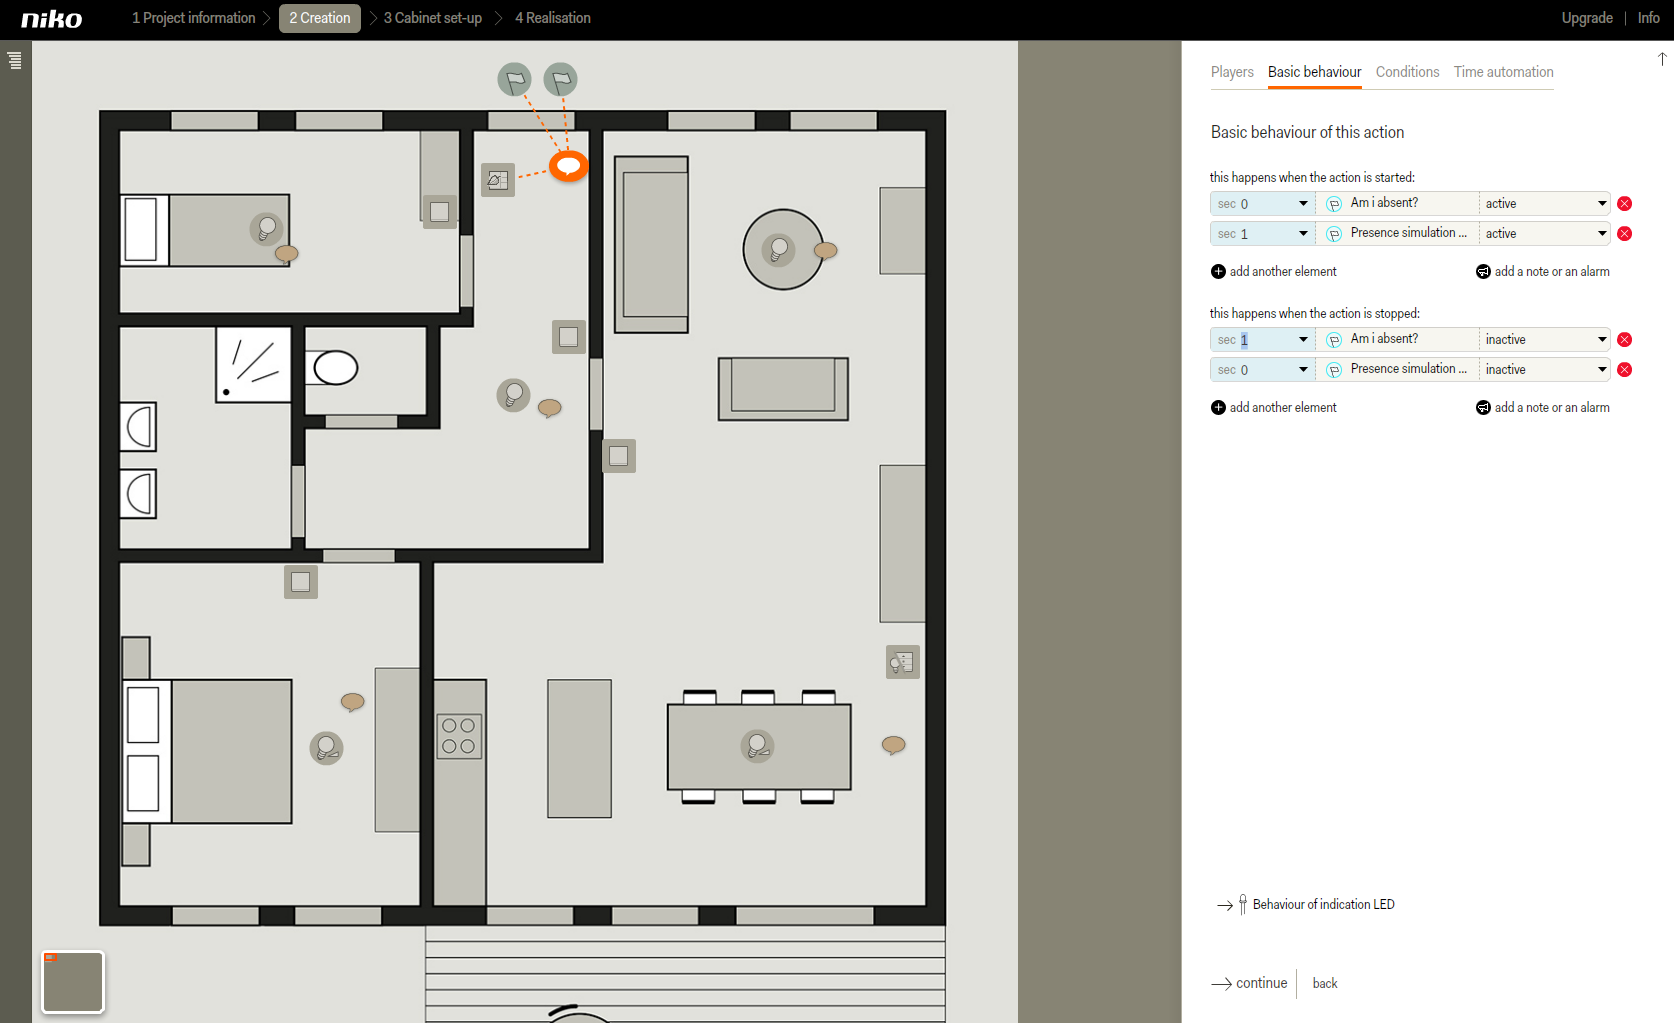
Click on continue to go to the Basic behaviour tab.
-
In start behaviour, set the output Presence simulation active at 1 second.
-
In stop behaviour, set the output Am I absent at 1 second.
-
Click on continue to go to the Conditions tab.
-
Click on continue to go to the Time automation tab.
-
Click on save to return to the Creation start screen.
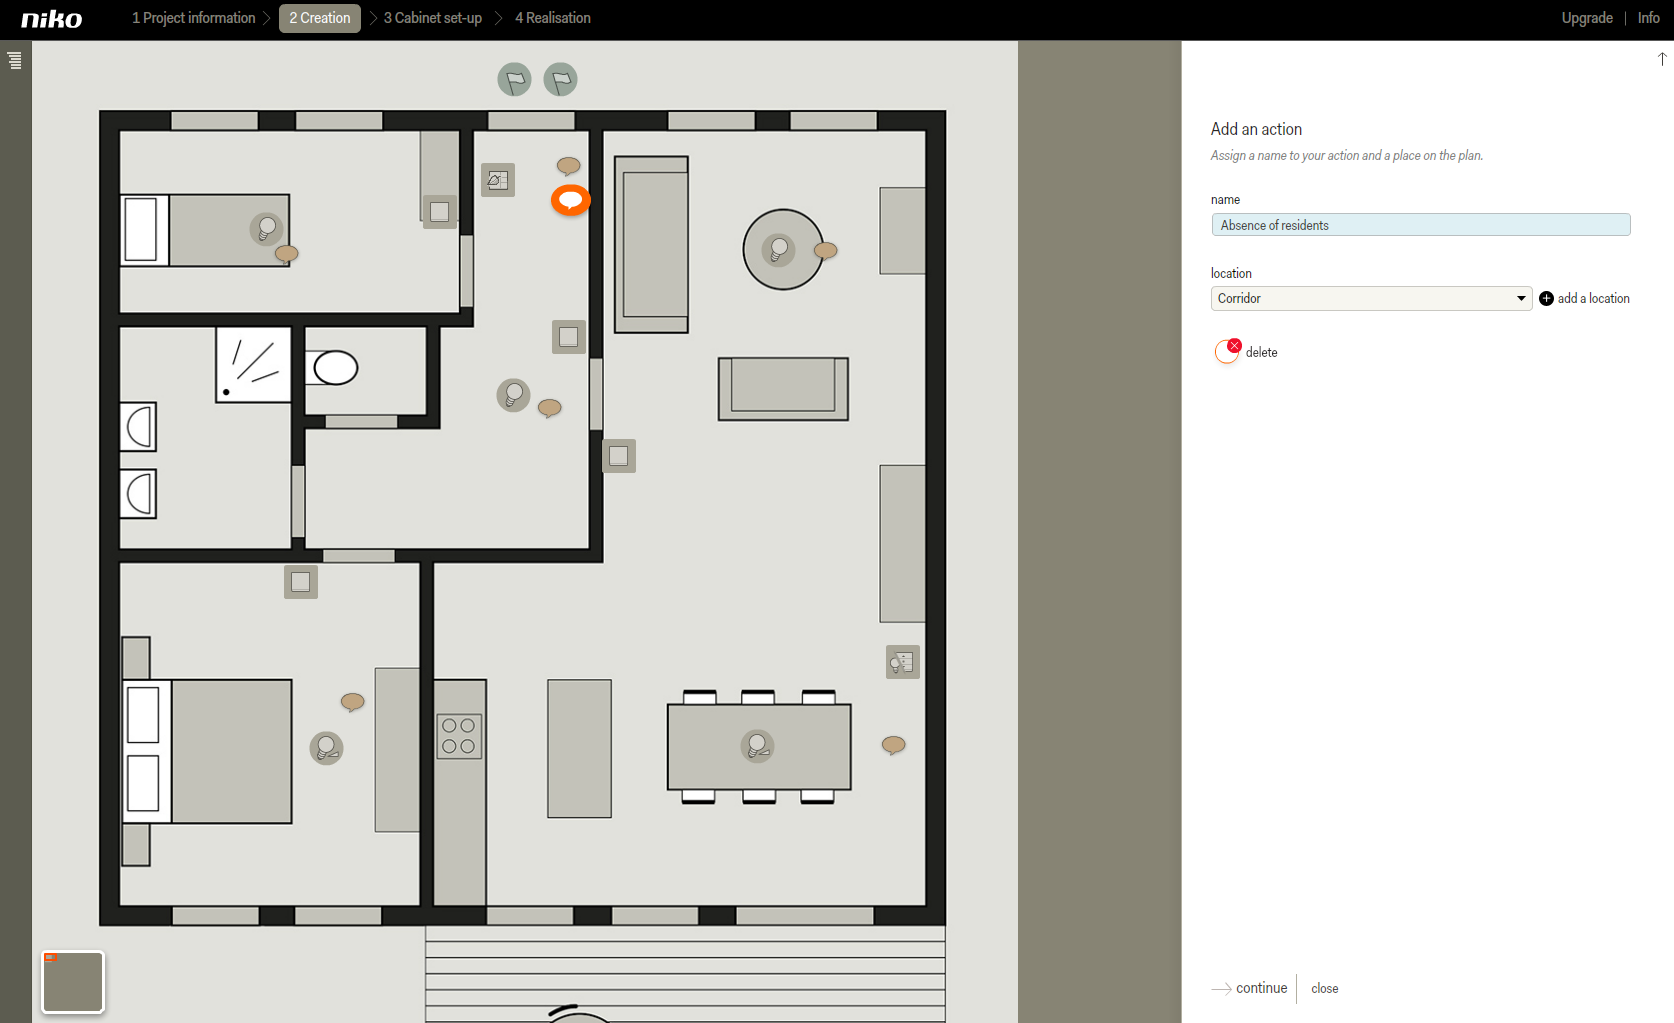
Step 5: Create an action 'Absence of residents'
-
Click on add an action.
The action will appear as a text balloon on the plan. -
Drag the icon to a logical and appropriate place on the plan.
-
Give the action a clear name, for example "Absence of residents".
-
Choose a location from the list (e.g. Corridor).
-
Add a location if the location has not yet been defined.
-
Click on continue to go to the Players tab.
-
Click the outputs that need to be switched on and off during the presence simulation to link them to the action. Do not add an input.
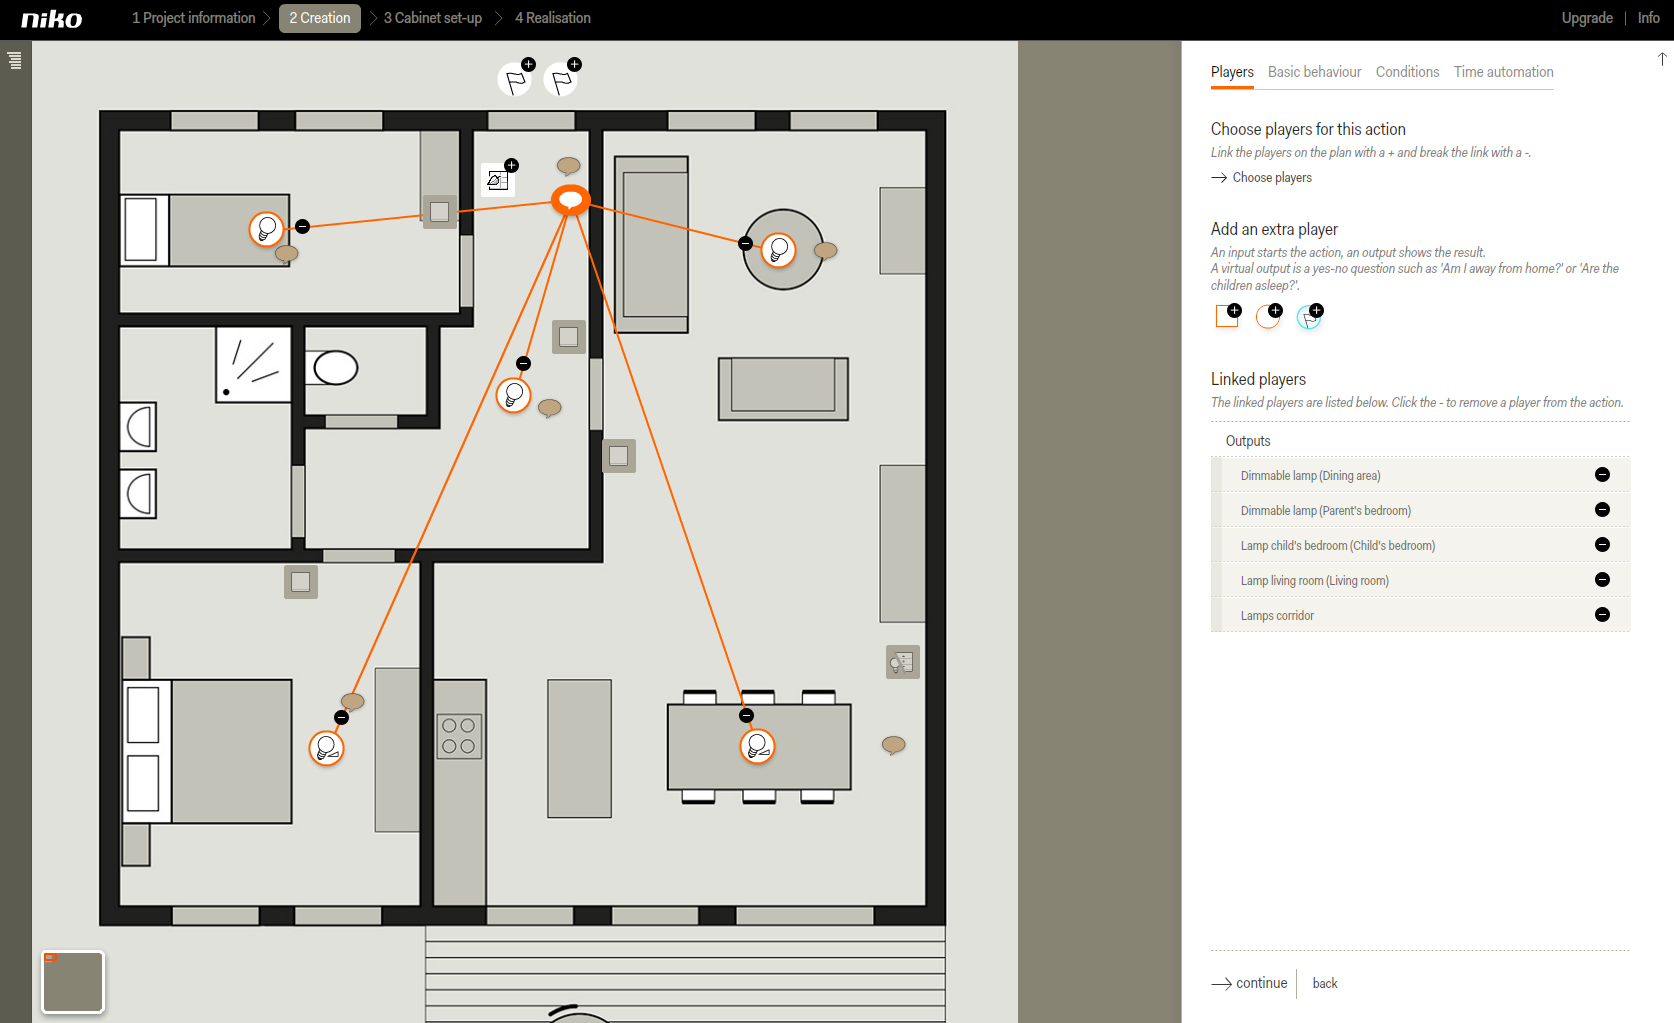
-
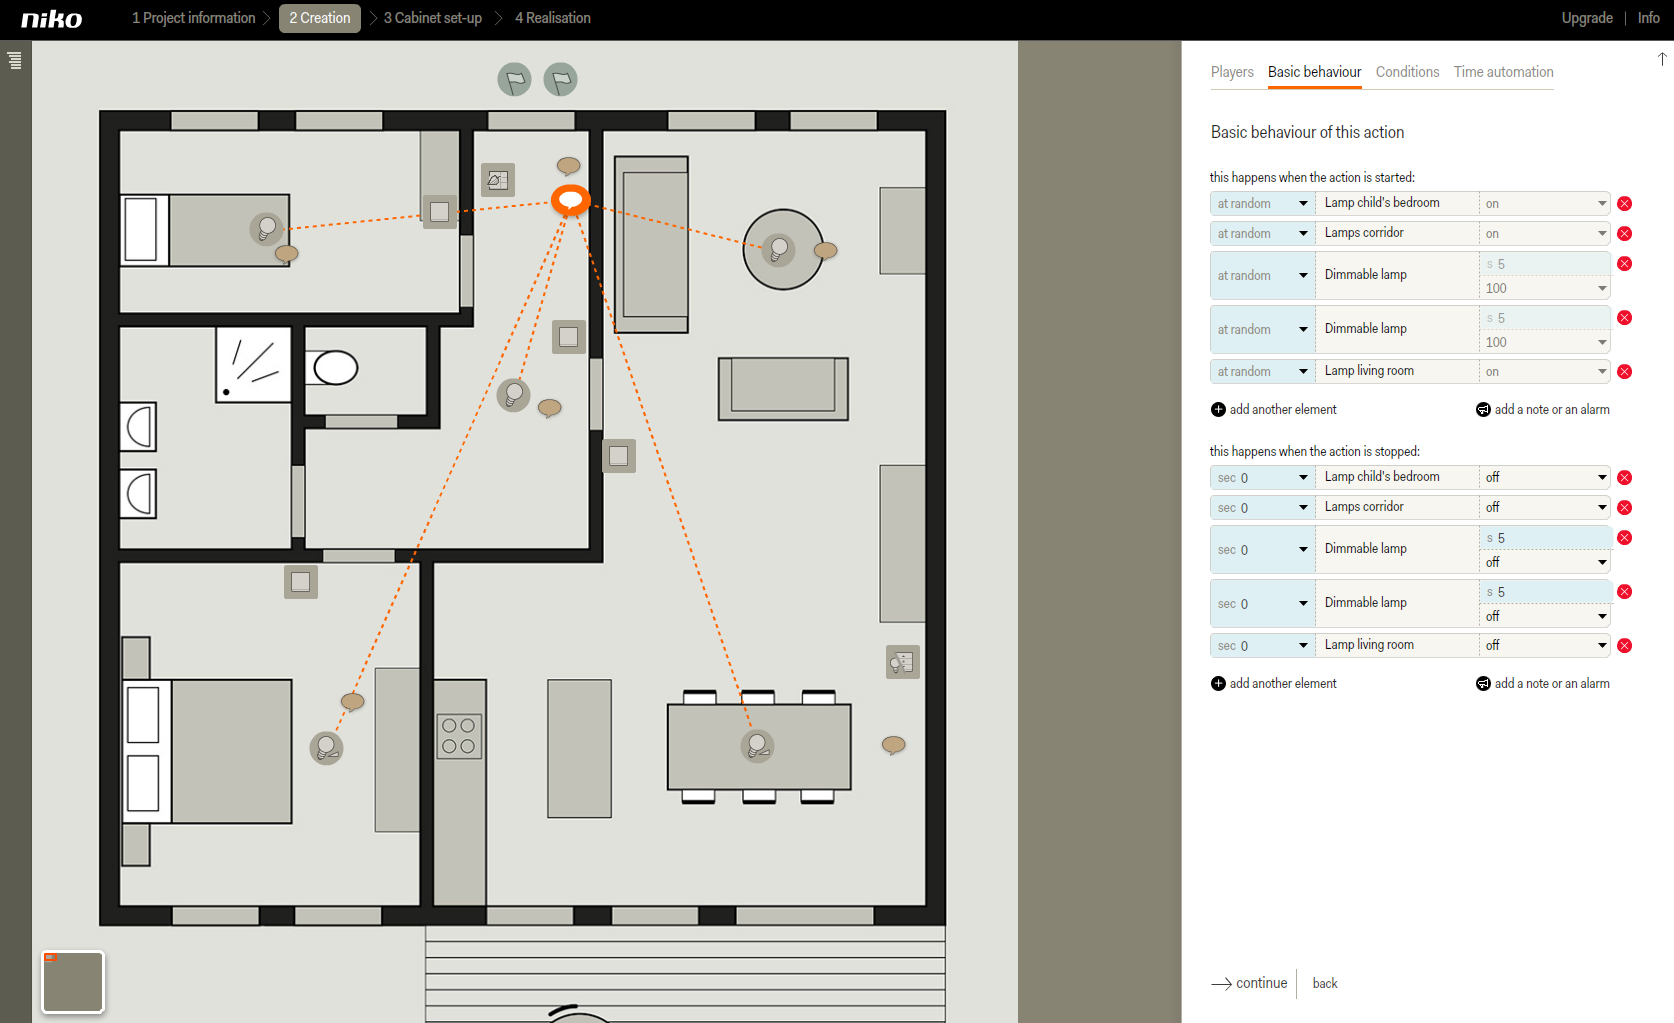
Click on continue to go to the Basic behaviour tab.
-
For start behaviour, choose 'at random' as start moment for all outputs.
-
The default stop behaviour is correct. You don't need to change this.
TIP: adjust the light volume for the linked dimmable lamps.
-
Click on continue to go to the Conditions tab.
-
Click on add a condition.
-
Give the condition a clear name, for example "Presence simulation".

-
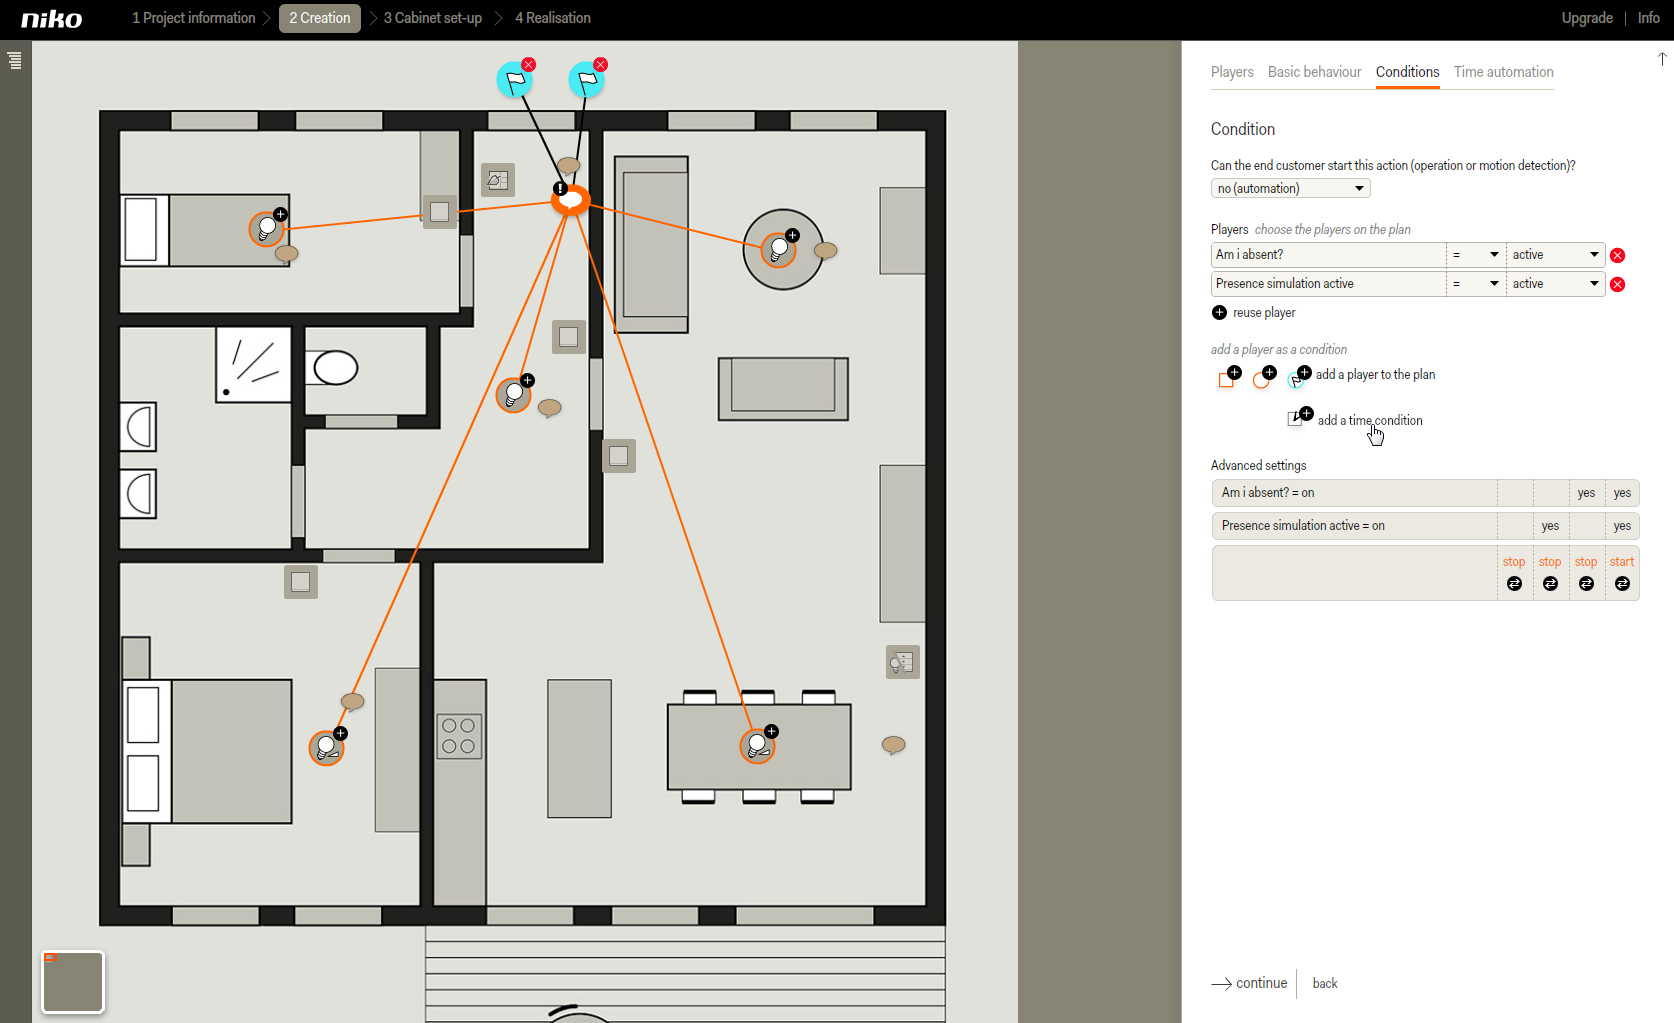
Click on no (automation).
There are no inputs linked to the action. The action can only be automatically started when a couple of conditions are met. -
Click the outputs you have defined in one of the previous steps to link them as players to the action.
-
Click the virtual outputs Am I absent? and Presence simulation active as players.
Warning: the order in which you click the virtual outputs has an influence on the rest of the programming.
-
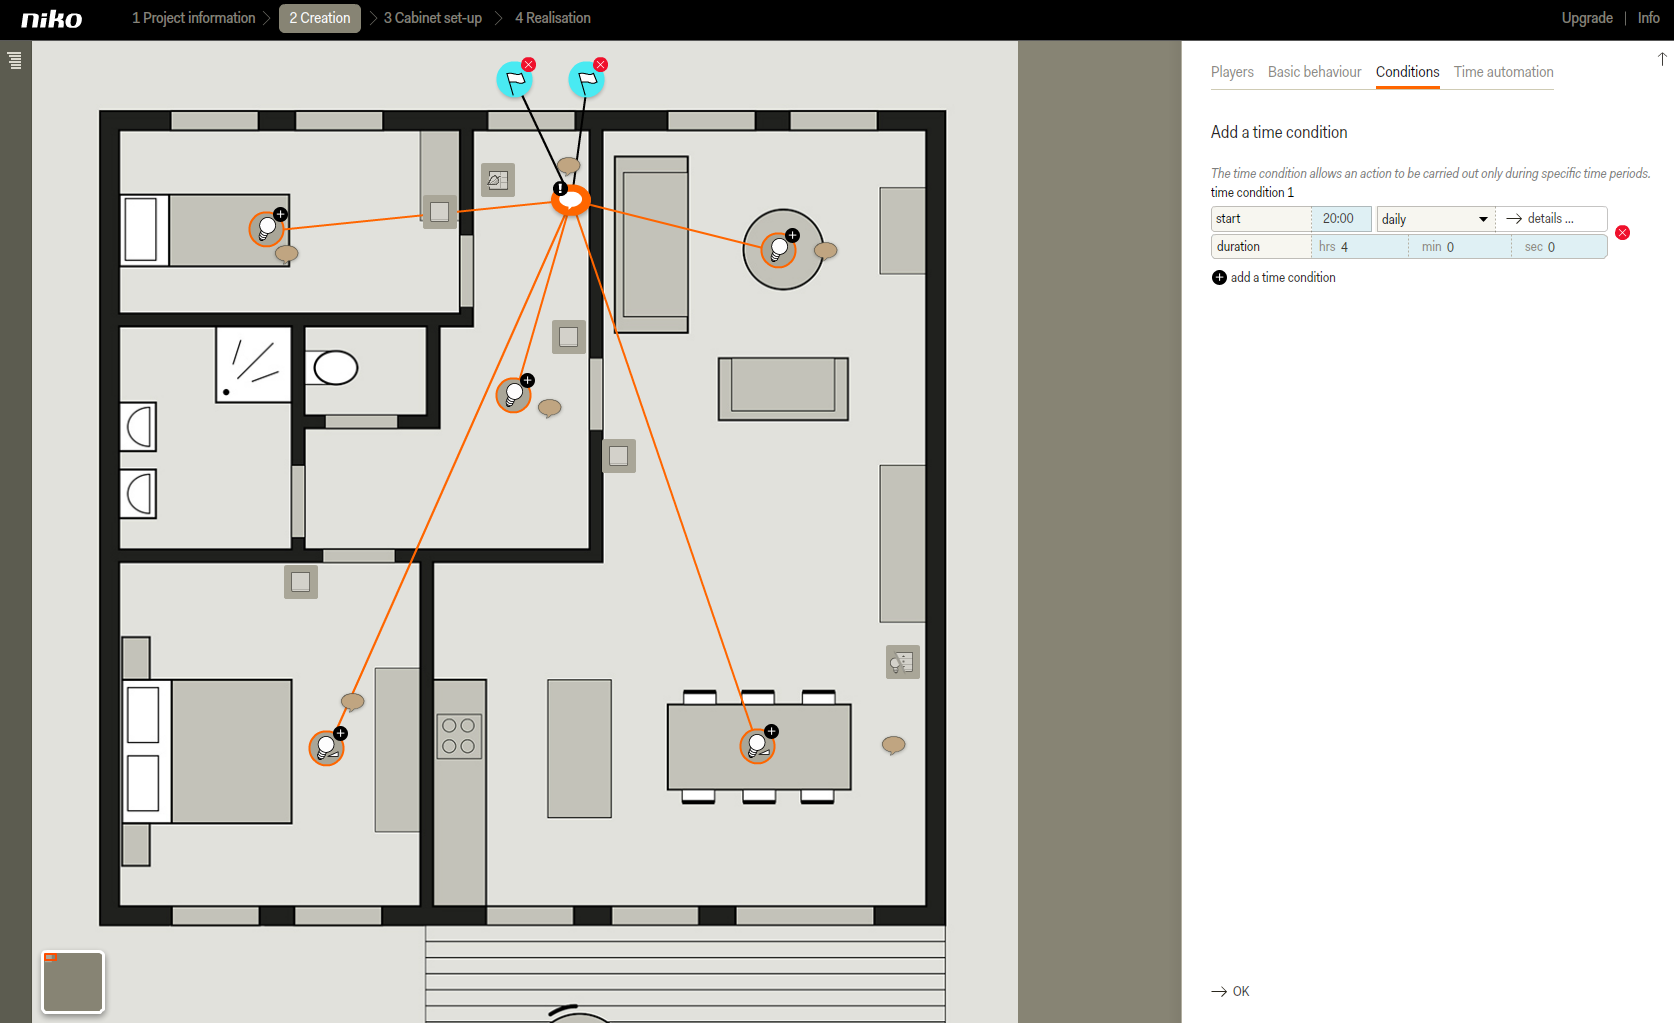
Click on add a time condition.
-
For start, enter the time at which the presence simulation should start (24-hour notation)
-
For duration, enter how long the presence simulation should last.
Info: the default frequency is daily. As default, the software chooses the following day as start date.
-
Click on details to change the frequency details, including the start date.
-
Click on daily to change the frequency to weekly, monthly or yearly.
A pop-up window will appear in which you can enter the details. -
Add as many time conditions as necessary.
For example, you can activate the presence simulation in the evenings and the mornings and/or during winter months in the late afternoon on weekdays. Make sure the time conditions don't overlap to guarantee proper functioning.
The number of time conditions influences the logical table in the next steps.
-
Click OK.
-
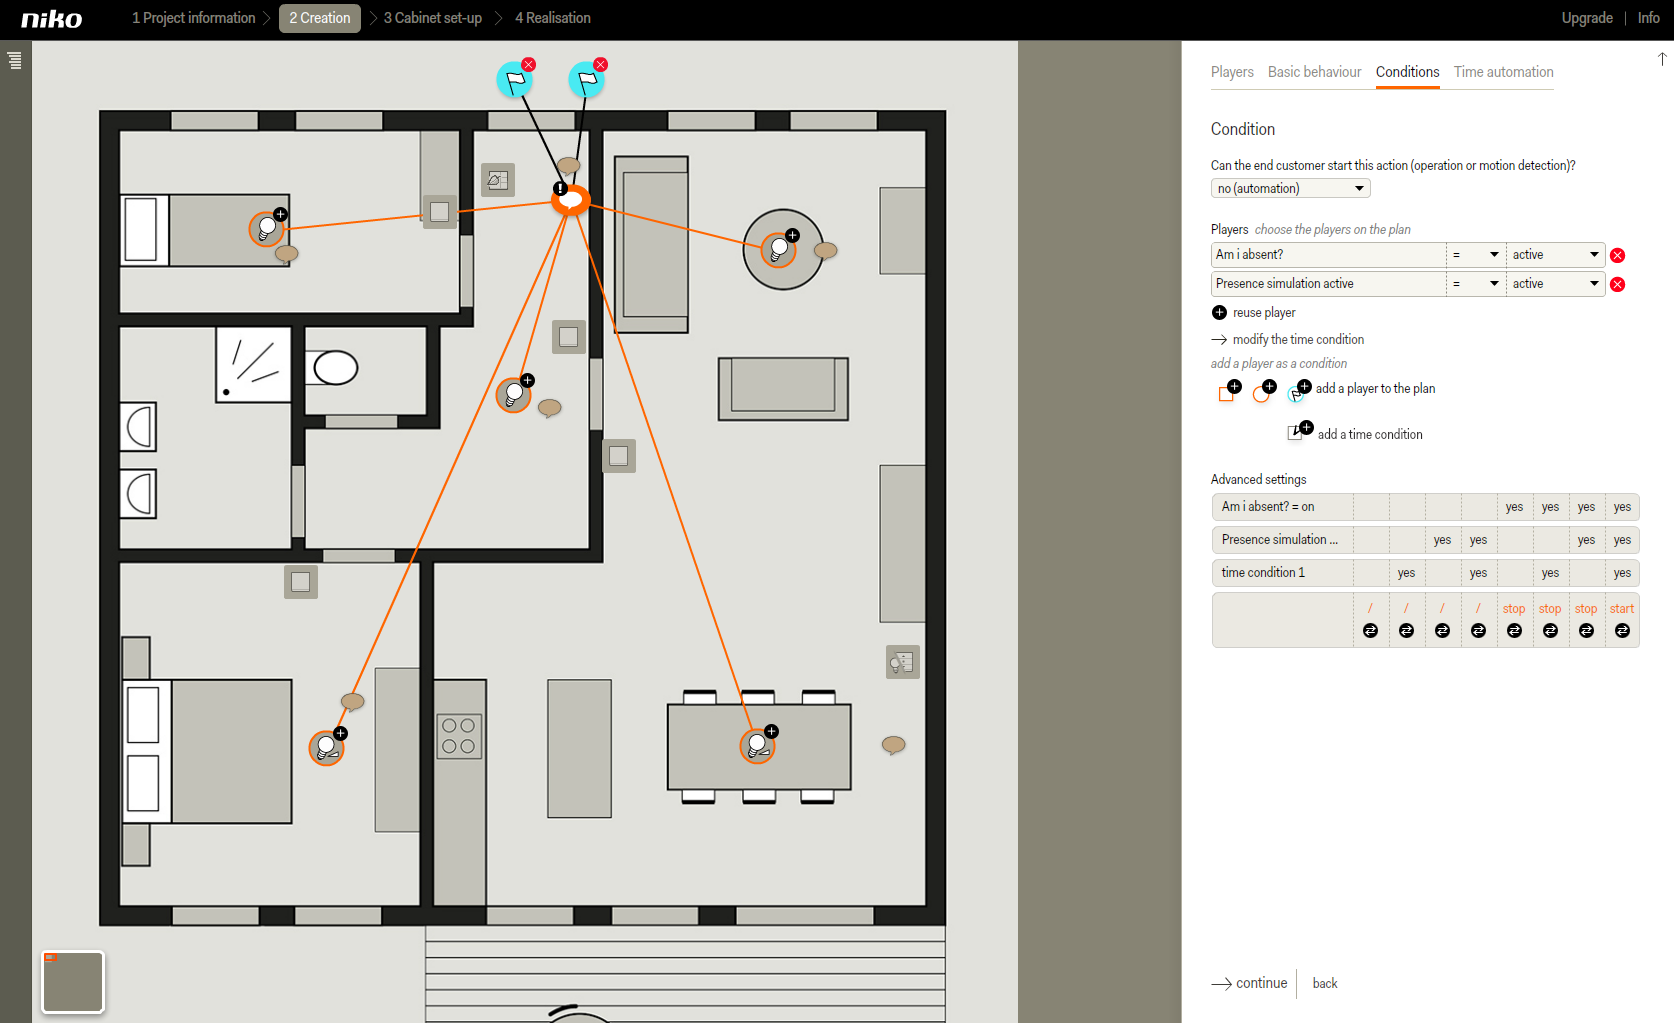
If you have selected more than 1 time condition, click on Logic to open a pop-up window. If you have selected only one time condition, the table will appear directly under advanced settings.
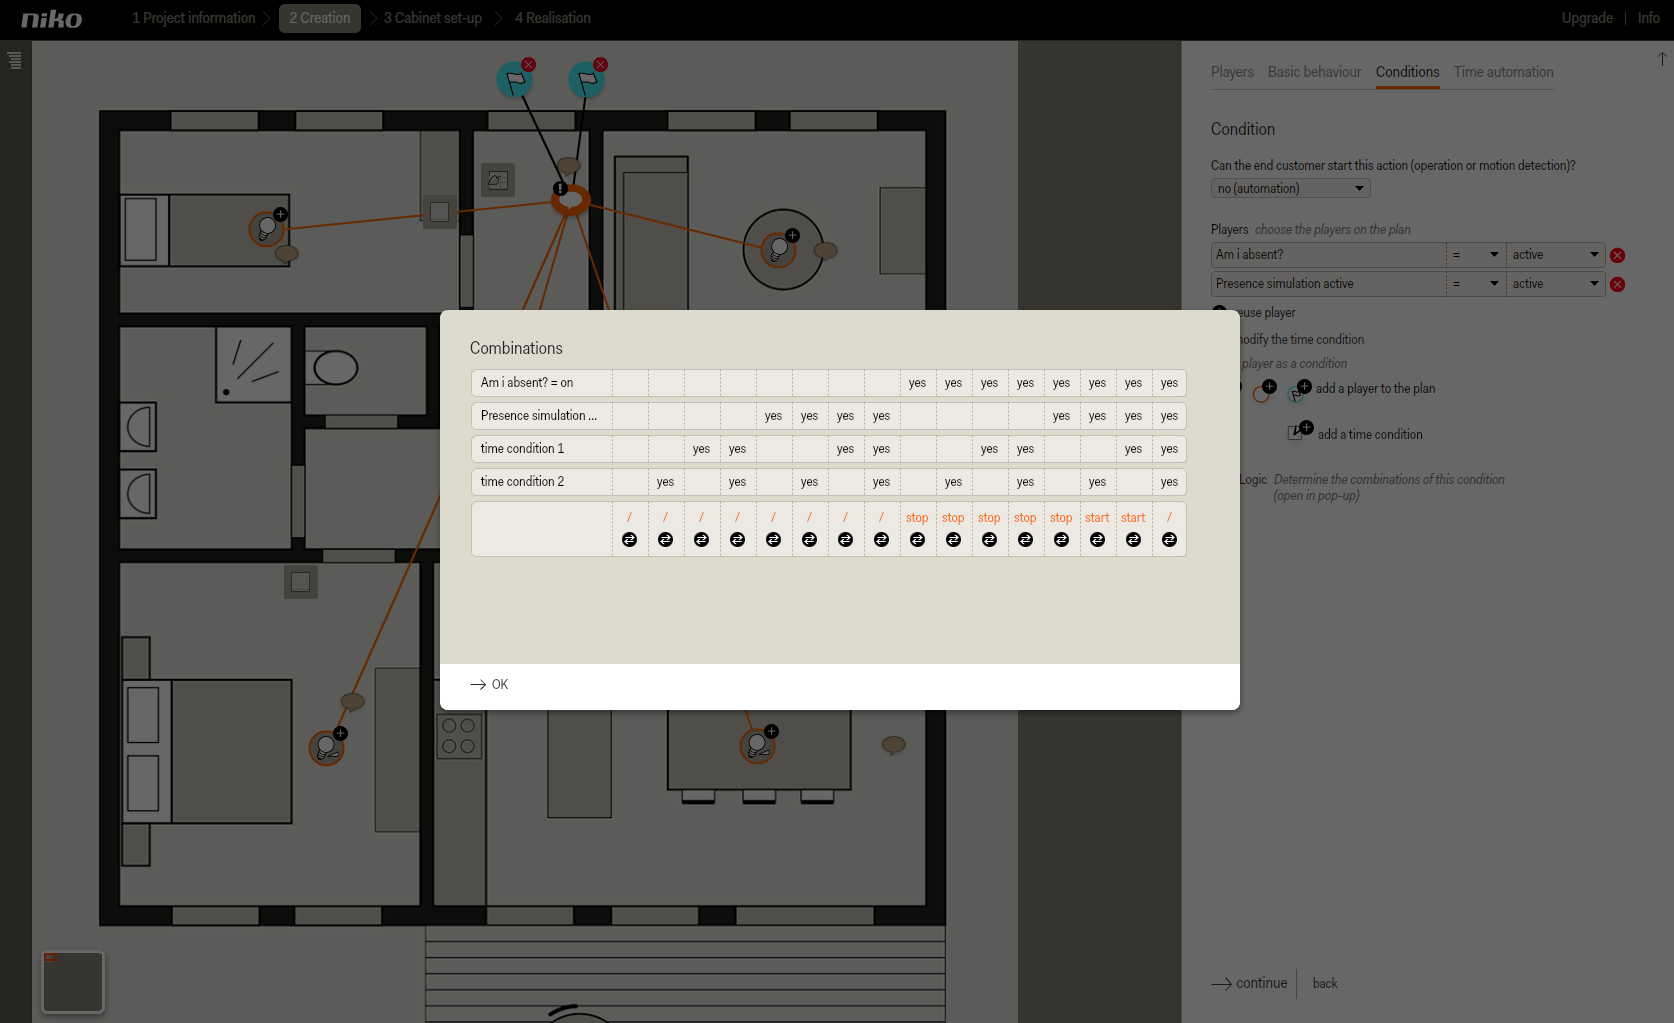
Every column represents a combination of conditions that are (yes) or are not (empty) met.
Click on the arrows at the bottom of each column until the right value is indicated:
-
start for a combination of conditions that should activate the presence simulation.
-
stop for a combination of conditions that should end the presence simulation.
-
/ for a combination of conditions that should not do anything.
-
If 2 time conditions are assigned, program the logical table as shown in the image above.
-
If 1 time condition is assigned, program the logical table as shown in the image below.
-
If you use more than 1 time condition, click OK to return to the Conditions tab.
-
Click on continue to go to the Time automation tab.
-
Click on save to return to the Creation start screen.
-
Go to Project information in the menu bar at the top to save the project.
Result
You can now continue with step Cabinet lay-out or step Realisation.