Hardware manual Niko Original, Niko Intense, Niko Pure, Niko Rocker and Niko Toggle

Data-aansluitingen

Installatie

Niko Original, Niko Intense en Niko Pure

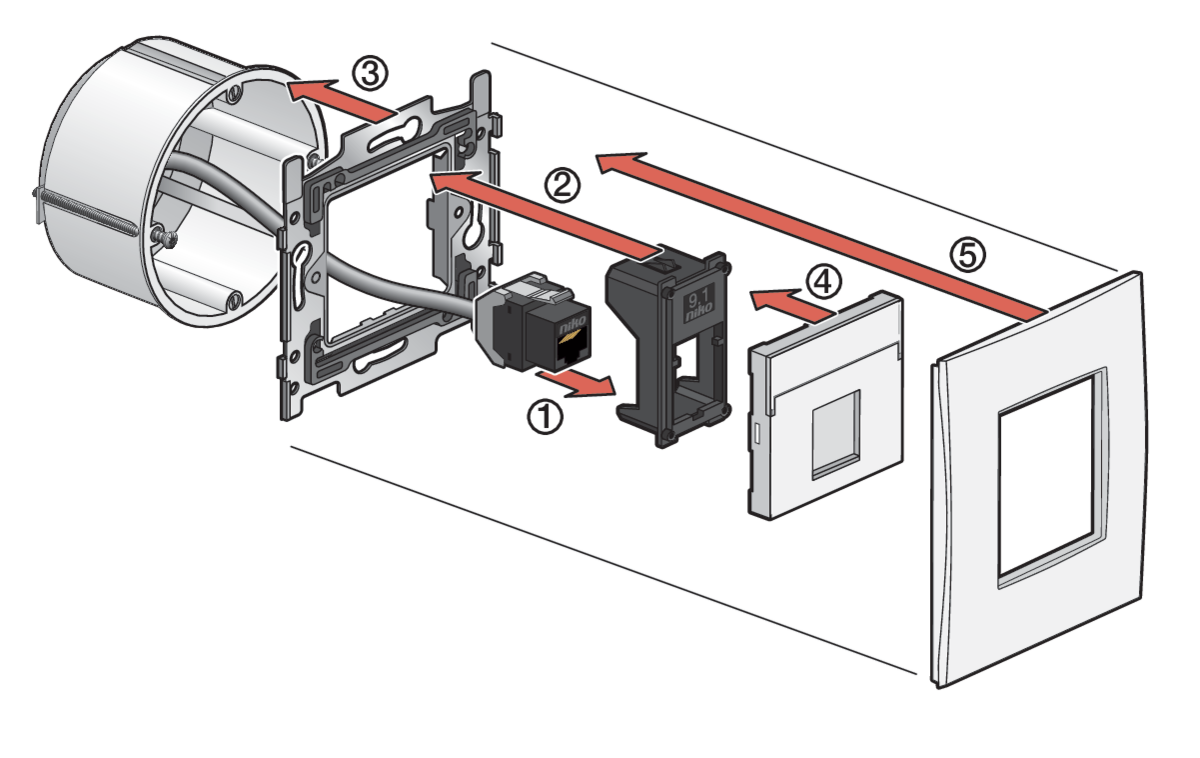
Enkelvoudige vlakke RJ-aansluiting

https://dam.nikocdn.eu/asset/167528/guideImage/170-65901_TG_002.png


Installatiestappen
  1. Klik de (voorbekabelde) connector in het passtuk.

  2. Klik het passtuk in het midden van de sokkel.

  3. Monteer de sokkel in de inbouwdoos.

  4. Klik de centraalplaat op de sokkel.

  5. Klik de afdekplaat op de sokkel.

Je vindt de artikelnummers voor deze combinatie op de Niko website:

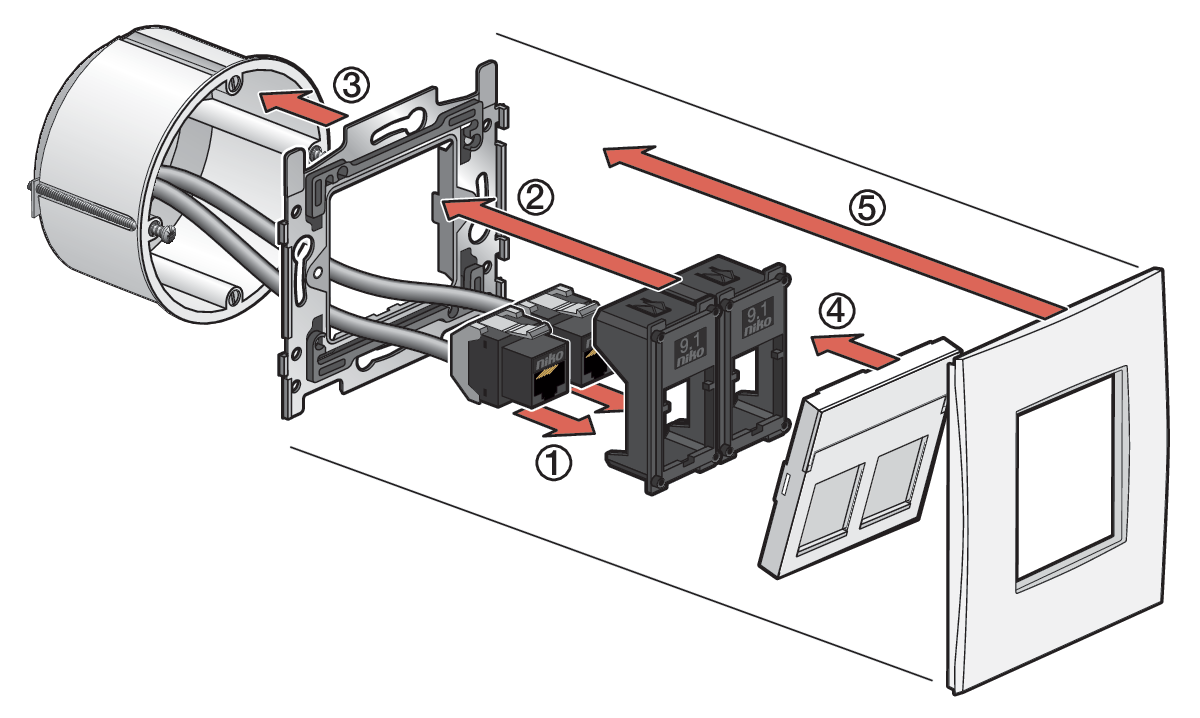
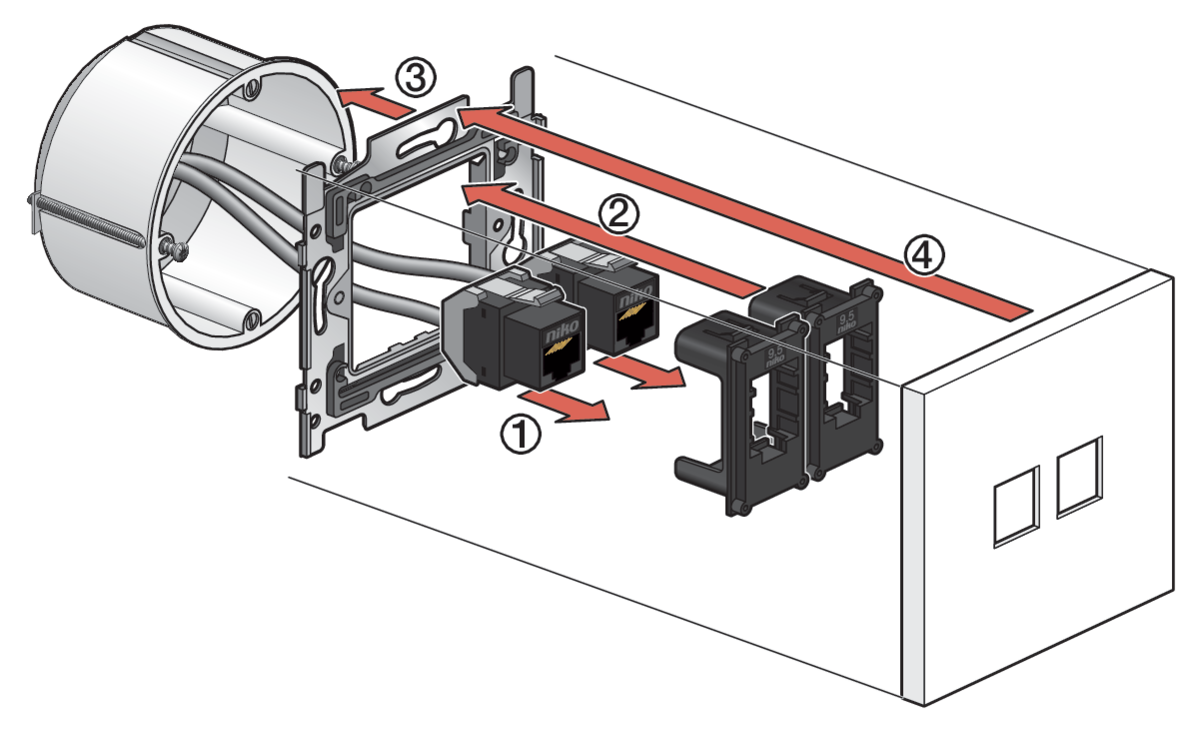
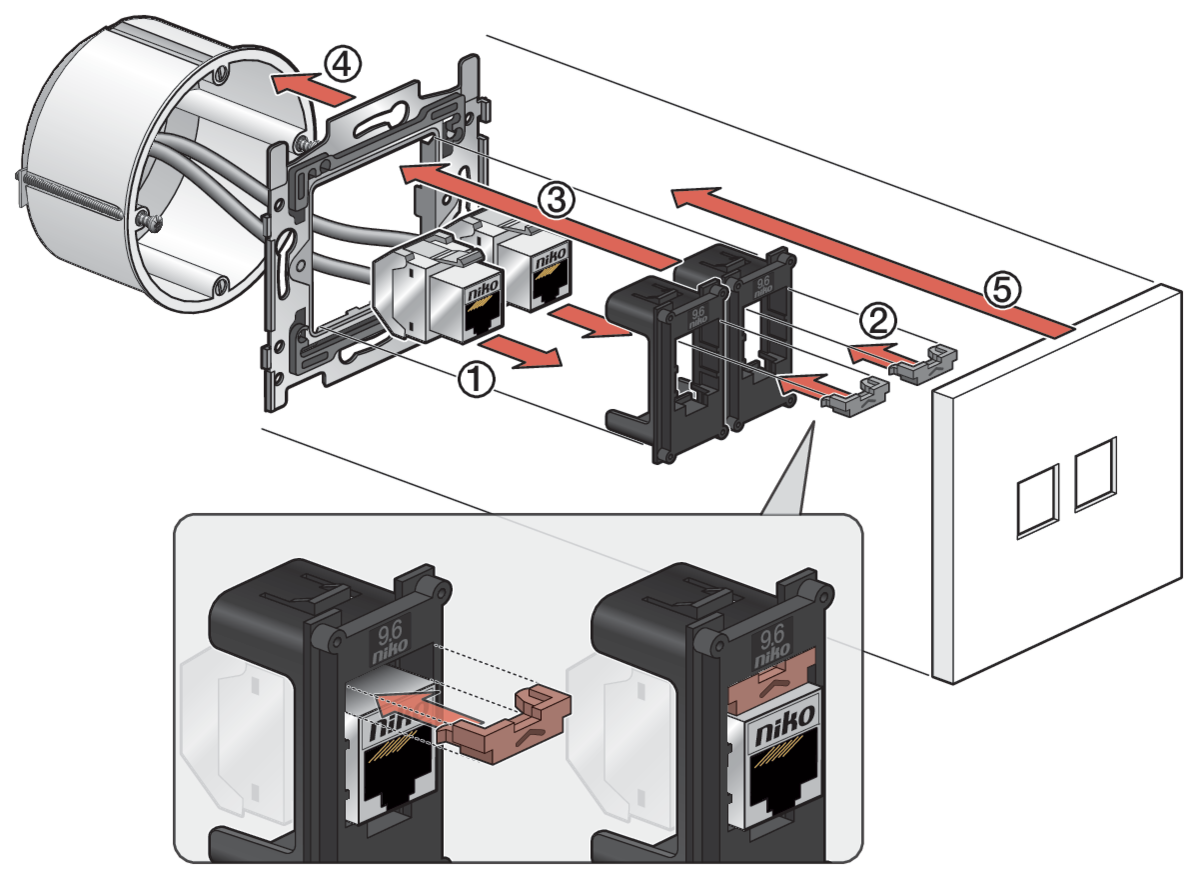
Dubbele vlakke RJ-aansluiting

https://dam.nikocdn.eu/asset/167527/guideImage/170-65901_TG_001.png


Installatiestappen
  1. Klik de (voorbekabelde) connectoren in het passtuk.

  2. Klik de twee passtukken in de sokkel.

  3. Monteer de sokkel in de inbouwdoos.

  4. Klik de centraalplaat op de sokkel.

  5. Klik de afdekplaat op de sokkel.

Je vindt de artikelnummers voor deze combinatie op de Niko website:

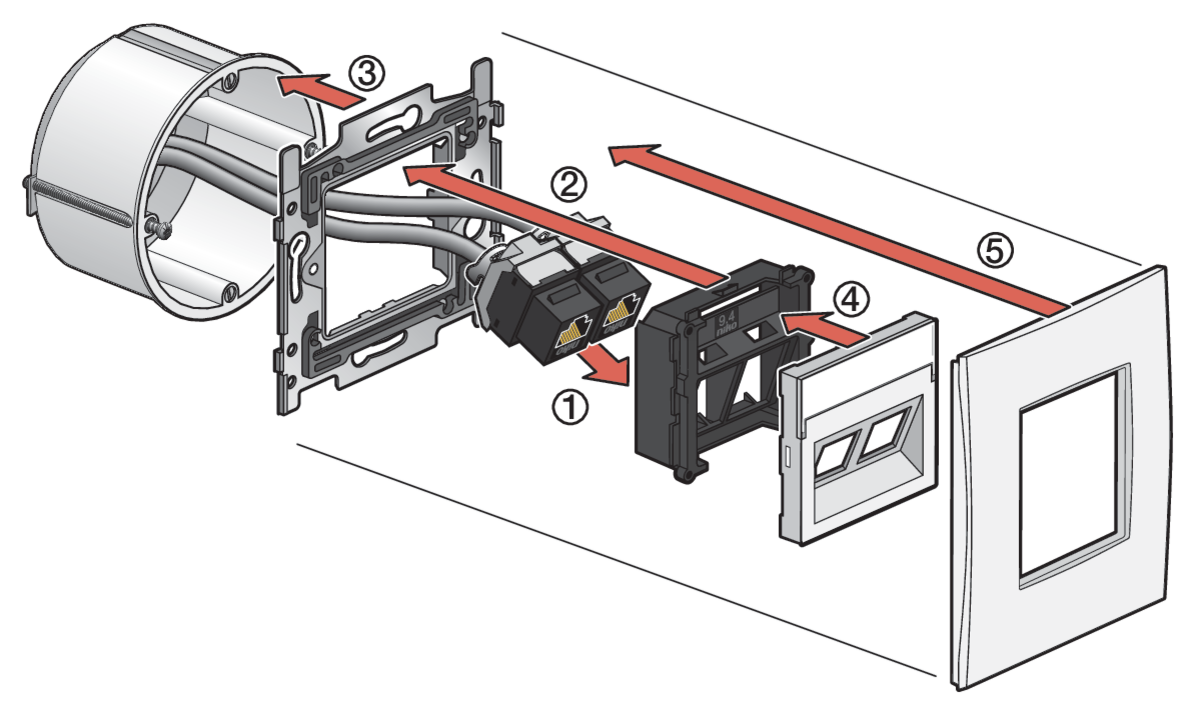
Dubbele schuine RJ-aansluiting

https://dam.nikocdn.eu/asset/167530/guideImage/170-65904_TG_001.png


Installatiestappen
  1. Klik de (voorbekabelde) connectoren in het passtuk.
    Let op: de connectoren moeten met het Niko logo ondersteboven gemonteerd worden in deze combinatie.

  2. Klik het passtuk in de sokkel.

  3. Monteer de sokkel in de inbouwdoos.

  4. Klik de centraalplaat op de sokkel.

  5. Klik de afdekplaat op de sokkel.

Je vindt de artikelnummers voor deze combinatie op de Niko website:

Niko Rocker en Niko Toggle

Dubbele RJ-aansluiting – UTP

https://dam.nikocdn.eu/asset/167529/guideImage/170-65905_TG_001.png


Installatiestappen
  1. Klik de (voorbekabelde) connectoren in het passtuk.

  2. Klik de twee passtukken in de sokkel.

  3. Monteer de sokkel in de inbouwdoos.

  4. Klik de afdekplaat op de sokkel.

Je vindt de artikelnummers voor deze combinatie op de Niko website:

Dubbele RJ-aansluiting – STP

https://dam.nikocdn.eu/asset/167531/guideImage/170-65906_TG_001.png


Installatiestappen
  1. Klik de (voorbekabelde) connectoren in het passtuk.

  2. Klik de inzetstukken in de passtukken, boven de geïnstalleerde connectoren (het inzetstuk is inbegrepen in de verpakking van het passtuk).

  3. Klik de twee passtukken in de sokkel.

  4. Monteer de sokkel in de inbouwdoos.

  5. Klik de afdekplaat op de sokkel.

Je vindt de artikelnummers voor deze combinatie op de Niko website:


nv Niko sa
Industriepark West 40
9100 Sint-Niklaas, Belgium

http://www.niko.eu

+32 3 778 90 80
support@niko.eu

The installation of products that will permanently be part of the electrical installation and which include dangerous voltages, should be carried out by a qualified installer and in accordance with the applicable regulations. This user manual must be presented to the user. It should be included in the electrical installation file and it should be passed on to any new owners. Additional copies are available on the Niko website or via Niko customer services.

image-20250212-095720.png

This product complies with all of the relevant European guidelines and regulations. For radio equipment Niko llc declares that the radio equipment in this manual conforms with the 2014/53/EU directive. The full text of the EU declaration of conformity is available at https://www.niko.eu under the product reference, if applicable.

image-20250212-095650.png

This product and/or the batteries provided cannot be disposed of in non-recyclable waste. Take your discarded product to a recognised collection point. Just like producers and importers, you too play an important role in the promotion of sorting, recycling and reuse of discarded electrical and electronic equipment. To finance the rubbish collection and waste treatment, the government levies recycling charges in certain cases (included in the price of this product).

image-20250212-100336.png