Hardware manual Niko Original, Niko Intense, Niko Pure, Niko Rocker and Niko Toggle

Montage

Instructions d’installation

Niko Original, Niko Intense et Niko Pure

Simple connexion RJ plate
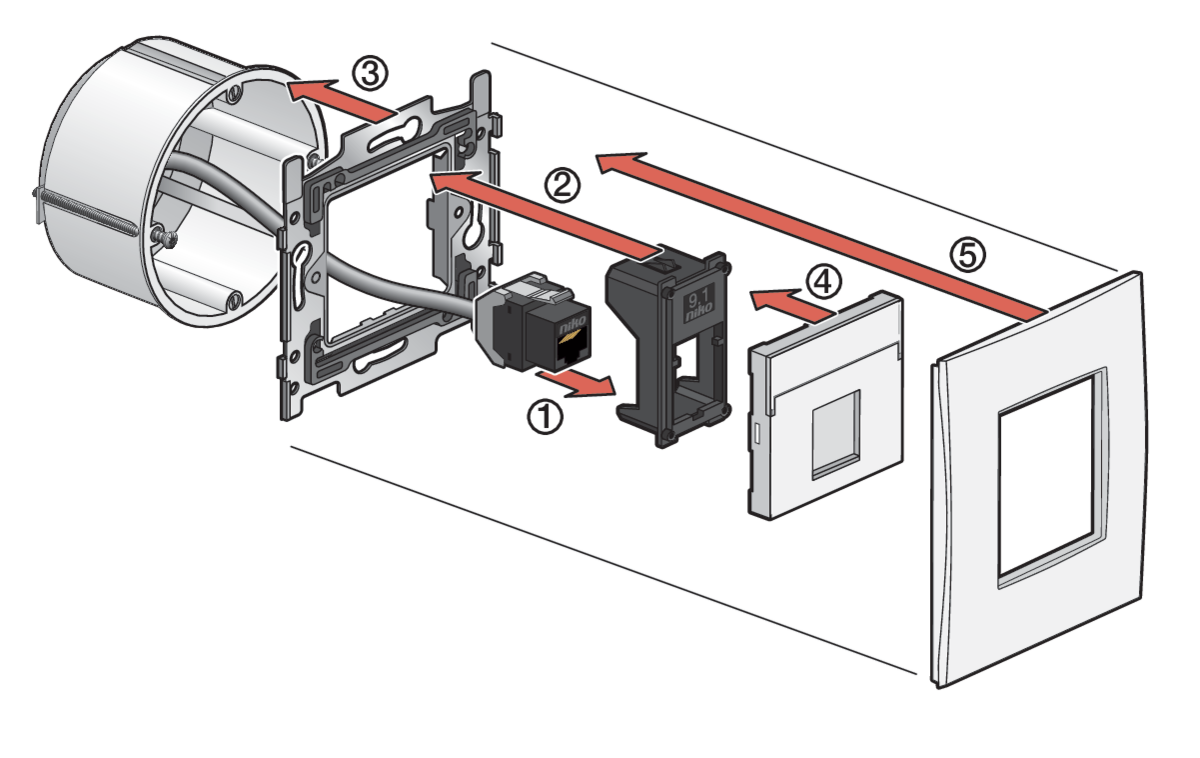
https://dam.nikocdn.eu/asset/167528/guideImage/170-65901_TG_002.png


Étapes de montage
  1. Click the (already wired) connector into the adaptor.

  2. Click the adaptor into the centre of the base.

  3. Mount the base in the flush-mounting box.

  4. Click the central plate onto the base.

  5. Click the faceplate onto the base.

Check the article numbers for this combination on the Niko website.

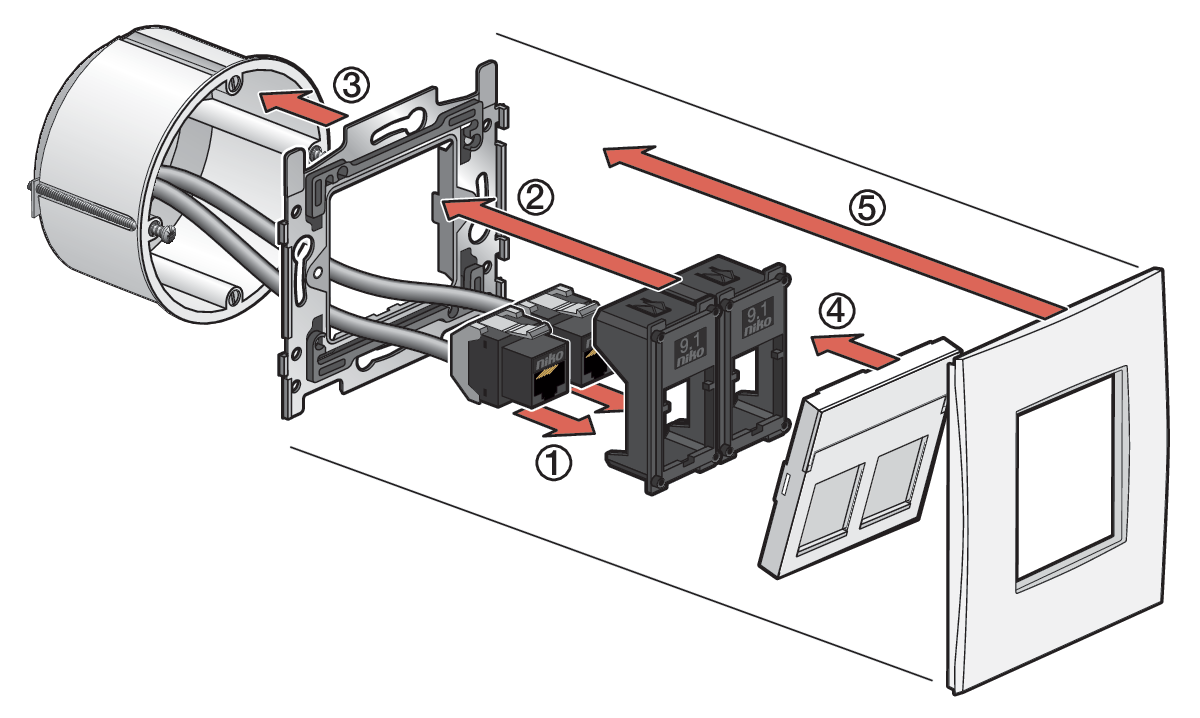
Double connexion RJ plate

https://dam.nikocdn.eu/asset/167527/guideImage/170-65901_TG_001.png


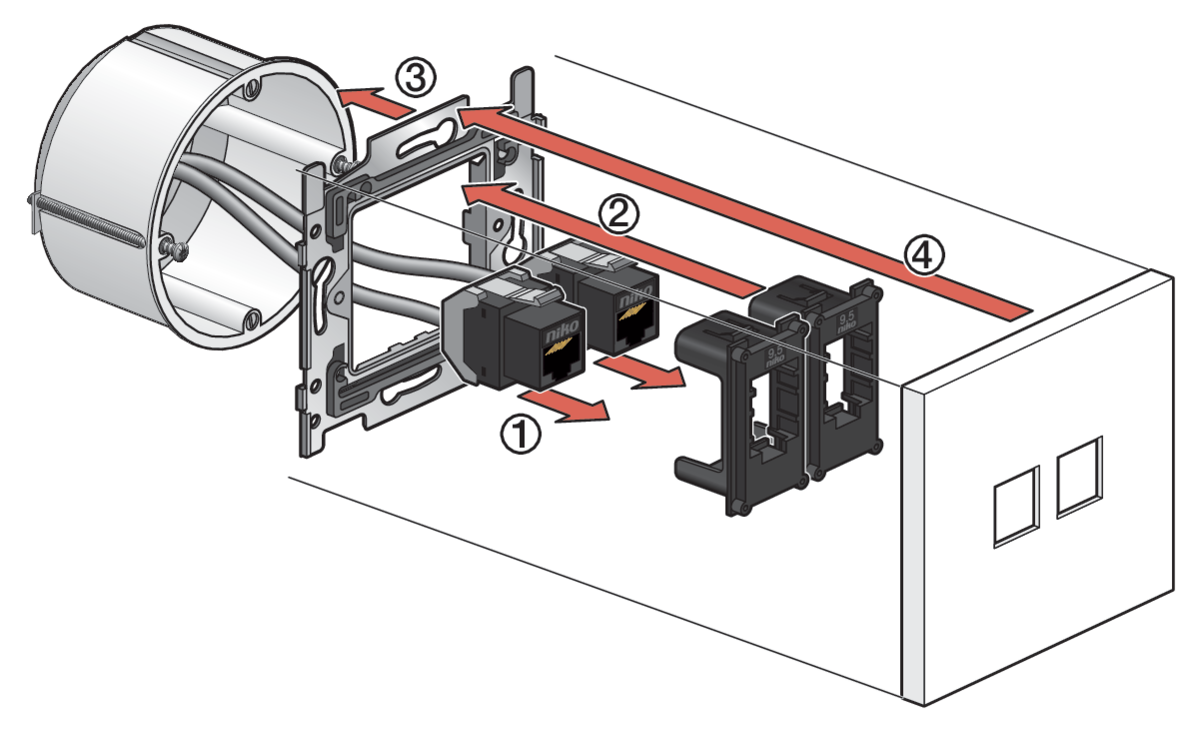
Étapes de montage
  1. Click each (already wired) connector into the adaptor.

  2. Click the two adaptors into the base.

  3. Mount the base in the flush-mounting box.

  4. Click the central plate onto the base.

  5. Click the faceplate onto the base.

Check the article numbers for this combination on the Niko website.

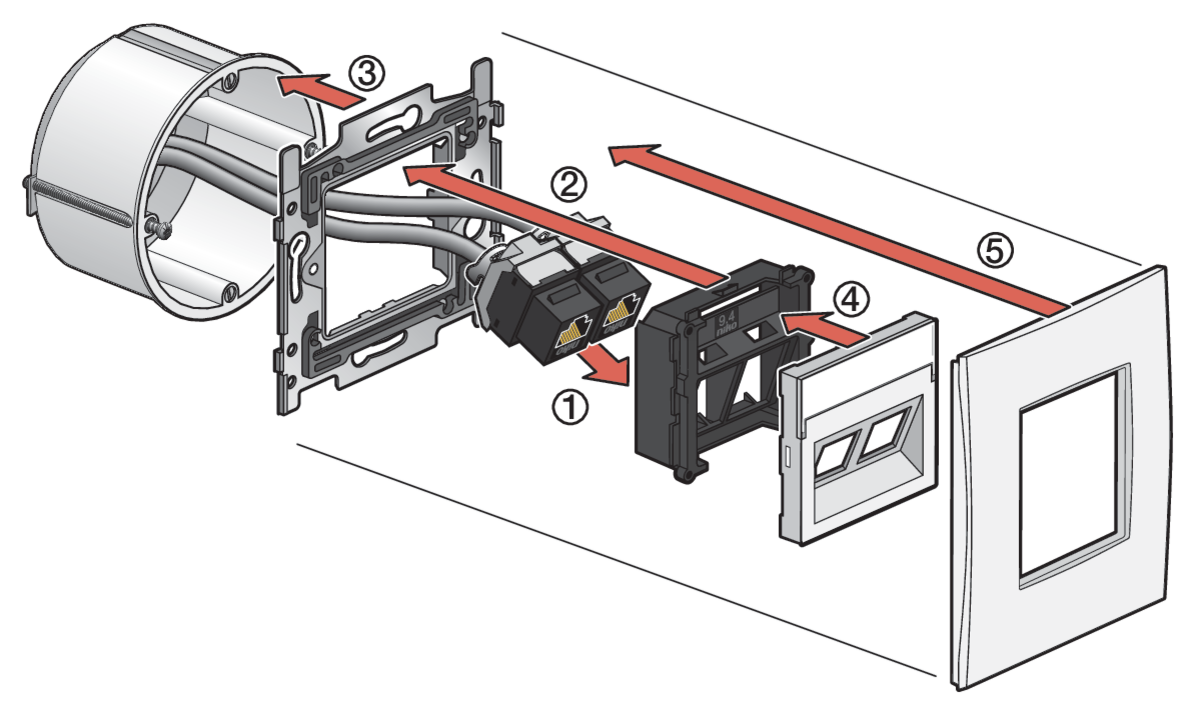
Double connexion RJ oblique

https://dam.nikocdn.eu/asset/167530/guideImage/170-65904_TG_001.png


Étapes de montage
  1. Click each (already wired) connector into the adaptor
    Attention: the connector needs to be mounted with the Niko logo upside down

  2. Click the adaptor into the base.

  3. Mount the base in the flush-mounting box.

  4. Click the central plate onto the base.

  5. Click the faceplate onto the base.

Check the article numbers for this combination on the Niko website.

Niko Rocker et Niko Toggle

Double connexion RJ – UTP
https://dam.nikocdn.eu/asset/167529/guideImage/170-65905_TG_001.png


Étapes de montage
  1. Click each (already wired) connector into the adaptor.

  2. Click the two adaptors into the base.

  3. Mount the base in the flush-mounting box.

  4. Click the faceplate onto the base.

Check the article numbers for this combination on the Niko website.

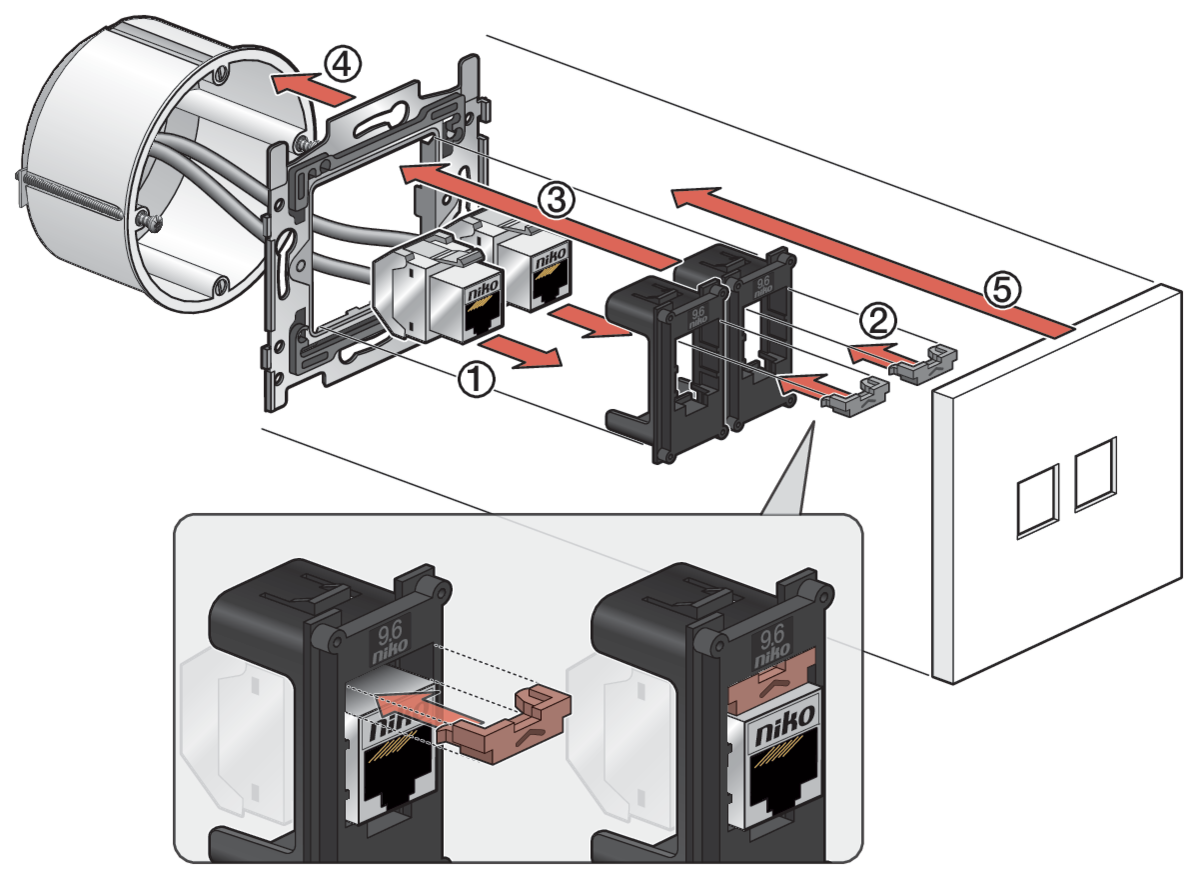
Double connexion RJ – STP

https://dam.nikocdn.eu/asset/167531/guideImage/170-65906_TG_001.png


Étapes de montage
  1. Click each (already wired) connector into the adaptor.

  2. Click the inserts into the adaptors, on top of the installed connectors (the insert is included in the packaging of the adaptor).

  3. Click the two adaptors into the base.

  4. Mount the base in the flush-mounting box.

  5. Click the faceplate onto the base.

Check the article numbers for this combination on the Niko website.


Informations juridiques

nv Niko sa
Industriepark West 40
9100 Sint-Niklaas, Belgium

http://www.niko.eu

+32 3 778 90 80
support@niko.eu