In this step-by-step plan, roll-down shutters are automated on the basis of time and the amount of daylight that is measured by a light sensor. As soon it gets dark during the time period defined as a condition, the roll-down shutters will automatically close.

Click Creation at the top of the screen.
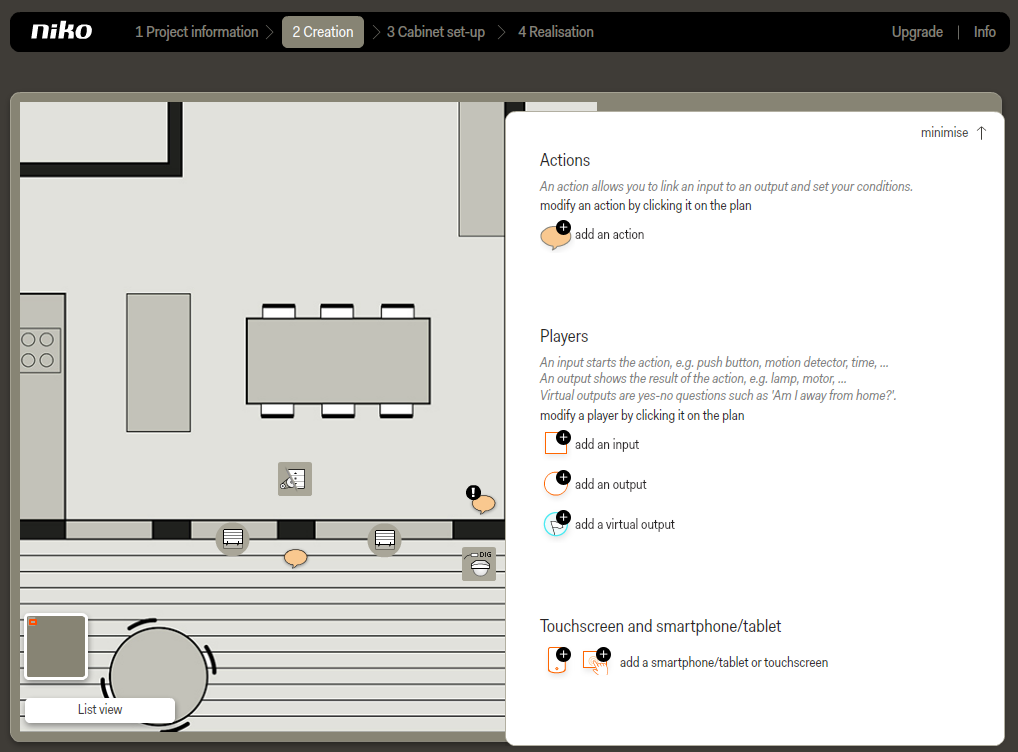
Click on add an input.
In order to measure the daylight, a light sensor is mounted on the outside wall.
Click on digital sensor in the selection list in the right-hand section of the screen.
The digital sensor appears in the plan.
Naturally, an analogue sensor can also be selected for this purpose.
Drag the digital sensor to the right place, and assign it a recognizable name.
Select an existing location from the selection list, or click on add a location if the location has not previously been defined.
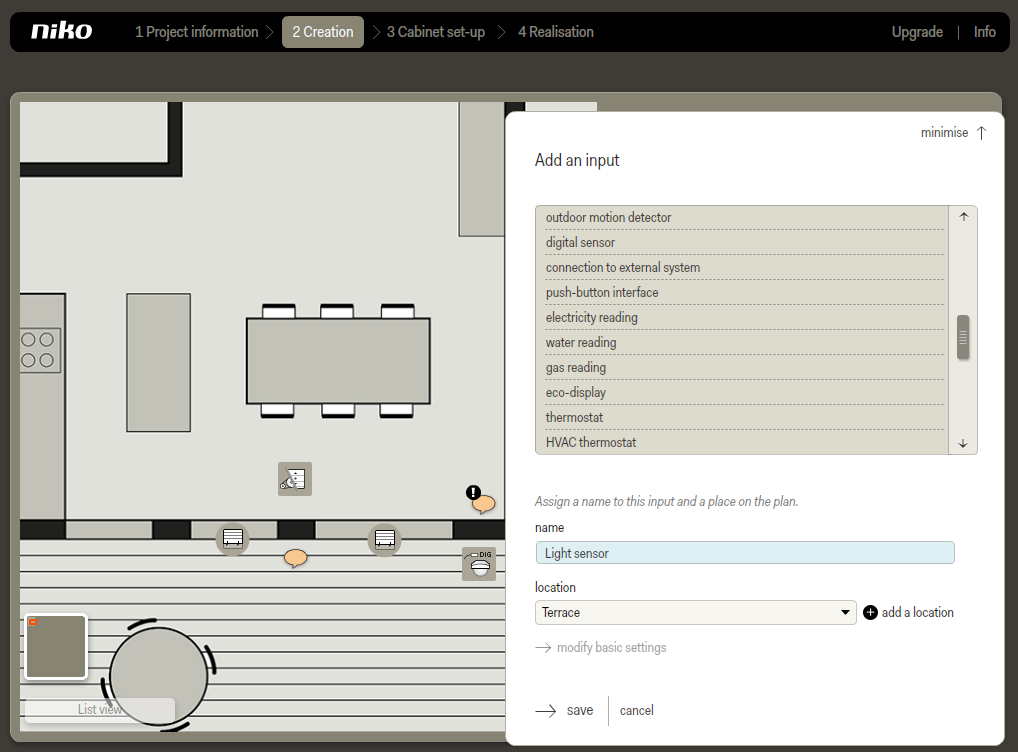
Click save.
You return to the start screen of the Creation step.
Time automation with light dependency requires a separate action.
Automations such as these are always configured around an action that contains no inputs. In other words, you cannot add this to an action to which a a control was already coupled. You must create a new action.
Click on add an action.
The action appears in the plan as a text balloon.
Drag the action to a place that you consider logical and convenient, for example, next to the relevant output.
Assign the action a name.
Select the location of the roll-down shutters from the selection list.
Click continue.
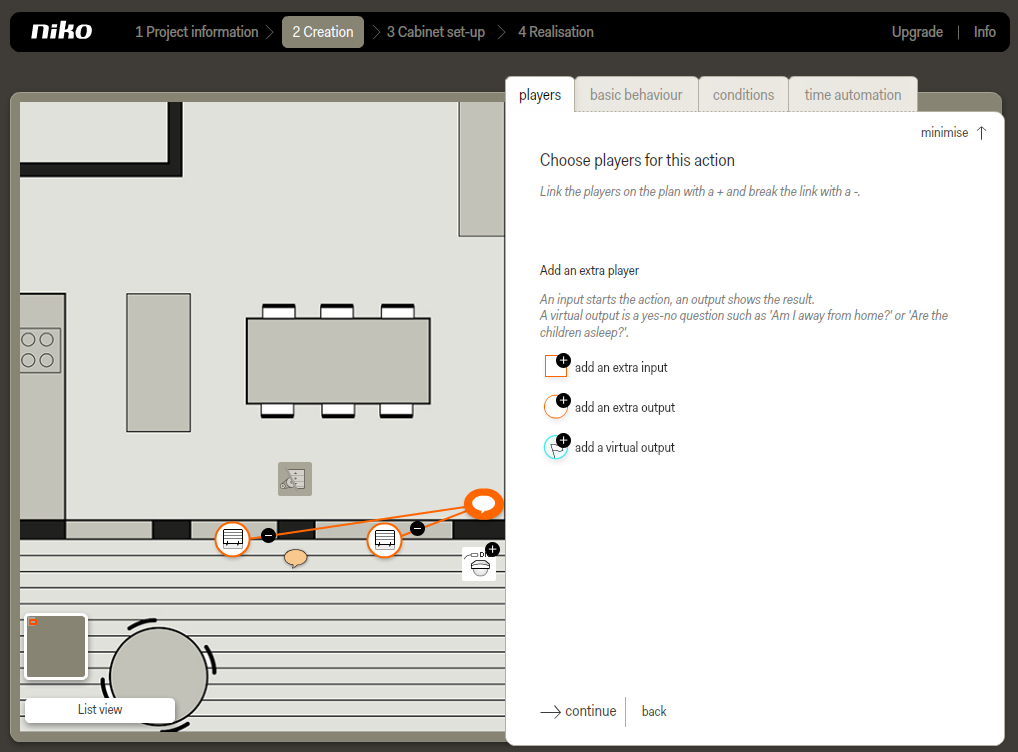
You go to the players tab.
Click on the roll-down shutters in the plan to couple them to the action.
This type of automation does not contain any inputs as players. Therefore, you are limited here to the selection of the outputs that must be controlled.
Click continue.
You go to the basic behaviour tab.
The basic behaviour is shown. Verify whether this behaviour is the desired behaviour and adjust, if necessary.
In this example, the basic behaviour is correct.
Click continue.
You go to the conditions tab.
Click on add a condition.
Assign the condition a name. For example, Dark.
Make sure that you add an unambiguous name for the condition so that you can directly identify it if additional adjustments are needed later.
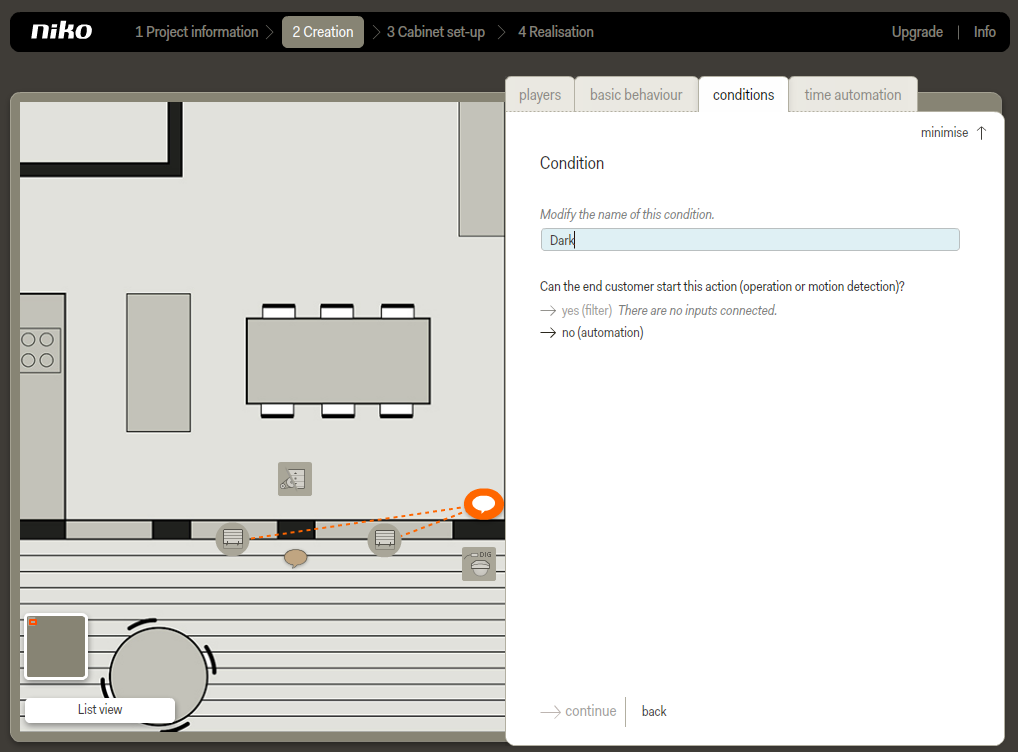
Click no (automation).
You have not added any inputs to this action, therefore the end customer cannot start the action himself.
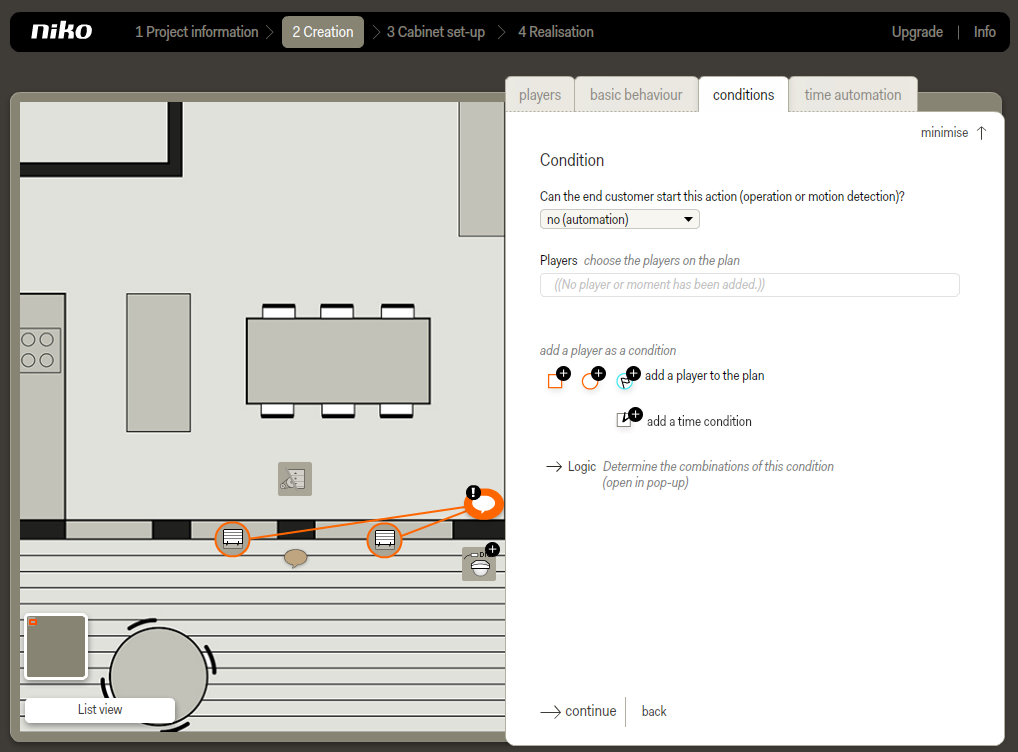
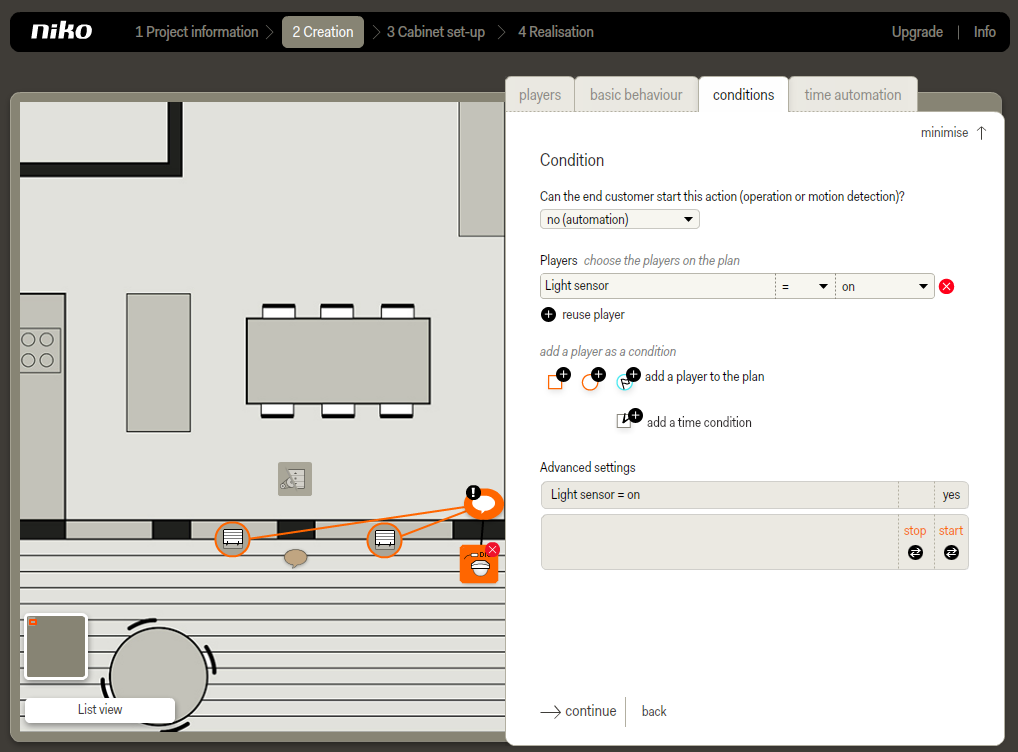
Click on the light sensor in the plan to couple it as a condition player to the action.
The digital sensor is connected to the action via a black line.
The behaviour of the condition player is indicated under advanced settings. In this example, yes means that it is dark. The action will start on that condition.
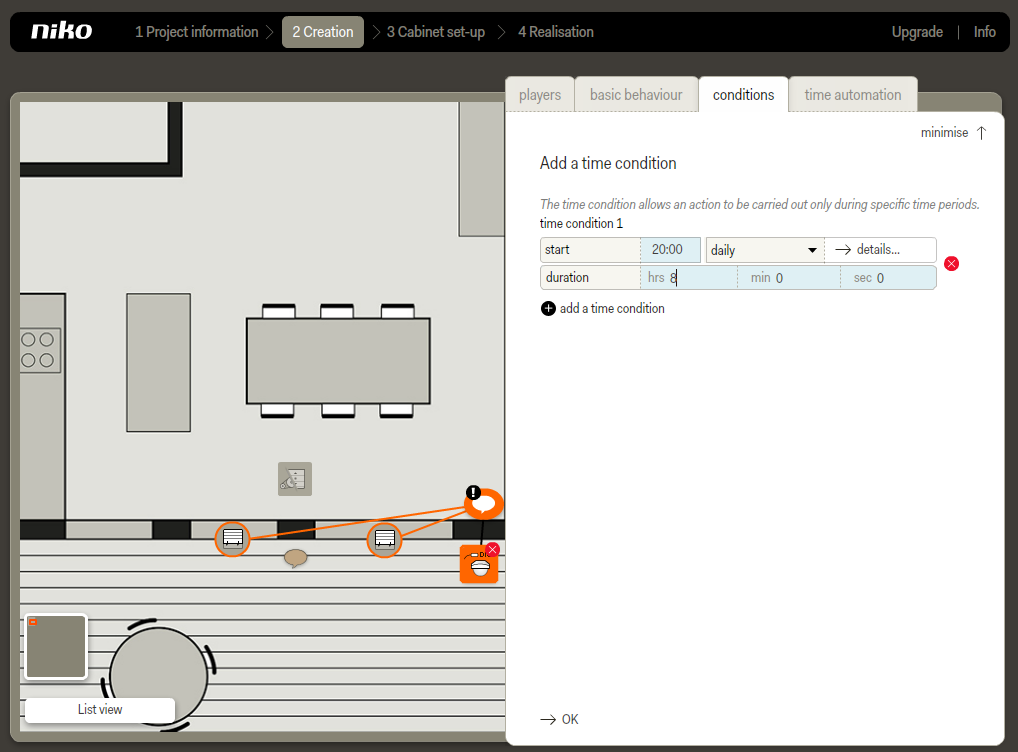
Click on add a time condition.

Enter the time condition.
For example: For every day between 8 o'clock in the evening and 6 o'clock in the morning except in the weekend, you enter a start time of 20:00 and a duration of 10 hours, because 6 o'clock in the morning is 10 hours after 20:00. Select the frequency weekly, and click on details to deselect Saturday and Sunday.
Click OK.

Under advanced settings, you will find a table with all of the possible combinations between the various condition players.
Go through each column and click on the black button under it to indicate what must occur in that specific case. You can choose between start, stop or slash (/). The / (slash) option means that nothing needs to occur.
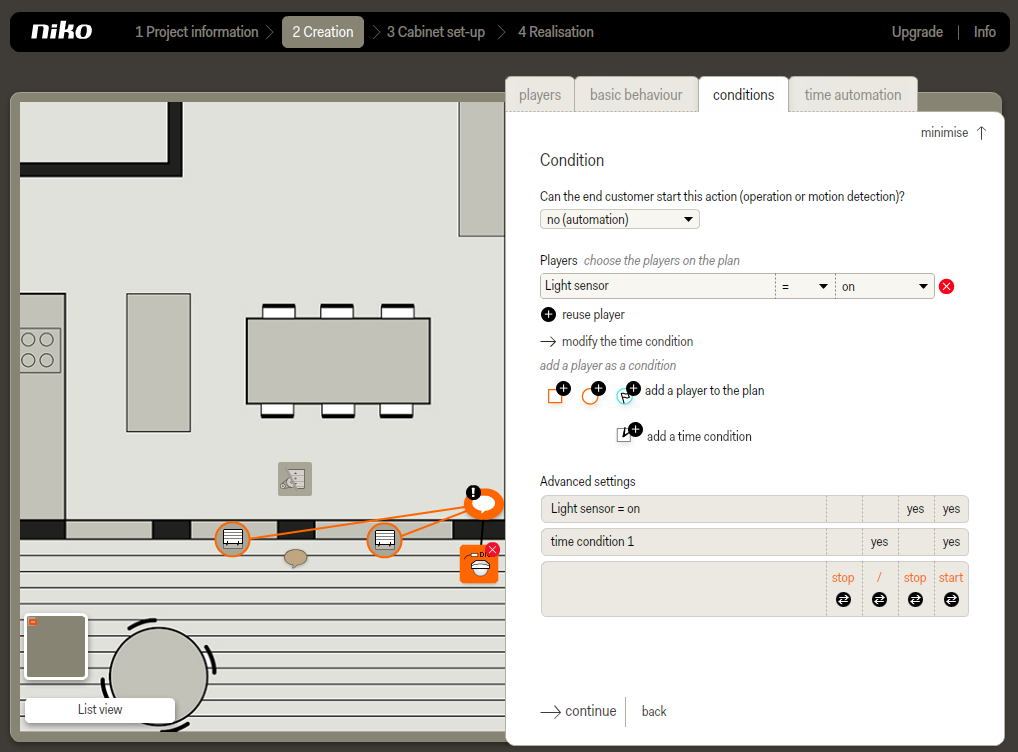
In this example, the roll-down shutters must only close automatically (start) when both conditions are true (yes). This means that it must be dark outside and be later than 20:00. If it only gets dark after 20:00, then the roll-down shutters will close later. The roll-down shutters will automatically open again at 06:00, regardless of whether it is still dark or already light outside. This also prevents the roll-down shutters from automatically opening at night when an outdoor lamp is switched on or when the sun rises very early in the summer.
Click continue.
You go to the time automation tab.
Click save.
You return to the start screen of the Creation step.
In the plan, the action receives an exclamation mark to indicate that a condition is coupled to the action.
Now continue with Cabinet set-up and Realisation.
In Cabinet set-up, add the digital sensor to a digital sensor module. If you are using an analogue sensor, add an analogue sensor module during cabinet set-up.