Universal HVAC Interface (CoolMaster)
Applicability
This link takes you to the product page. There, you will find detailed specifications, all compatible articles, certificates of CE-marking, etc.
This online manual is applicable to the following product(s):
This article can be used for all compatible HVAC systems. The HVAC universal interface replaces the HVAC interfaces for specific brands that are no longer available (550-00551, 550-00552, 550-00553, 550-00554, 550-00556, 550-00557, 550-00558, 550-00559).
Description
The HVAC Universal Interface allows you to connect a VRV or VRF air conditioning system (HVAC system) to the Niko Home Control installation. This module acts as the interface between the air conditioning system and the Niko Home Control connected controller and allows communication between both systems.
Operation
You can connect your entire HVAC system, within the following limits:
You can use only 1 CoolMaster per Niko Home Control installation.
The HVAC interface can interact with a maximum of 32 indoor units.
You can create up to 20 zones in one Niko Home Control installation.
You can add a maximum of 8 indoor units per zone. The HVAC system has its own order of priority when responding to various commands from different zones.
To check compatibility, verify if the required connection terminals are present on your indoor unit, as described in Connecting the CoolMaster. If you are not sure, please contact customer services.
The functionalities are limited for the following HVAC brands:
Daikin KRP with DTA D3 interface does not support the ‘ventilation speed control’ and ‘room temperature monitoring’ functions.
Hitachi models do not transfer temperature to the Niko Home Control installation.
You can control your HVAC installation via:
Niko Home app, on a tablet (optionally attached to a wall in your home) or your smartphone
Digital black
Touchscreen 3 (only for older systems that contain an HVAC thermostat)
The HVAC interface synchronizes the Niko Home Control installation and the HVAC system every 10 minutes and after every action from the installation. The following parameters will be synchronized:
Heating/cooling
On/off
Ventilation speed
Desired temperature
Temperature settings
Installation
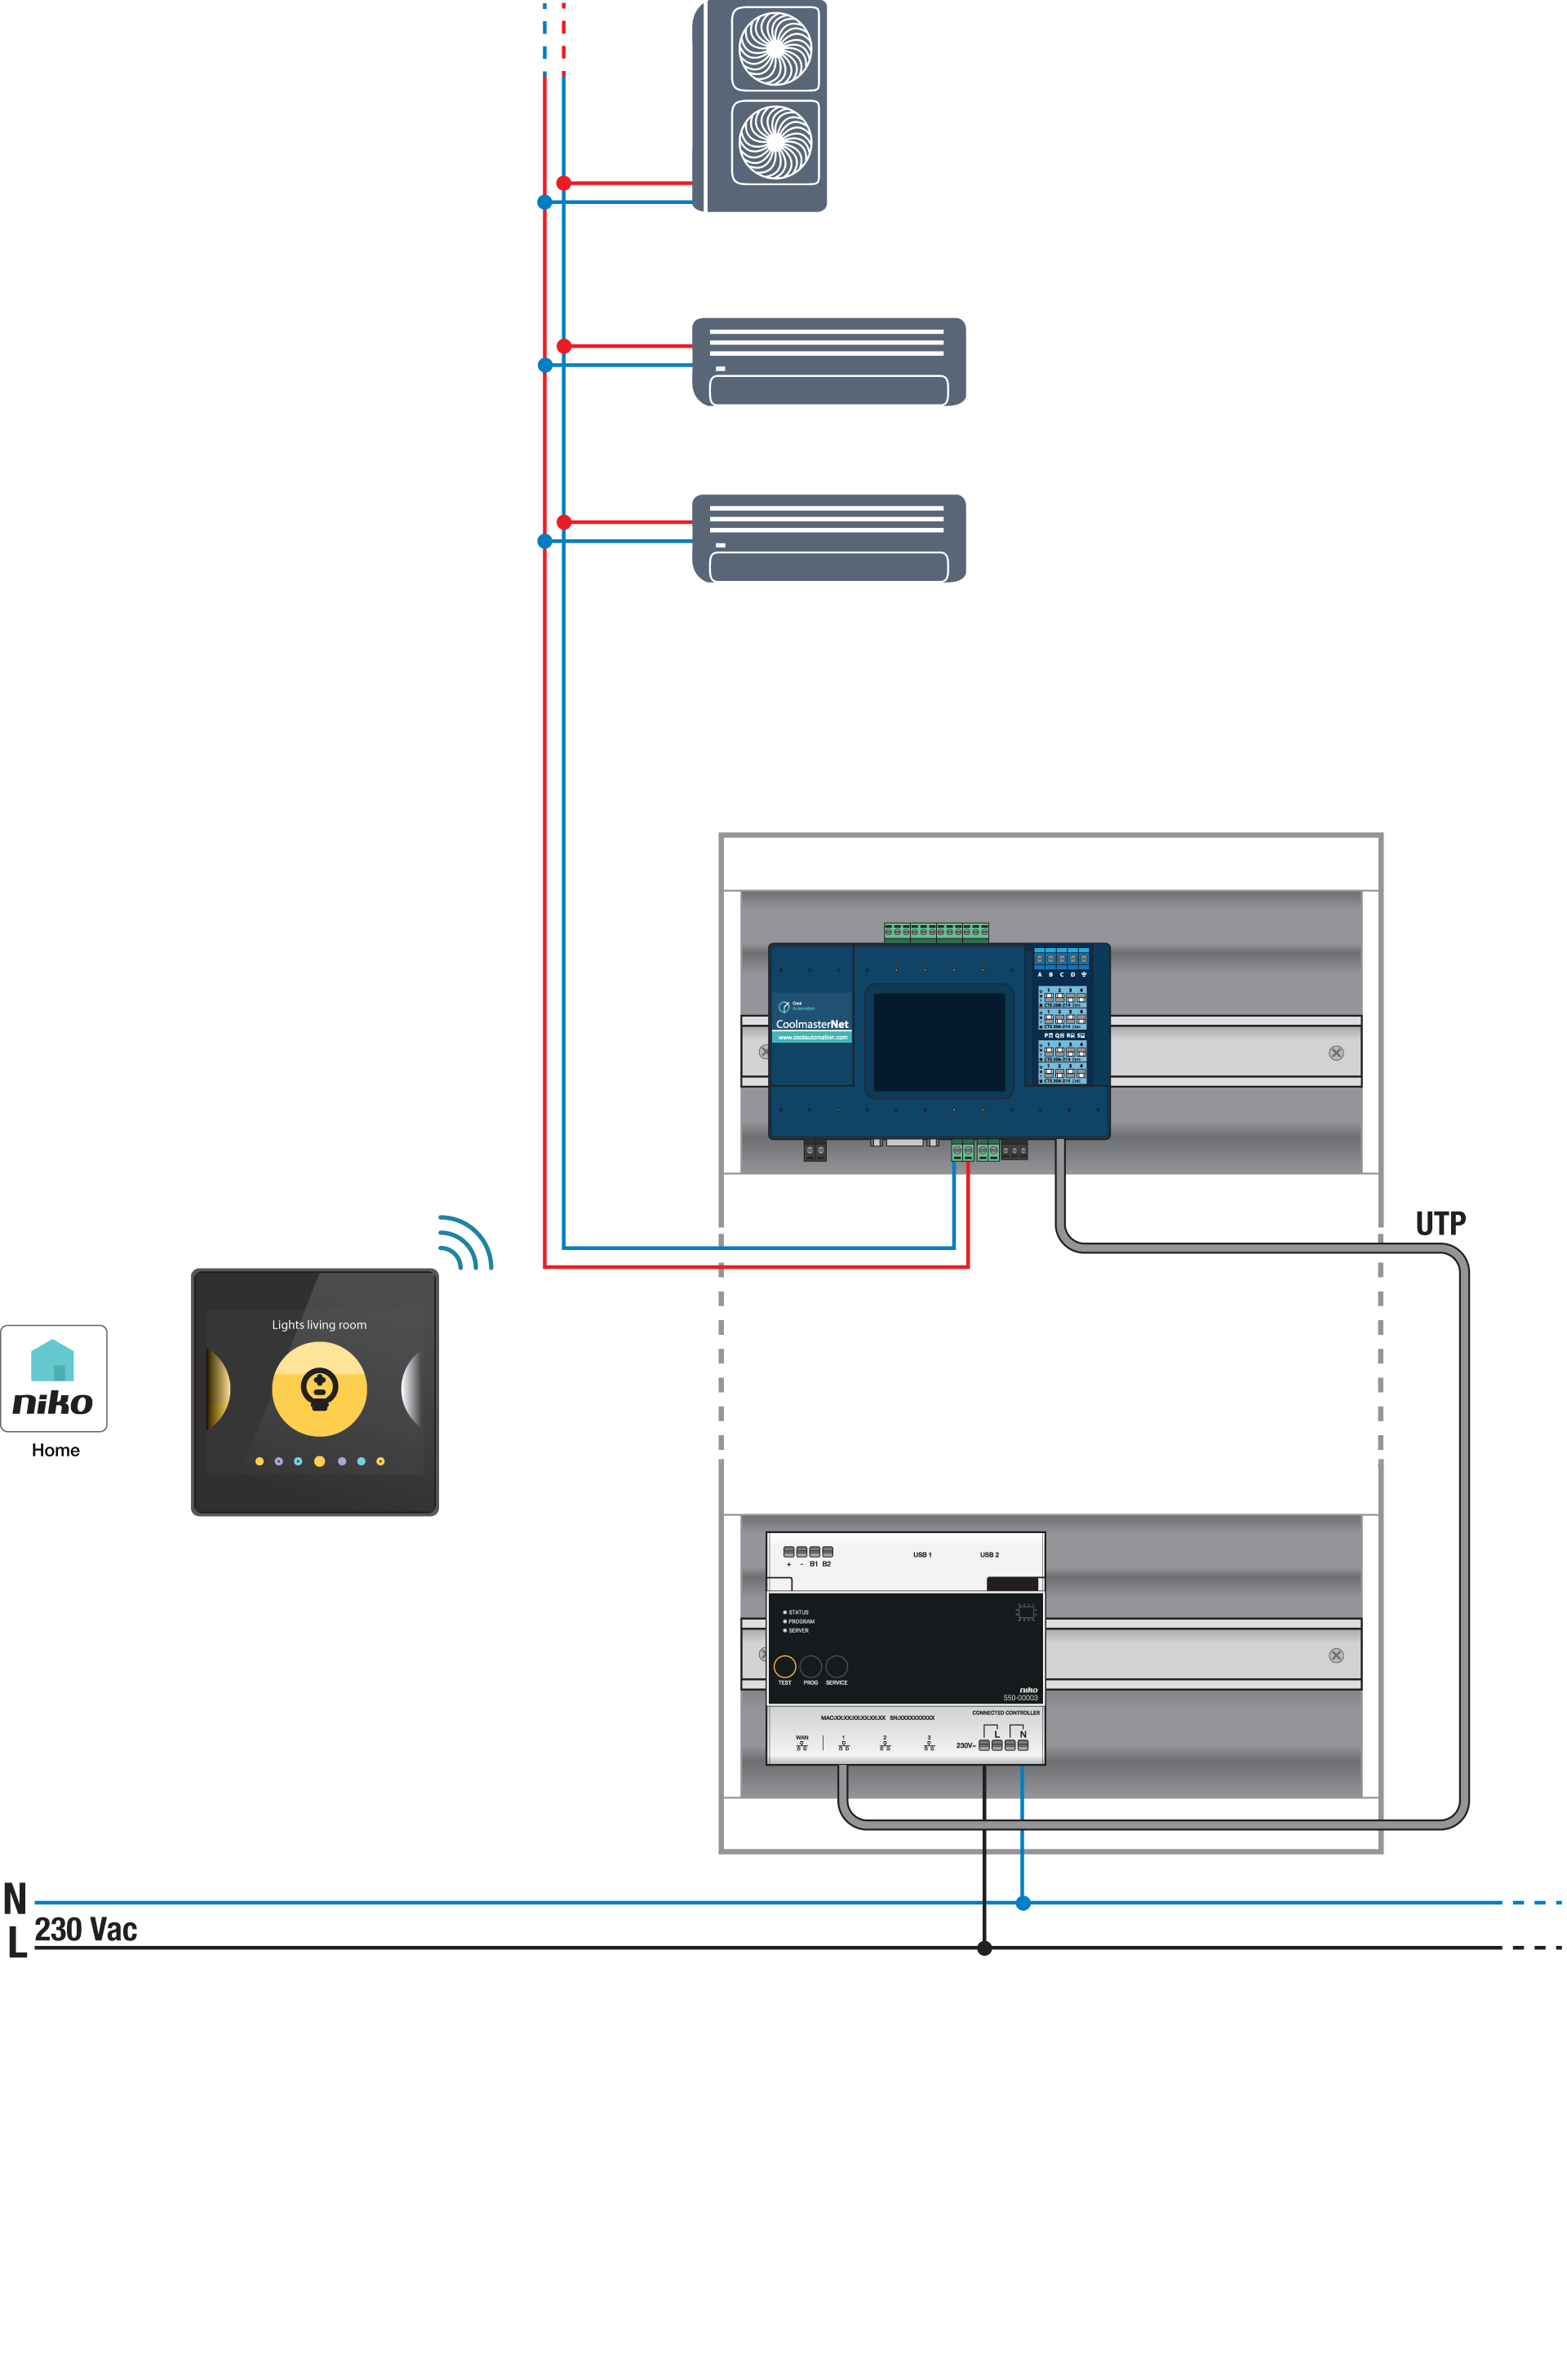
System overview
To avoid crosstalk in new installations, connect all SELV cables to the left inside the electrical cabinet and all high-voltage cables to the right inside the electrical cabinet. Group all low-voltage modules together.
The CoolMaster must be connected to the LAN port of the connected controller to allow communication with the Niko Home Control installation.
The CoolMaster is connected to the HVAC units via a wired connection.
CoolMaster components
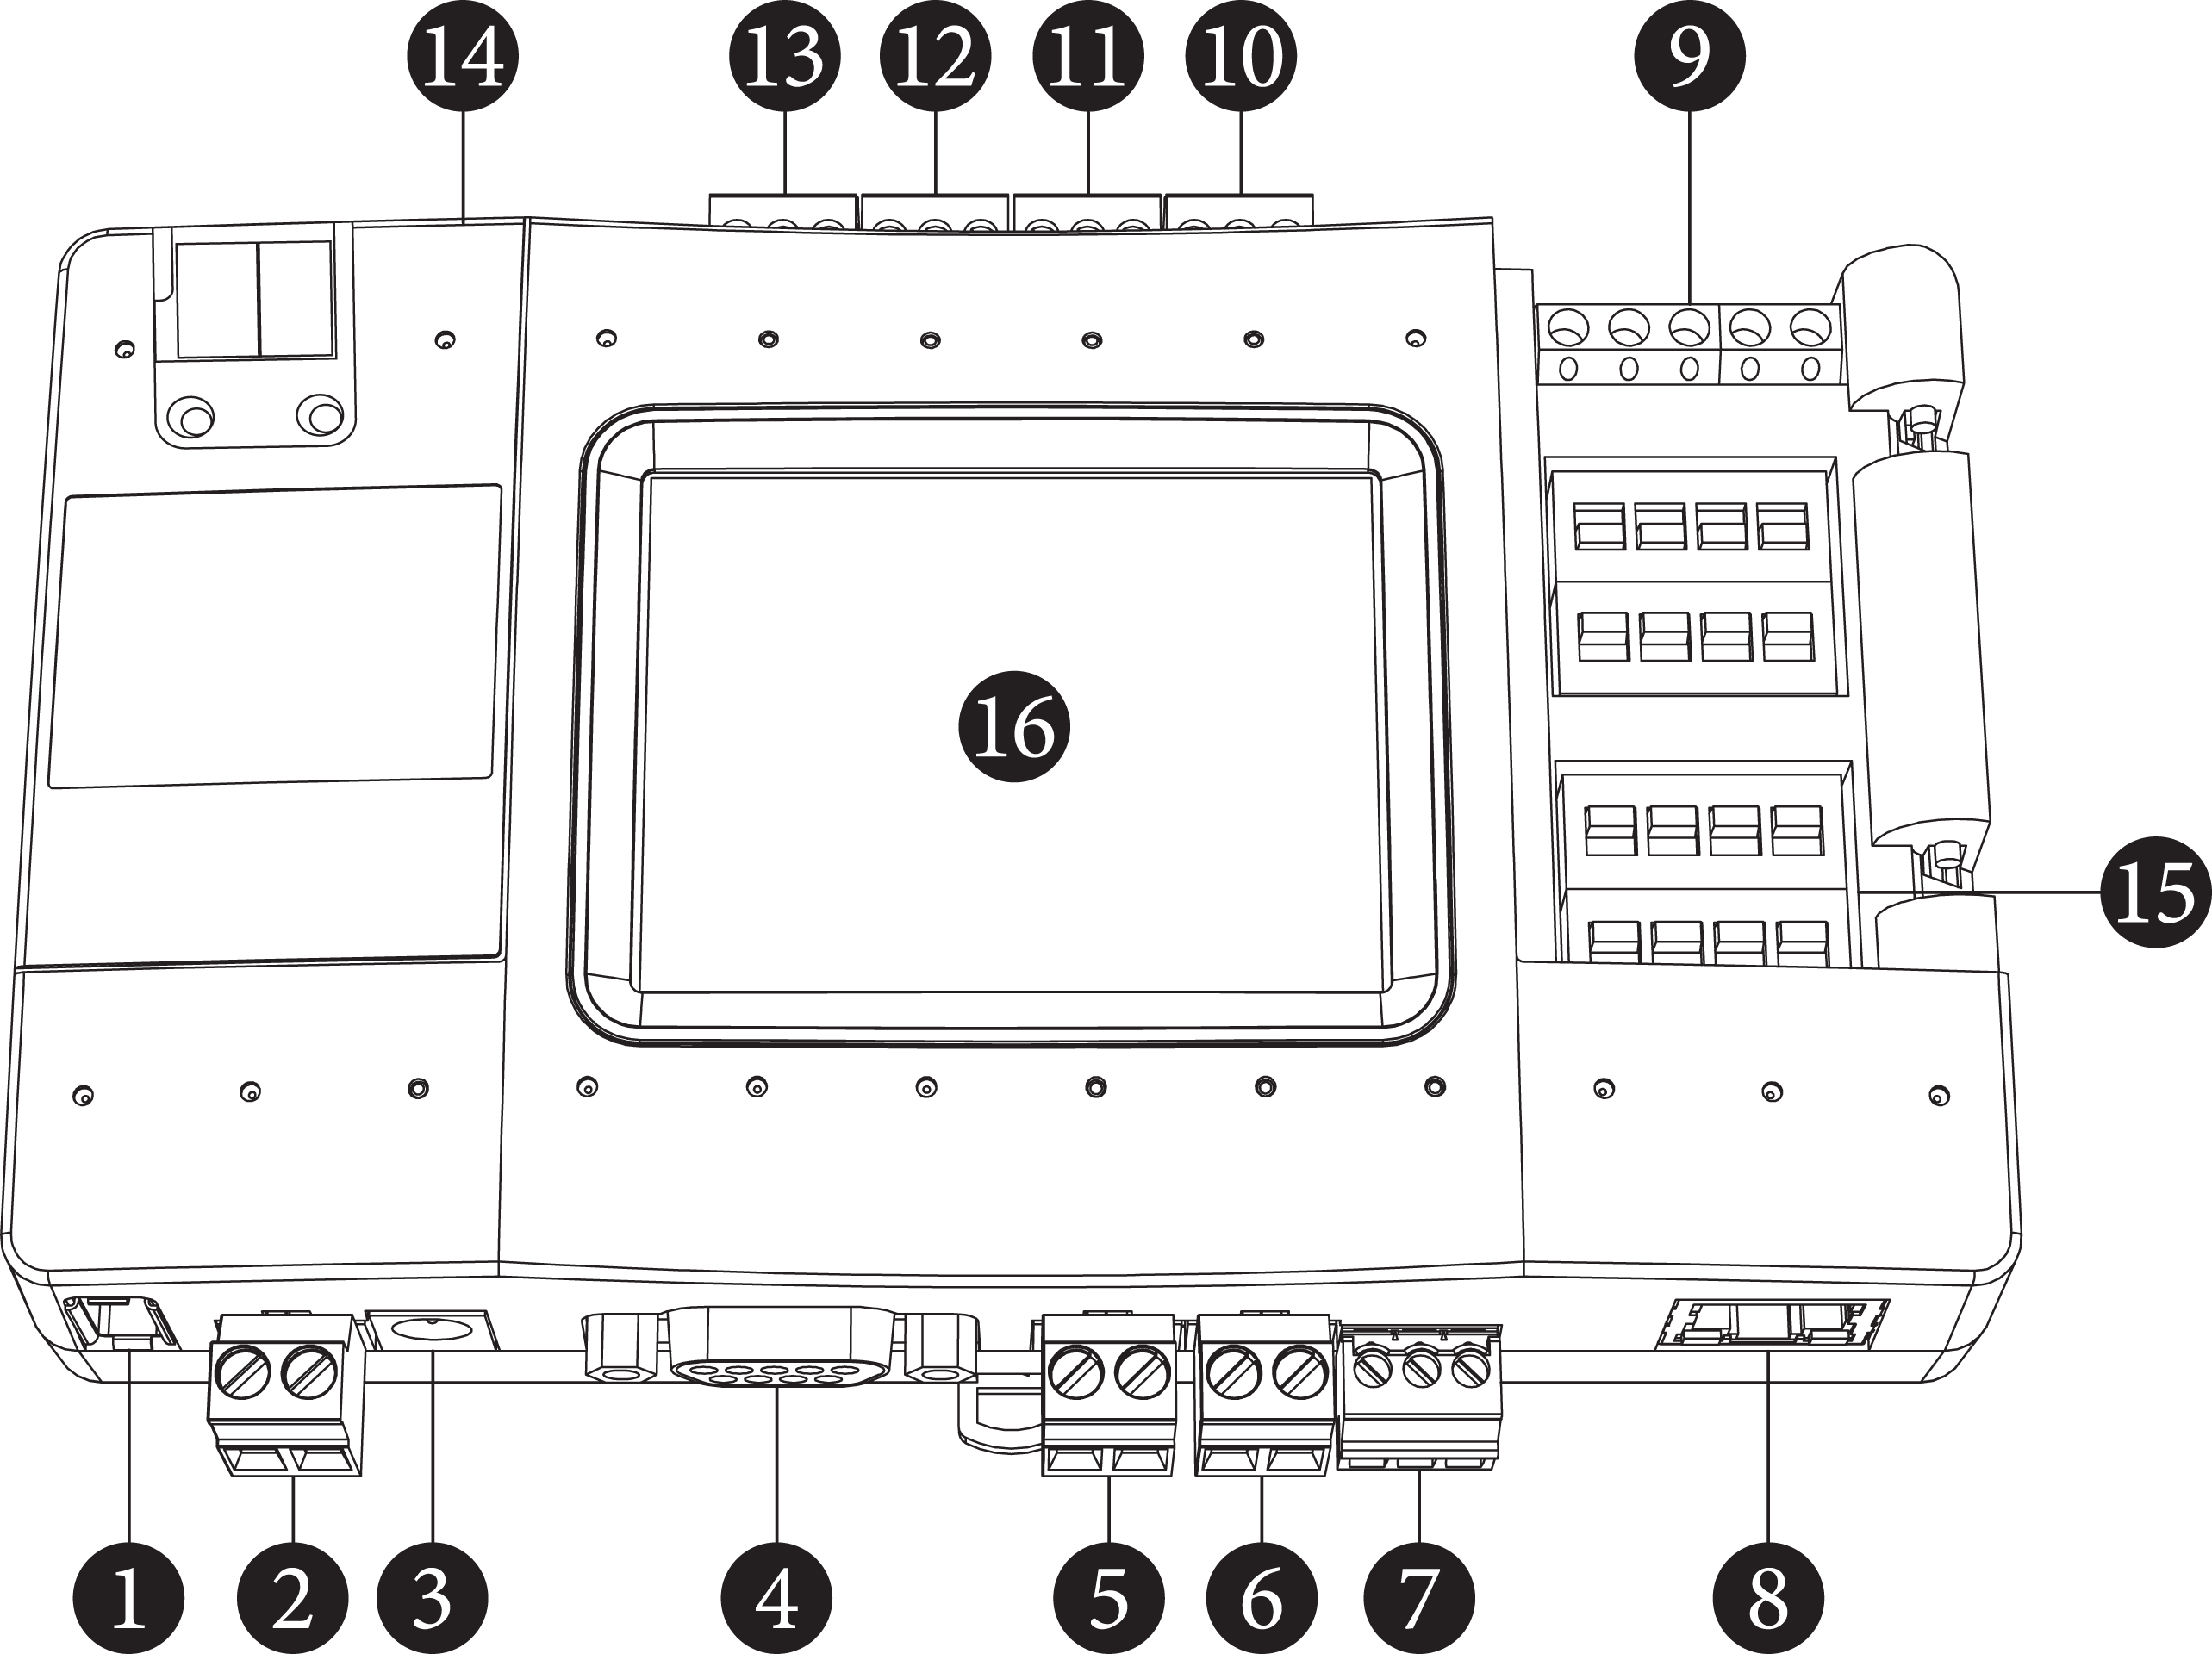
L8 - HVAC Line 8 (USB Host)
Power
Power Plug
RS232 Port
L1 - HVAC Line 1
L2 - HVAC Line 2
L3 - RS485
Ethernet Port
GPIOs
L7 - HVAC Line 7
L6 - HVAC Line 6
L5 - HVAC Line 5
L4 - HVAC Line 4
USB Device Port
DIP Switches P, Q, R, S
LCD Touch Screen
1. Mounting the CoolMaster
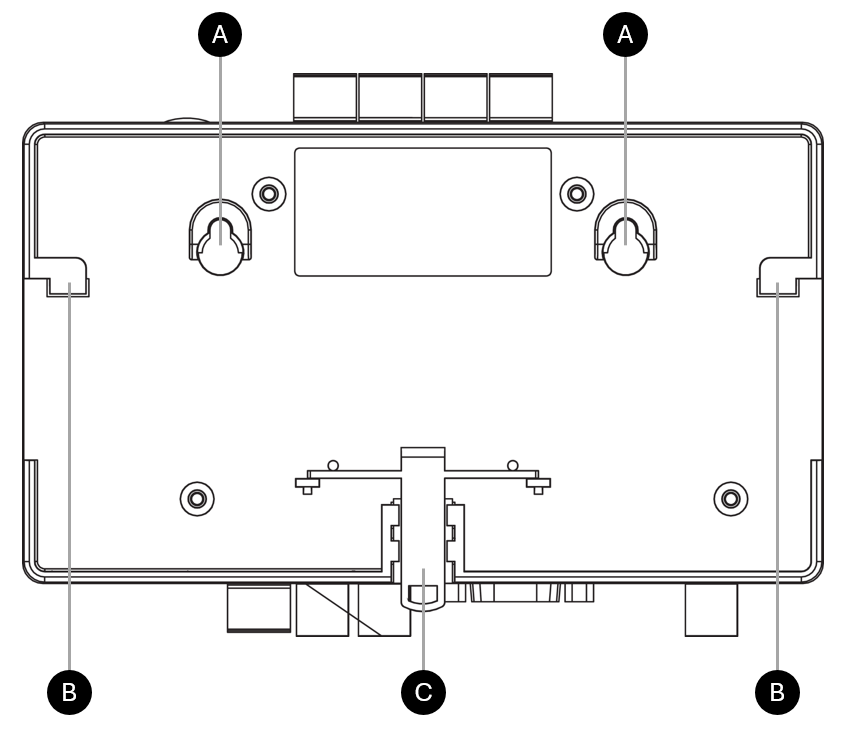
Mount the CoolMaster, by one of the following methods:
On a wall: Fix the screws to the wall at the position of the mounting holes (A). The distance between the center points is 79 mm.
On the DIN rail: Place the mounting feet (B) on the DIN rail, push the lower part of the device onto the DIN rail to lock it in place. To detach, pull down the mounting lock (C) at the bottom of the device.
2. Connecting the CoolMaster
The 550-00550 (HVAC universal interface) comes with a default configuration for Daikin VRV. When using another HVAC, the interface needs to be configured accordingly (DIP switch setting, and HVAC line setting via its display).
To connect the HVAC interface to a VRV or VRF air conditioning system, connect a two-wire HVAC bus cable between the terminals on the indoor unit(s) and the connections on the CoolMaster (using the included interface connector).
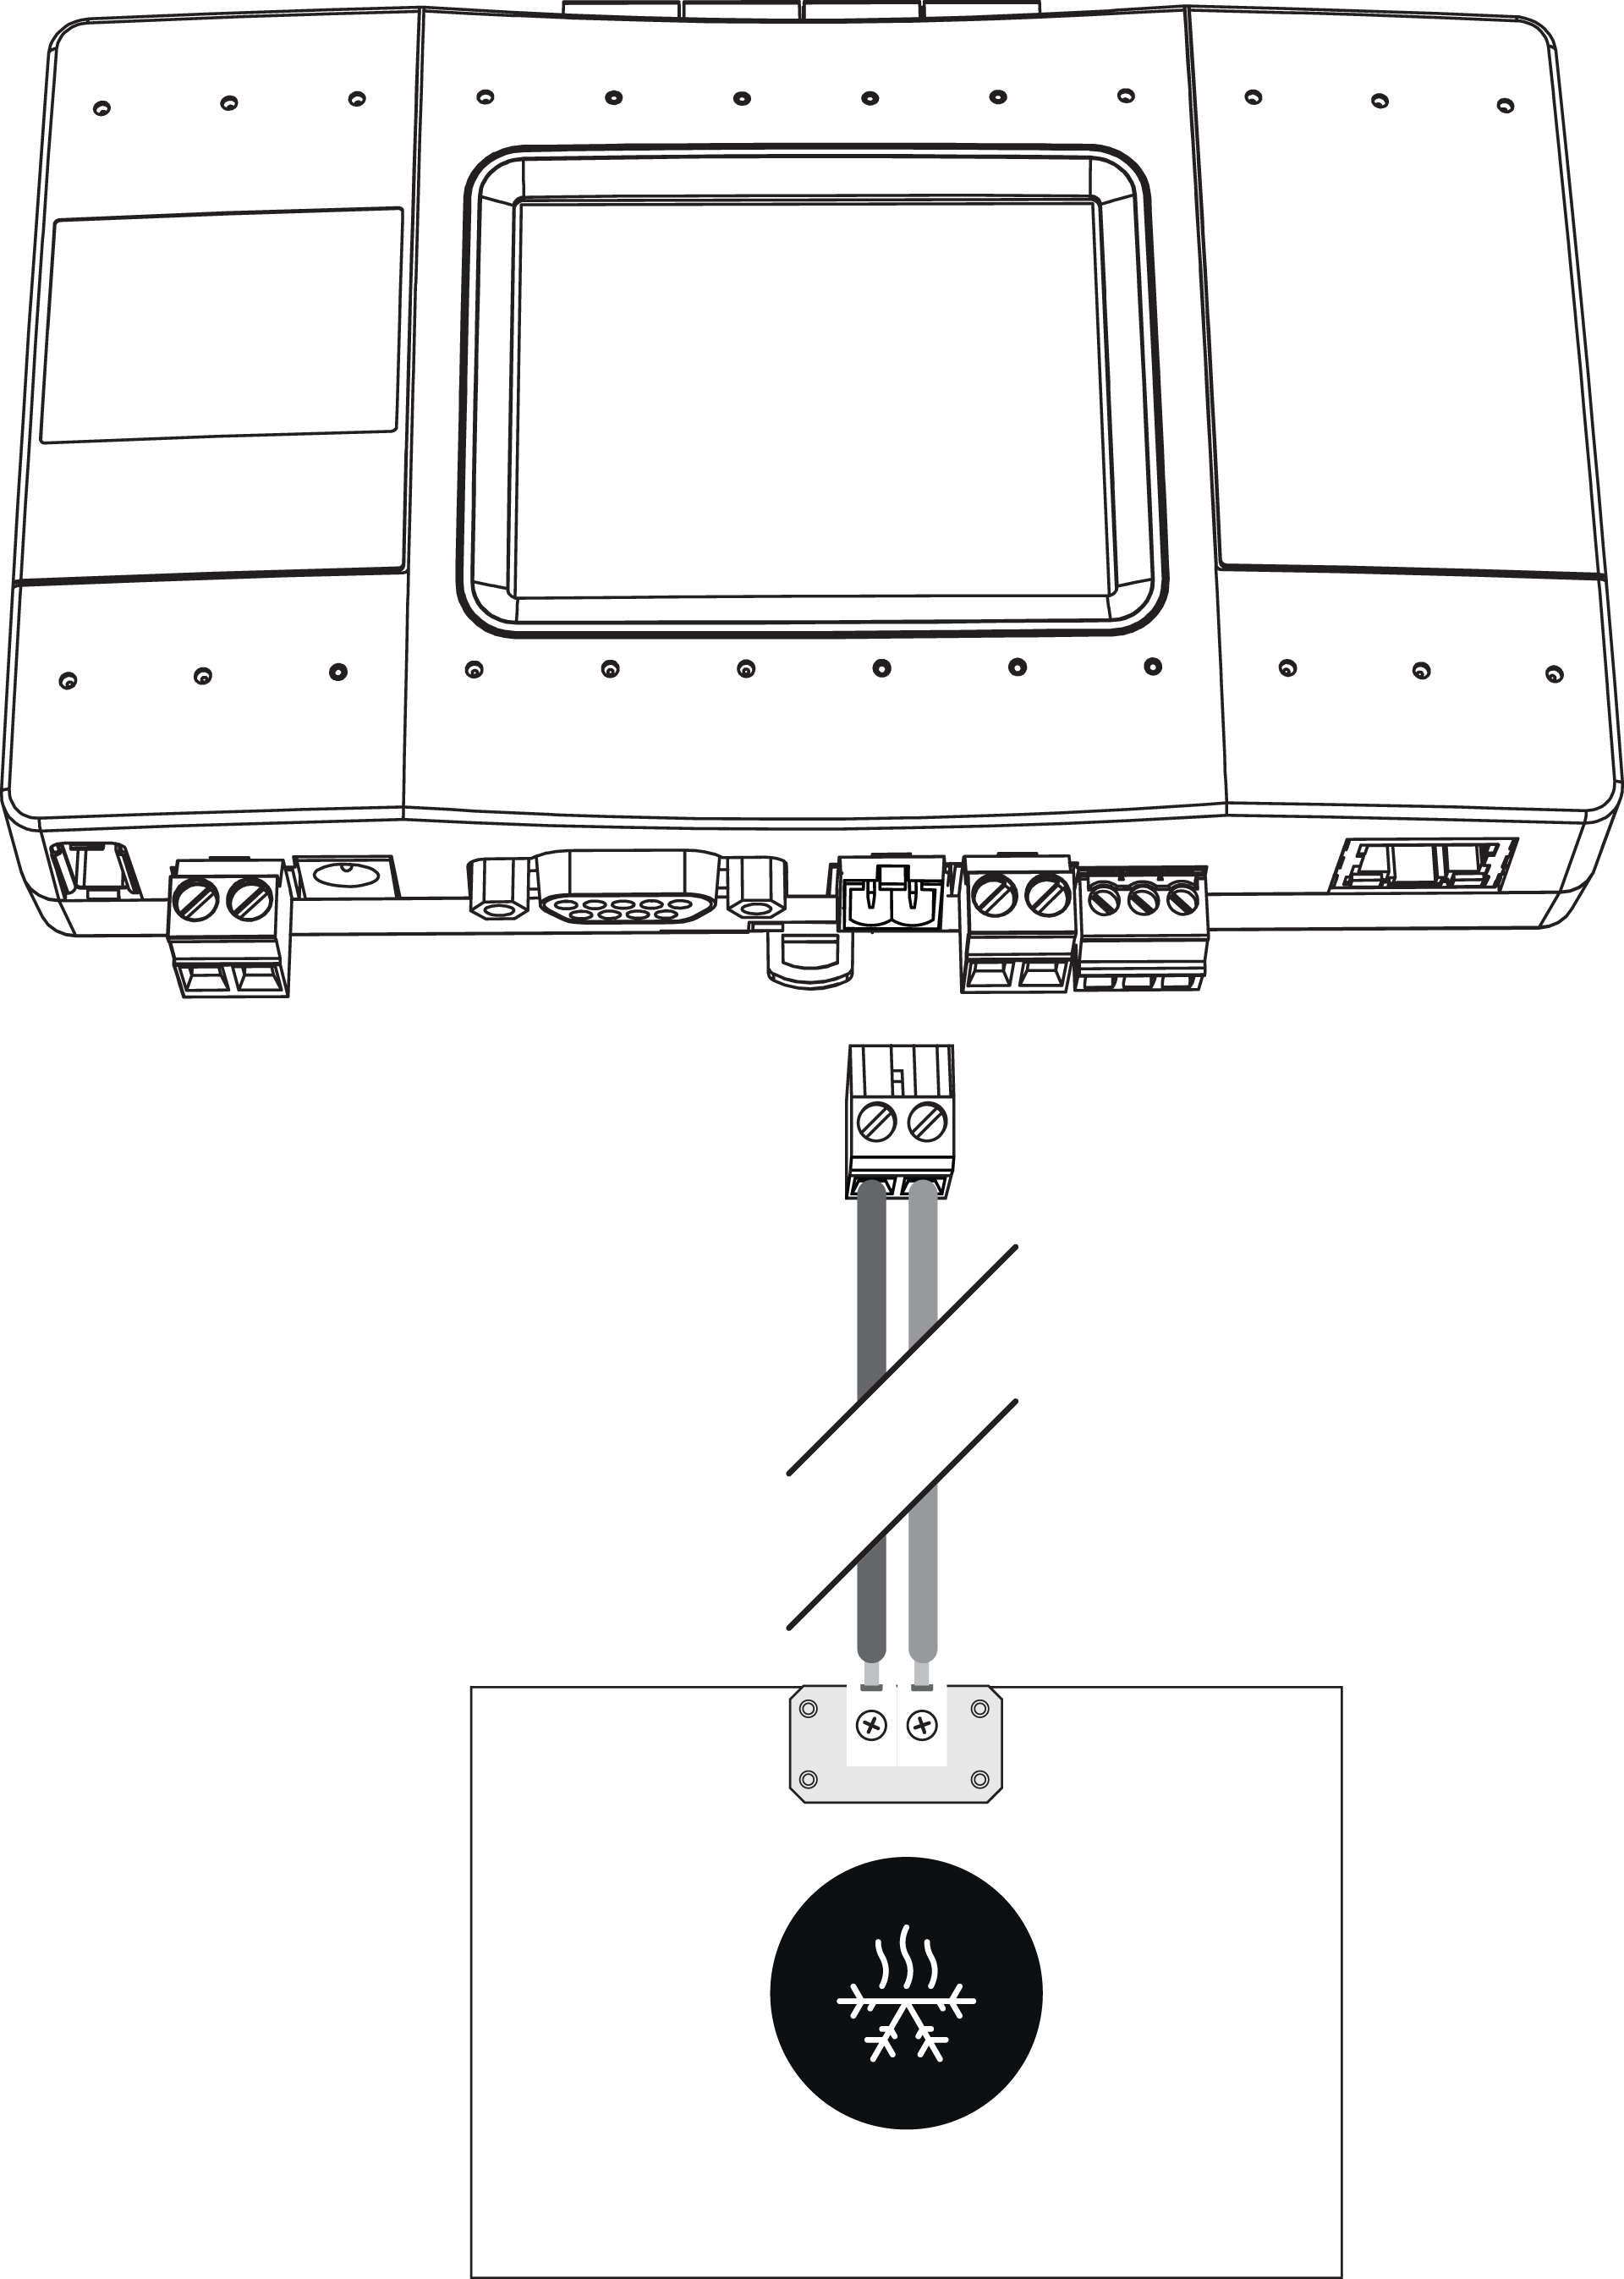
The table below provides an overview of the connection terminals on the indoor unit(s) for each type of HVAC system and the corresponding connection on the CoolMaster:
HVAC System | Connection terminals on indoor unit | Polarity | Connections on HVAC interface (CoolMaster) | Shielded network cable |
|---|---|---|---|---|
Daikin* | F1 F2 | None | L1 or L2 | Not required |
Panasonic/Sanyo | U1 U2 | None | Required | |
Toshiba | U1 U2 | None | Required | |
Mitsubishi Electric | M1 M2 | None | Required | |
Hitachi | 1 2 (on outdoor unit) | None | Required | |
Haier | P Q (on outdoor unit) | None | Required | |
LG | Inter A, Inter B (on outdoor unit) | + - | L3, L4, L5, L6 or L7 | Required |
Gree/GMV4 VRF | G1 G2 | + - | Required | |
Gree/GMV5, GMV6 VRF | G1 G2 (on outdoor unit) | + - | L8 | Required |
Mitsubischi Heavy Industries | A B (on outdoor unit) | + - | L3, L4, L5, L6 or L7 | Required |
Samsung | F1 F2 or R1 R2 (on outdoor unit) | + - | Required | |
Midea | X Y E (on outdoor unit) | + - GND | Required | |
Trane | X Y E (on outdoor unit) | + - GND | Required | |
Chigo | X Y E (on outdoor unit) | + - GND | Required | |
Blue Star | A2 B2 (on outdoor unit) | + - | Required | |
Fujitsu | Z1 Z2 (on outdoor unit) | None | L8 | Required |
Aux | A B (on outdoor unit) | + - | L7 | Required |
Tica | A2 B2 (on outdoor unit) | + - | Required |
*It is required to configure a centralised (group) address in the Daikin system.
When you connect HVAC units of multiple brands, take into account the following limitations:
When DIP switches P1 and P2 are "ON", lines L6 and L7 cannot be used as separated lines. In this case the polarity on the HVAC cable connected to L7 will be automatically detected.
Line L2 can not be connected simultaneously with line L6 and line L1 can not be connected simultaneously with line L5
3. Dip switch settings
Open the flap on the top right-hand side of the HVAC interface and check to ensure the dip switches are set correctly, according to the tables below.
DIP Switch P
Switch | ON | OFF |
|---|---|---|
P1 and P2 | Link L6, L7 and enable polarity auto-detecton on L7 | Separate L6, L7 |
P3 | L6 enabled, L2 disabled | L2 enabled, L6 disabled |
P4 | N/A | Normal operating mode |
P1 and P2 must be in the same position.
DIP Switch Q and R
DIP switch Q and R are used to adjust the internal parameters of HVAC lines L1 and L2.
HVAC System | Q1 | Q2 | Q3 | Q4 |
|---|---|---|---|---|
Daikin | ON | OFF | ON | OFF |
Mitsubishi Electric | OFF | OFF | OFF | OFF |
Toshiba | OFF | ON | OFF | ON |
Panasonic/Sanyo | OFF | ON | OFF | ON |
Hitachi | OFF | ON | OFF | ON |
Haier | OFF | ON | OFF | ON |
HVAC System | R1 | R2 | R3 | R4 |
|---|---|---|---|---|
Daikin | ON | OFF | ON | OFF |
Mitsubishi Electric | OFF | OFF | OFF | OFF |
Toshiba | OFF | ON | OFF | ON |
Panasonic/Sanyo | OFF | ON | OFF | ON |
Hitachi | OFF | ON | OFF | ON |
Haier | OFF | ON | OFF | ON |
If all DIP switches R1, R2, R3, and R4 are in position ON during a power reset, the CoolMaster will be forced into BOOT Mode.
DIP Switch S
Switch | ON | OFF |
|---|---|---|
S1 and S2 | Enable DC output on HVAC line L1 | Disable DC Output on HVAC line L1 |
S3 and S4 | Enable DC output on HVAC line L2 | Disable DC Output on HVAC line L2 |
S1 and S2 must be in the same position.
S3 and S4 must be in the same position.
These settings are only applicable if you need to connect the HVAC interface to a non-VRF system via a KRP or MAC adapter and no other DC source is present on this line.
4. Powering the CoolMaster
Power the CoolMaster, by one of the following methods:
Connect the power adapter (included) to the HVAC interface and connect the adapter to the mains.
Connect directly on DC power supply from the local electrical panel.
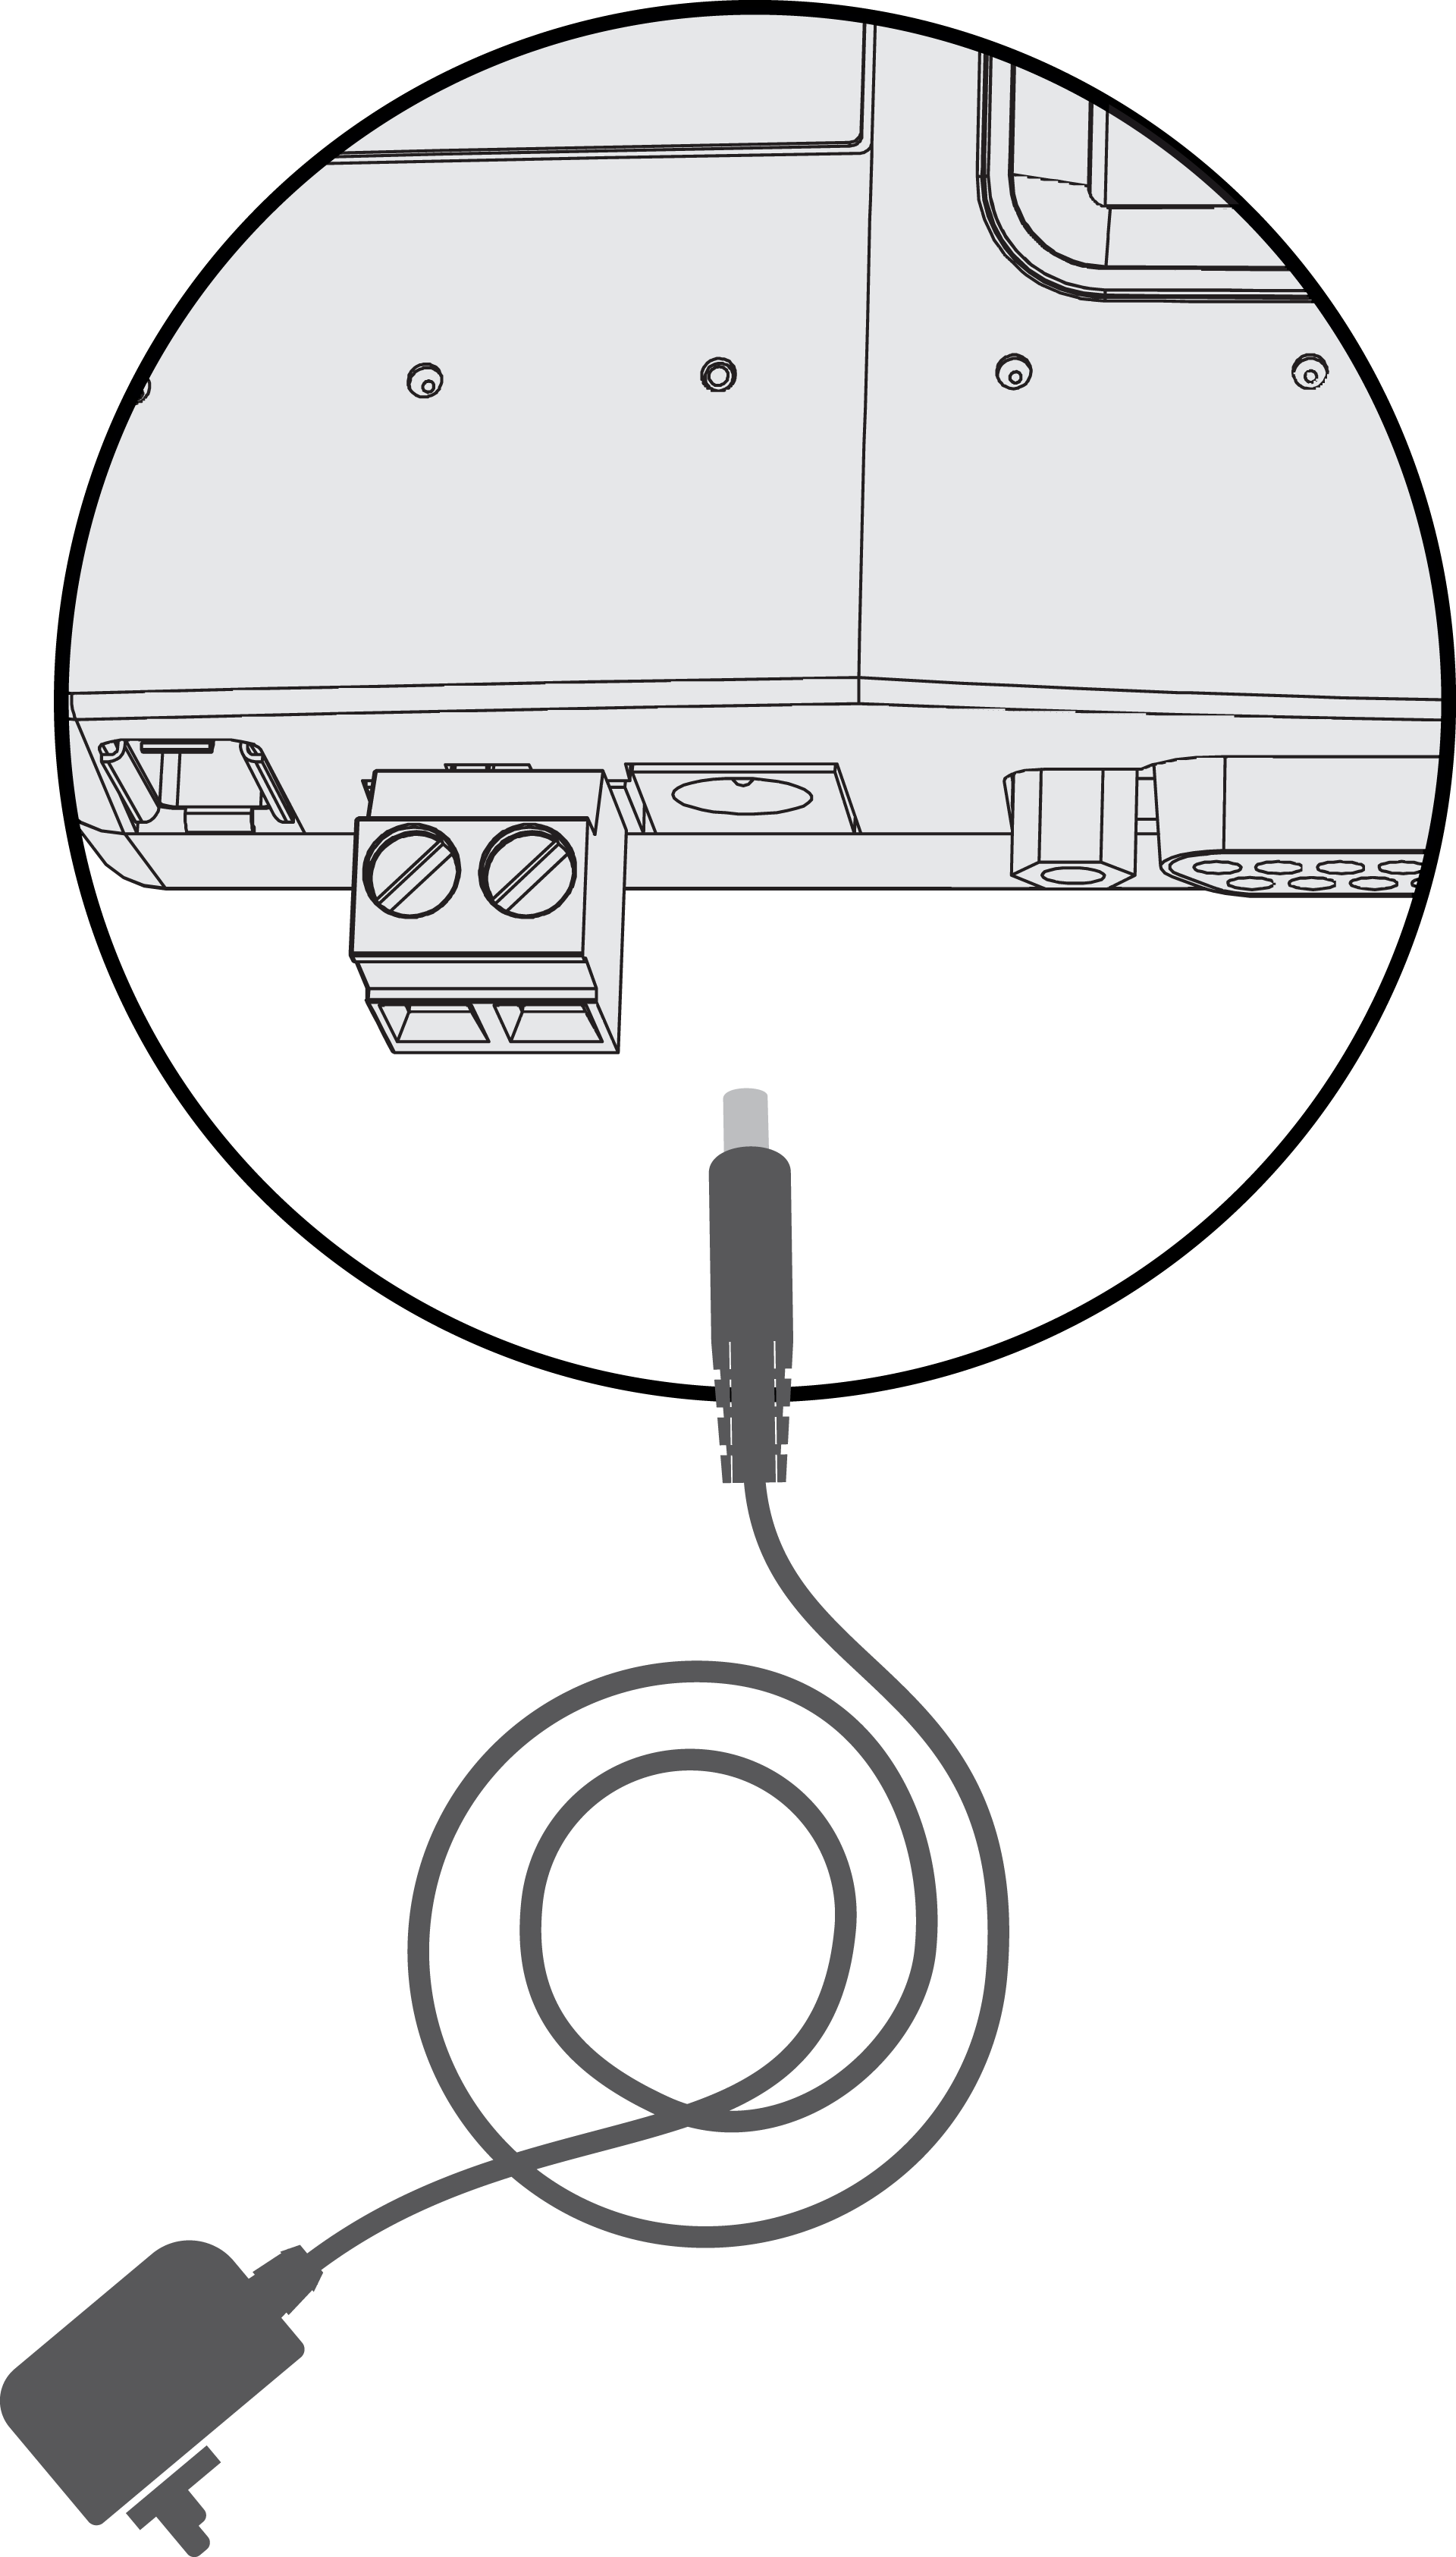 | 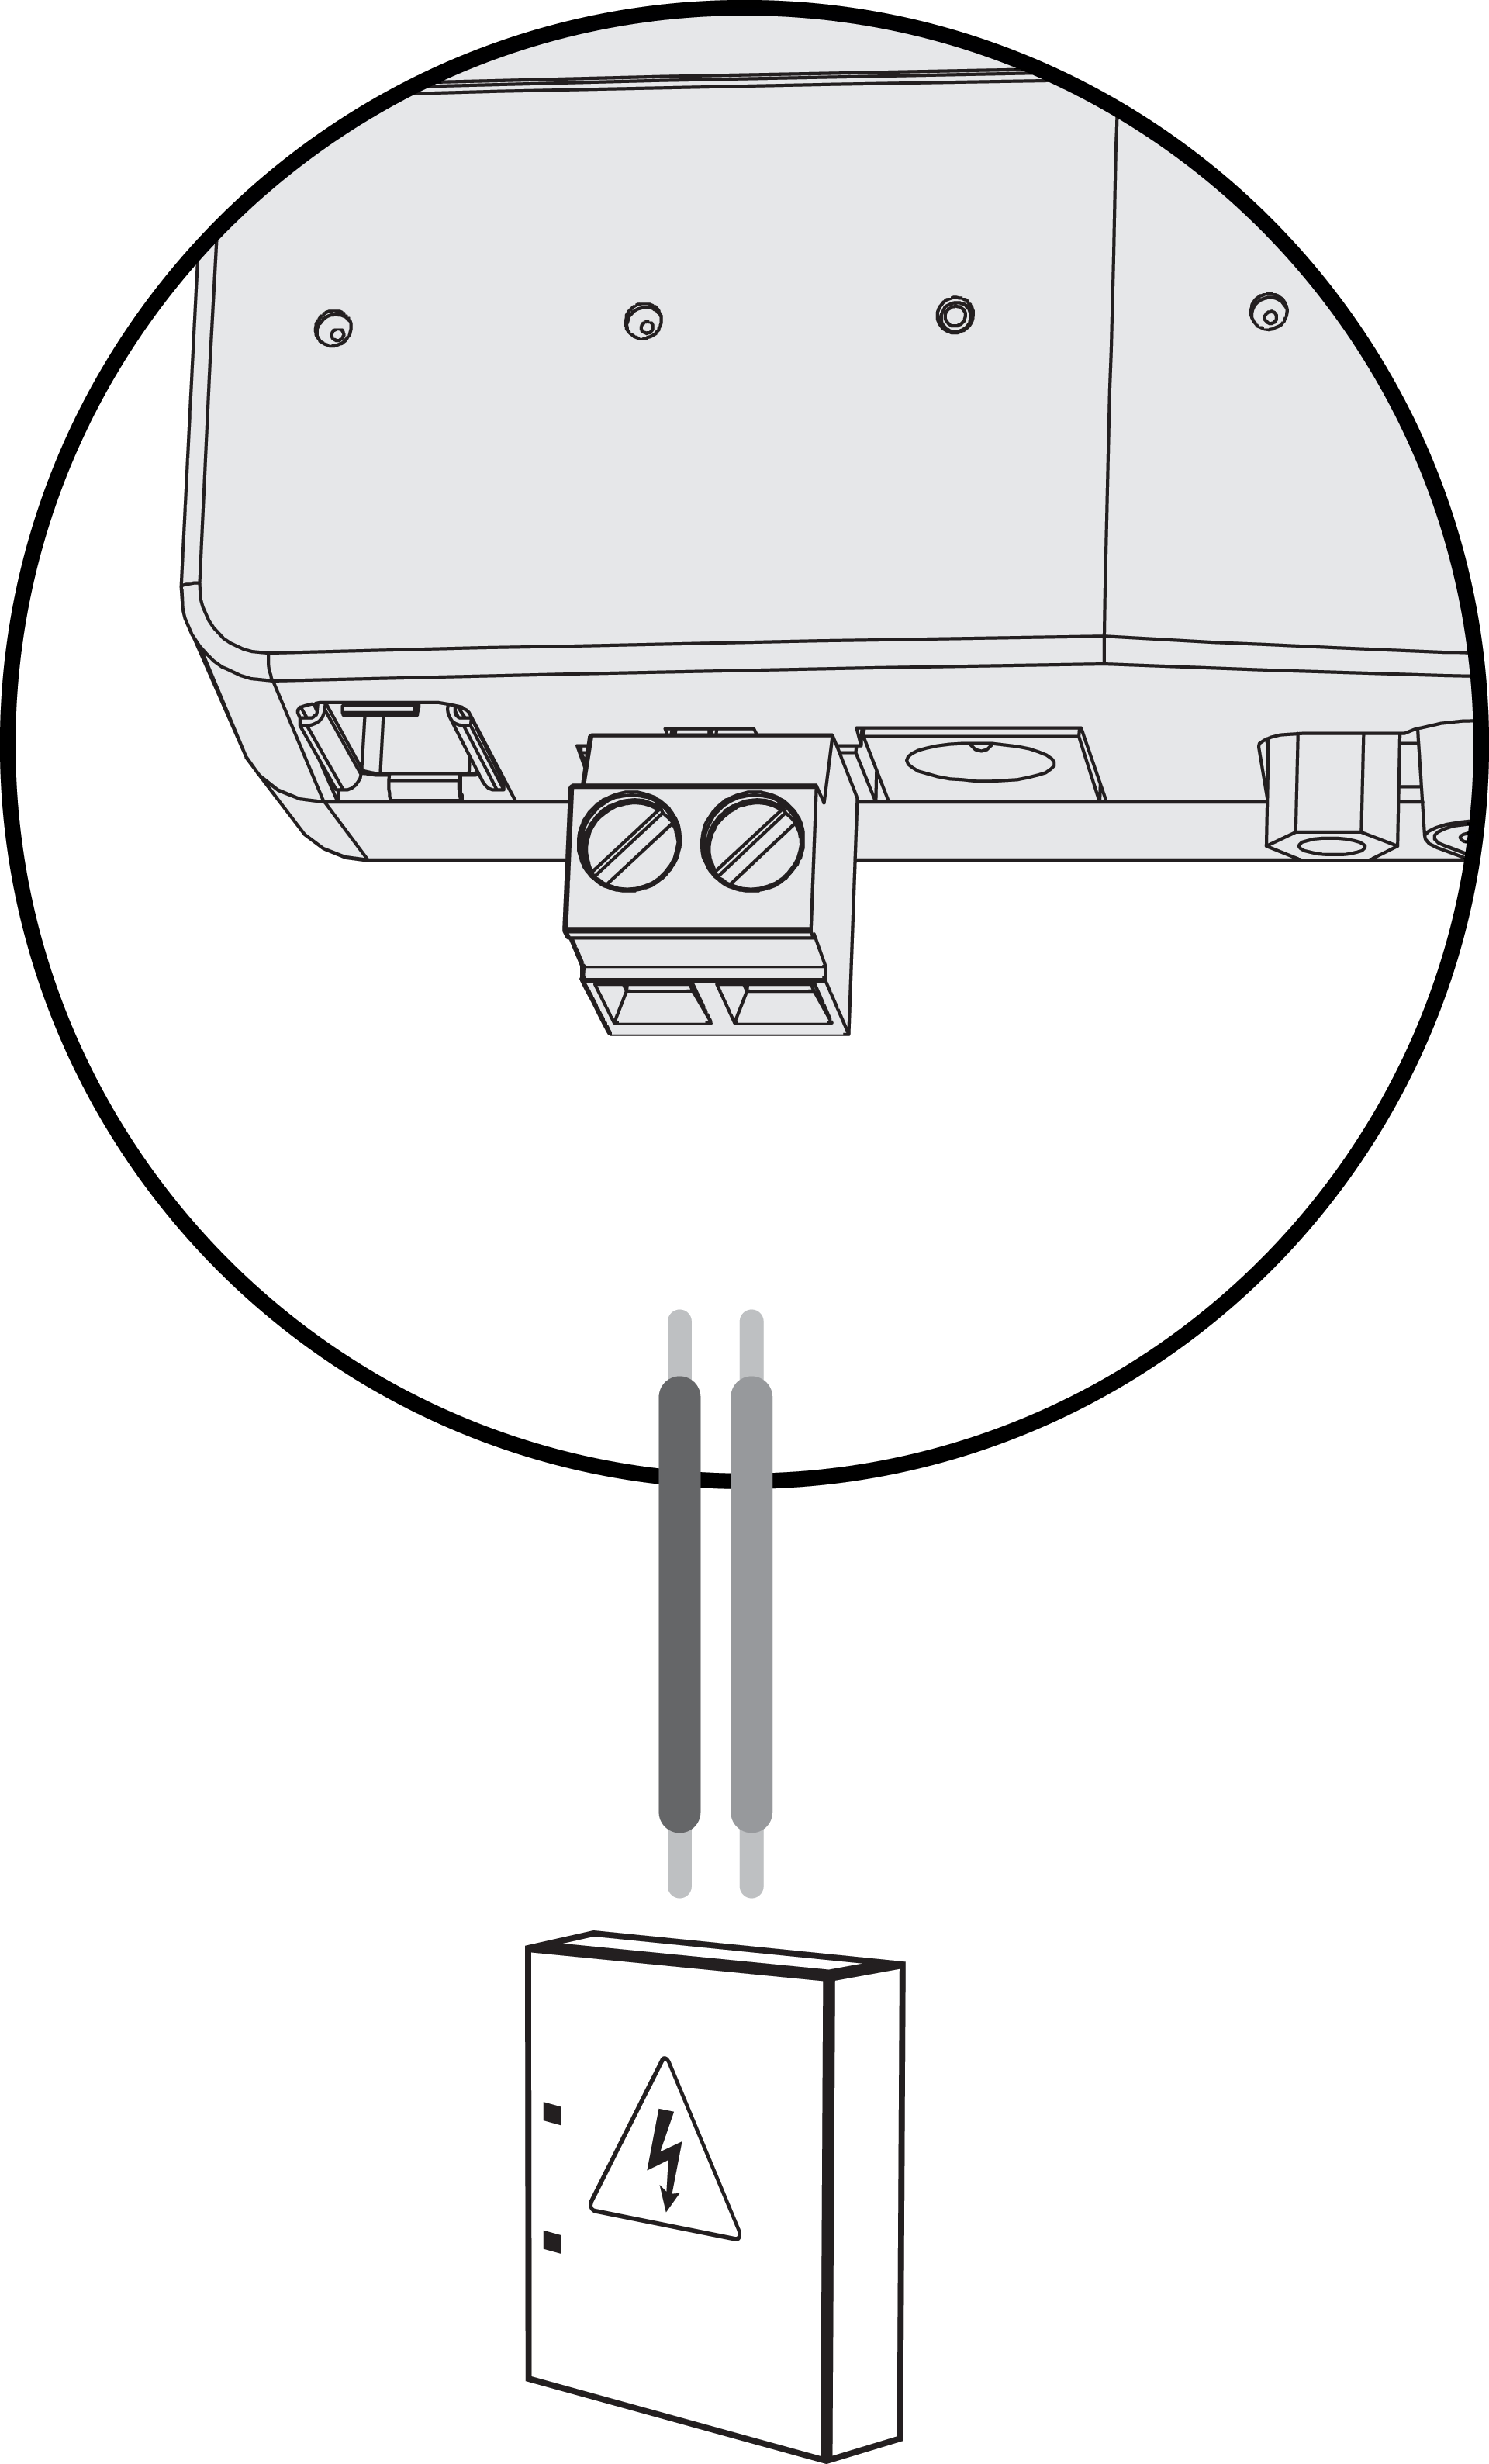 |
Input voltage: 12 Vdc | Input voltage: 12 - 24 Vdc |
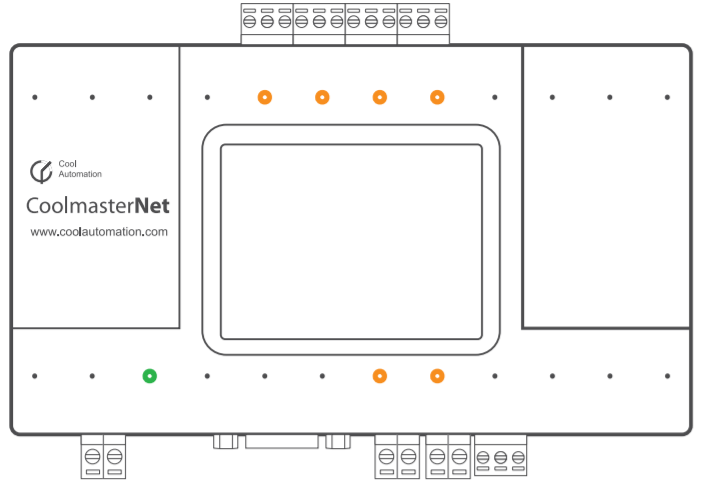
The display and the green LED will light up.
5. HVAC line settings
Abbreviation | HVAC System |
|---|---|
DK | Daikin |
HT | Hitachi |
HA | Haier |
ME | Mitsubishi Electric |
TO | Toshiba |
PN | Panasonic |
FJ | Fujitsu |
LG | LG |
SM | Samsung |
MD | Midea |
CG | Chigo |
GR | Gree |
AU | AUX |
BS | Blue Star |
MH | Mitsubishi Heavy Industries |
On the display, select the correct brand of HVAC system for the used line.
Go to Settings.

Go to HVAC line.

Select the HVAC line you want to configure.

Configure the HVAC line type.

LED behaviour
 | Green LED continuous on | Good connection |
 | Orange LED flashing | Data transfer:
|
Troubleshooting
Problem | Possible cause | Solution |
|---|---|---|
No information appears on the display | Malfunctioning power supply | Verify that there is a steady signal from the 9 V DC power adapter |
The number of indoor units displayed on the display is not correct | It may take a few minutes before the HVAC system is recognised. There is a problem with communication to the HVAC system. |
|
