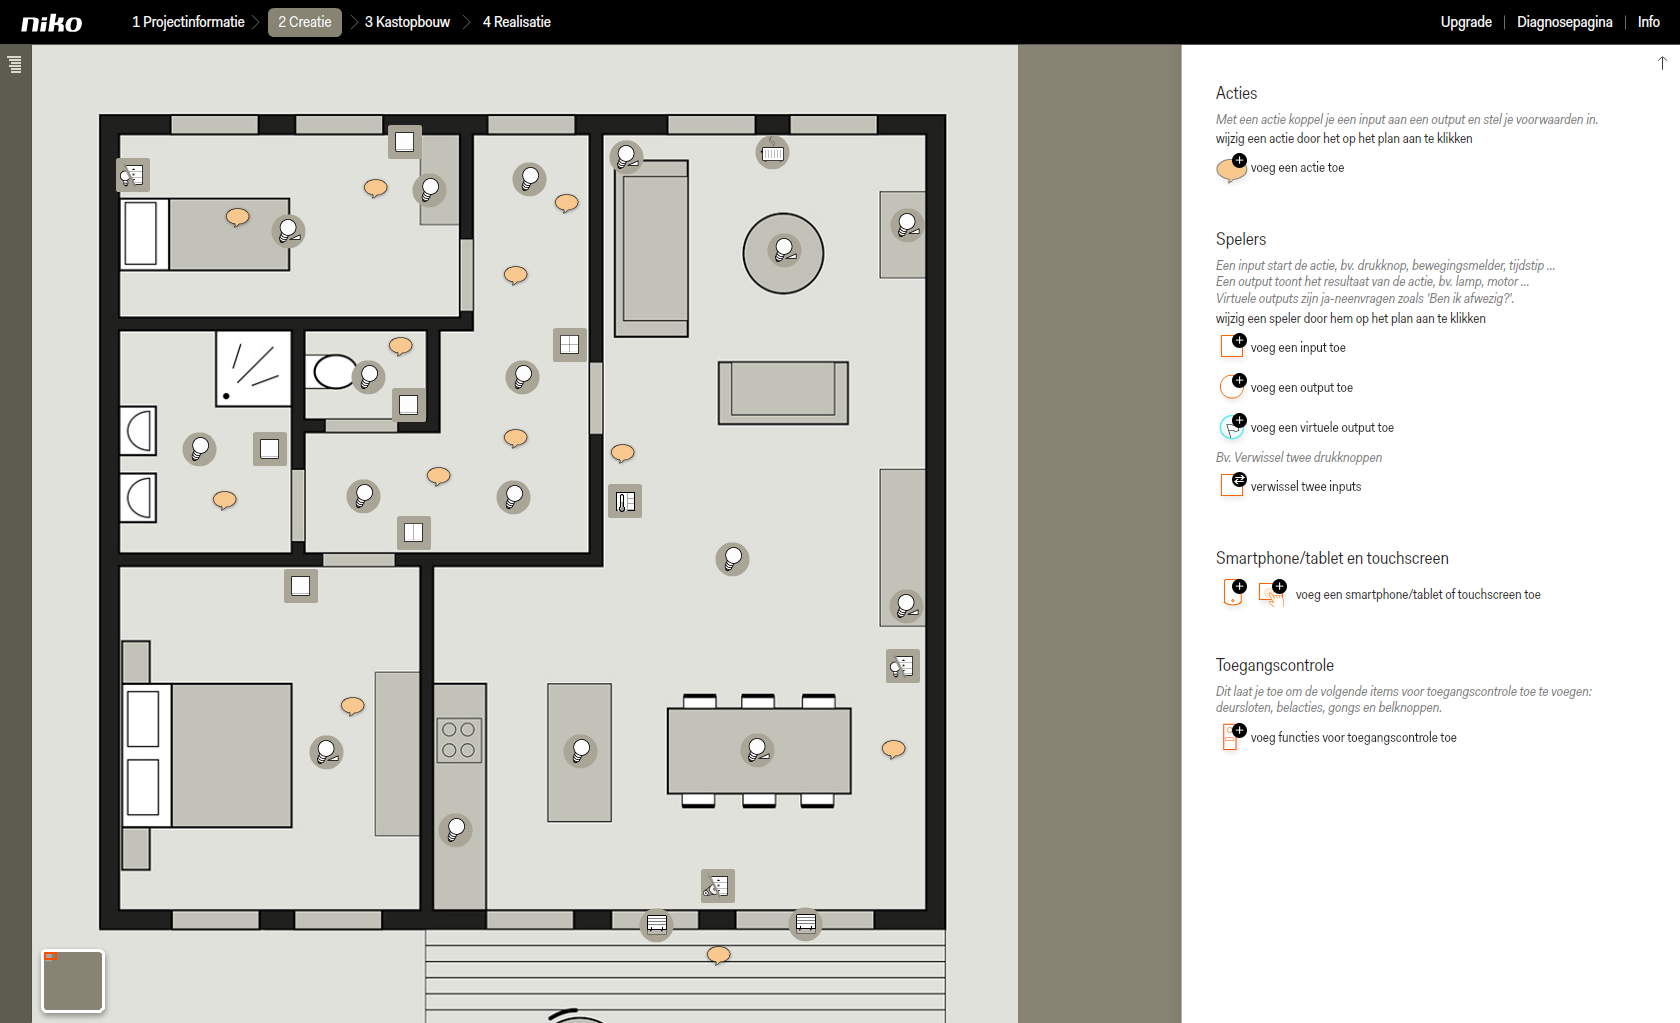
SituationCe plan par étapes vous montre comment installer trois ambiances et un bouton 'Toutes les ambiances éteintes' sur une commande d'ambiance. Pour notre exemple, nous choisissons l'espace combiné séjour/coin-repas, et nous y installons les ambiances 'détente', 'visite' et 'cuisine'. Point de départLe point de départ de ce plan par étapes est un projet pour lequel diverses entrées, sorties et actions ont déjà été définies. Ajouter une commande d'ambiance- Rendez-vous dans Création dans la barre de menu en haut.
- Cliquez sur ajoutez une entrée.
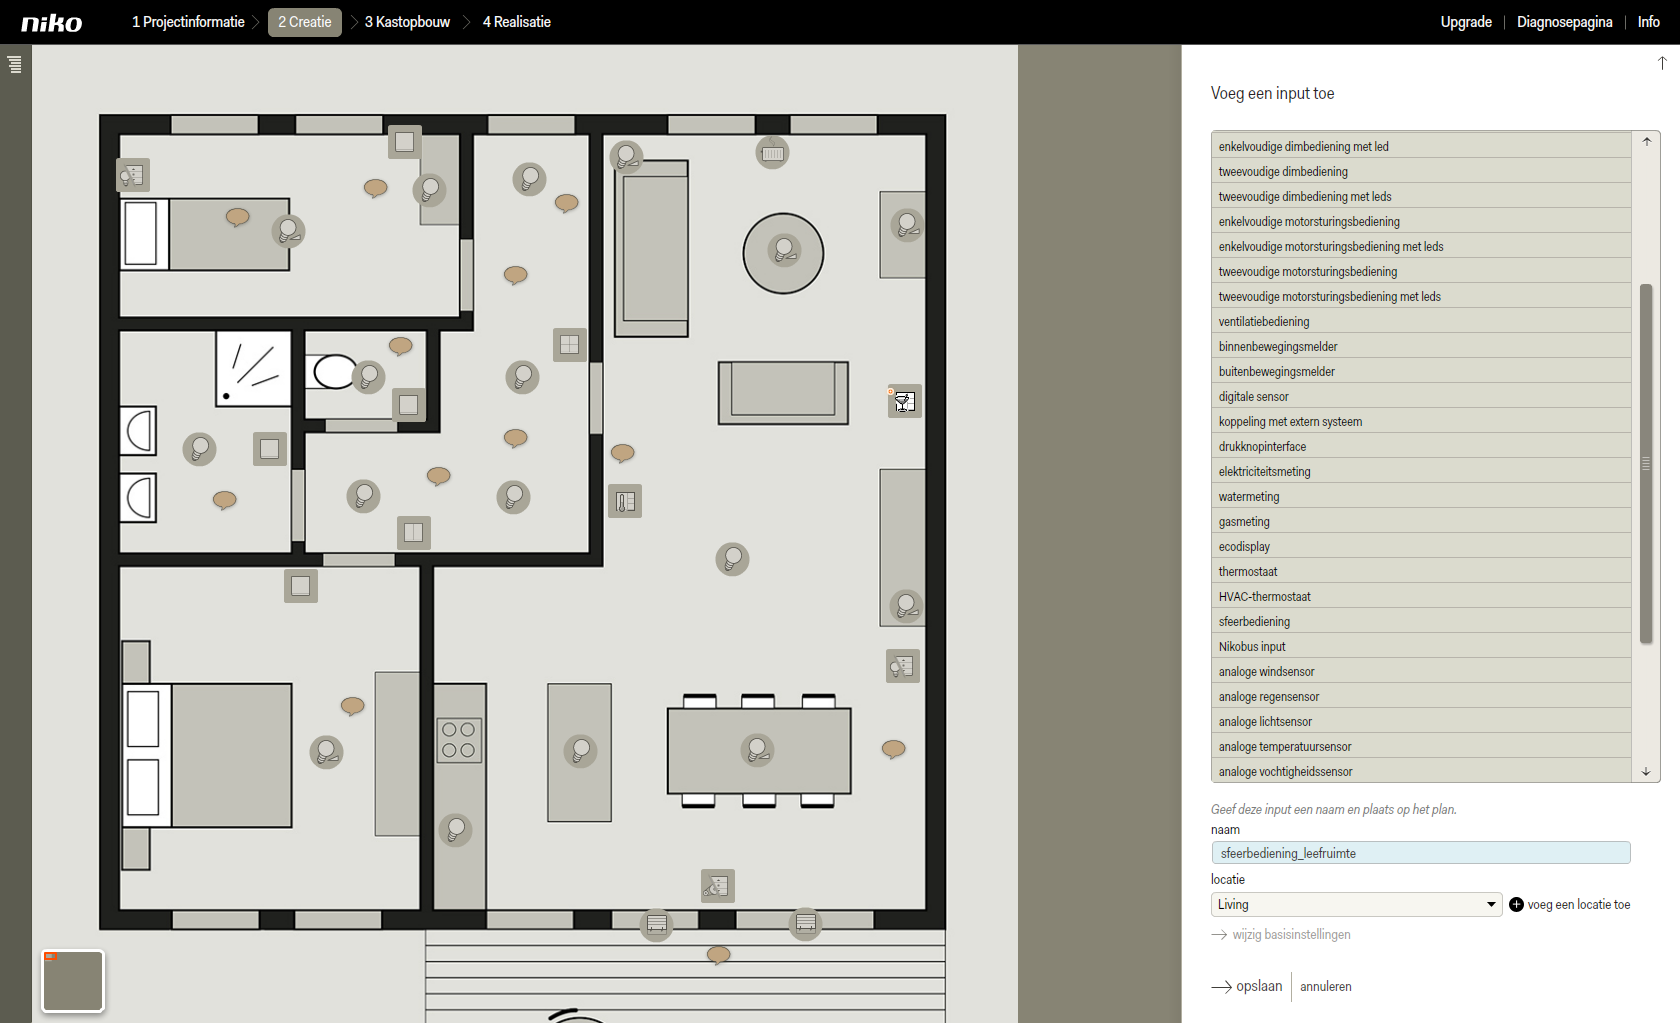
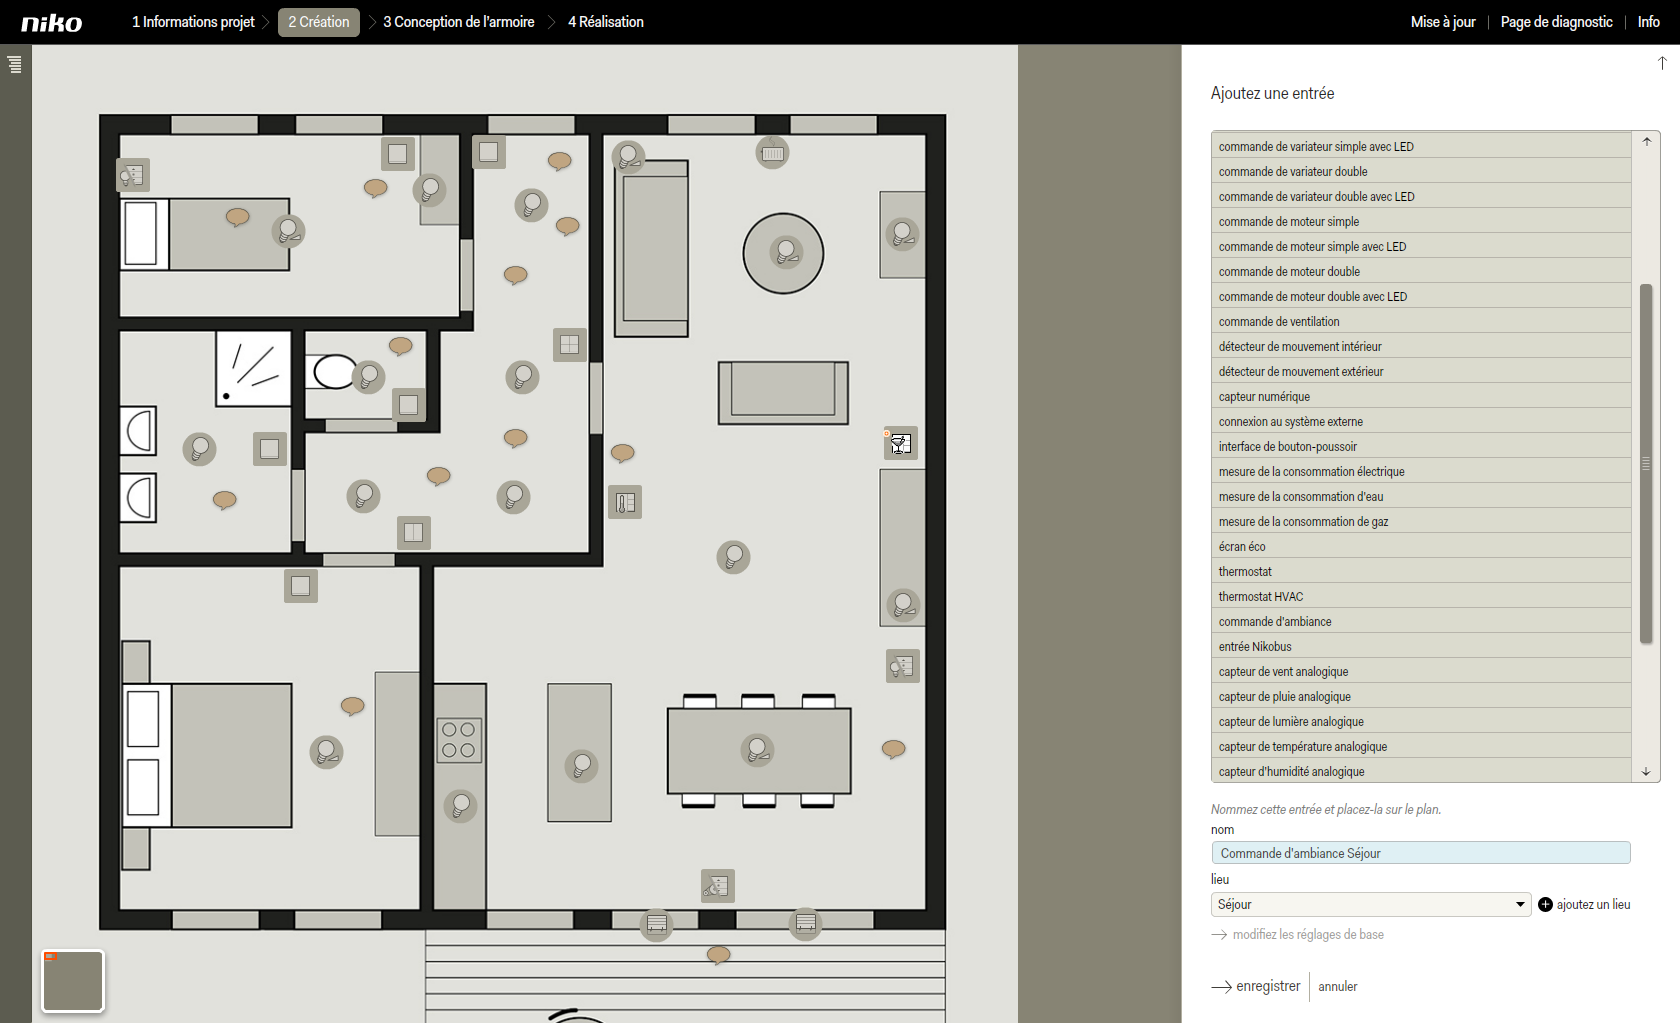
- Cliquez sur commande d'ambiance dans la liste à choix multiple dans la fenêtre de droite.
Le bouton-poussoir quadruple apparaît sur le plan. - Faites glisser la commande d'ambiance vers le bon endroit sur le plan et attribuez-lui un nom reconnaissable.
- Choisissez un lieu existant de la liste à choix multiple ou cliquez sur ajoutez un lieu si vous n'aviez pas encore défini le lieu.
- Cliquez sur enregistrer pour revenir à l'écran d'accueil de l'étape Création.
Créer une ambiance 'détente'
| Info |
|---|
| Pour chaque ambiance que vous programmez, vous devez définir une action. Vous pouvez créer jusqu'à huit ambiances par commande d'ambiance. Dans notre exemple, nous nous limitons à trois ambiances et un bouton 'Toutes les ambiances éteintes'. |
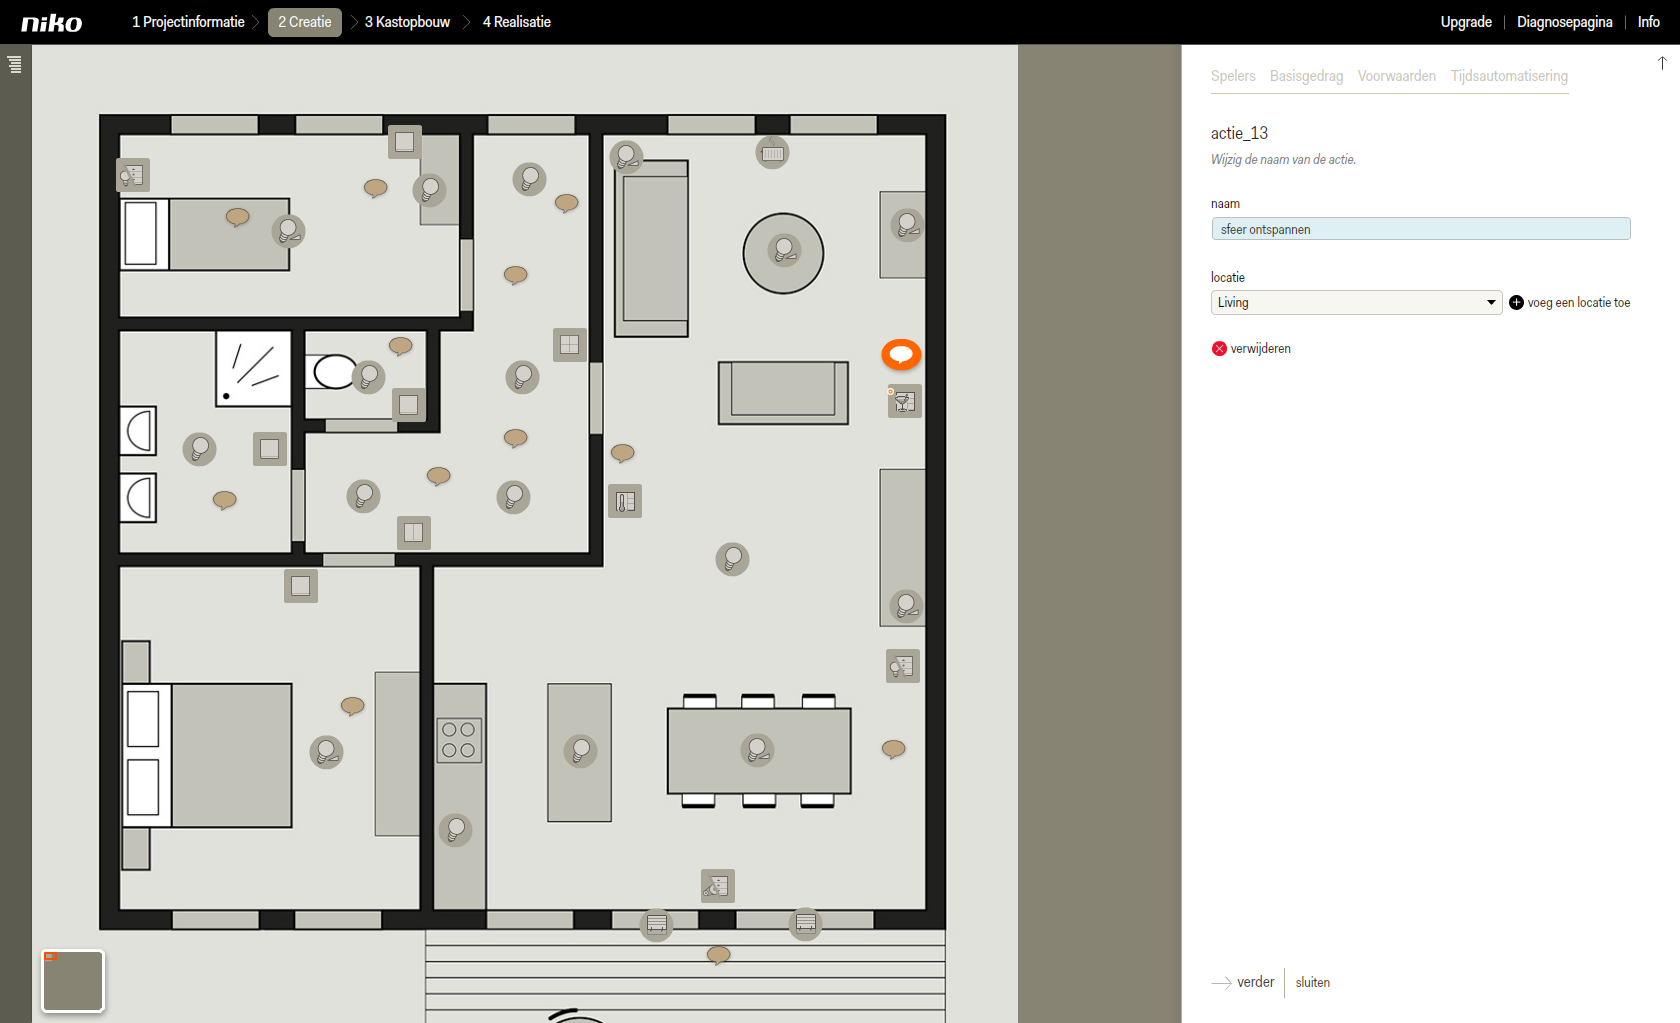
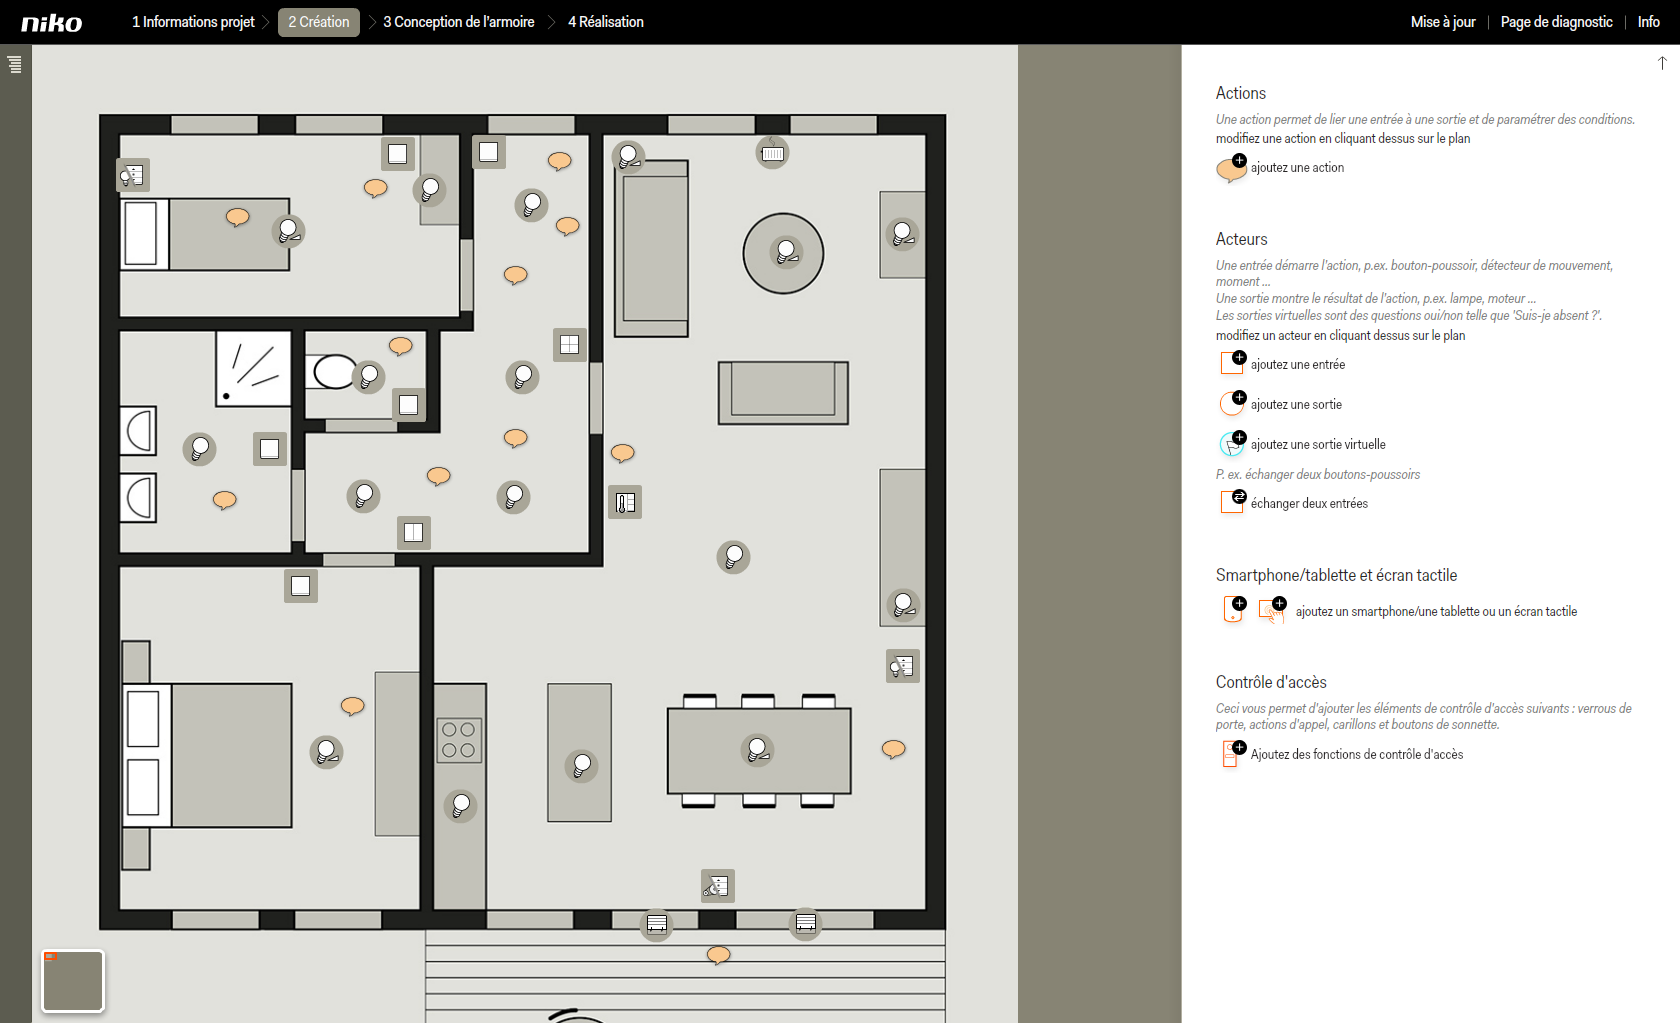
- Cliquez sur ajoutez une action.
L'action apparaît comme une bulle sur le plan. - Donnez un nom à l'action en fonction de l'ambiance que vous souhaitez créer.
- Choisissez le lieu de la commande d'ambiance dans la liste à choix multiple.
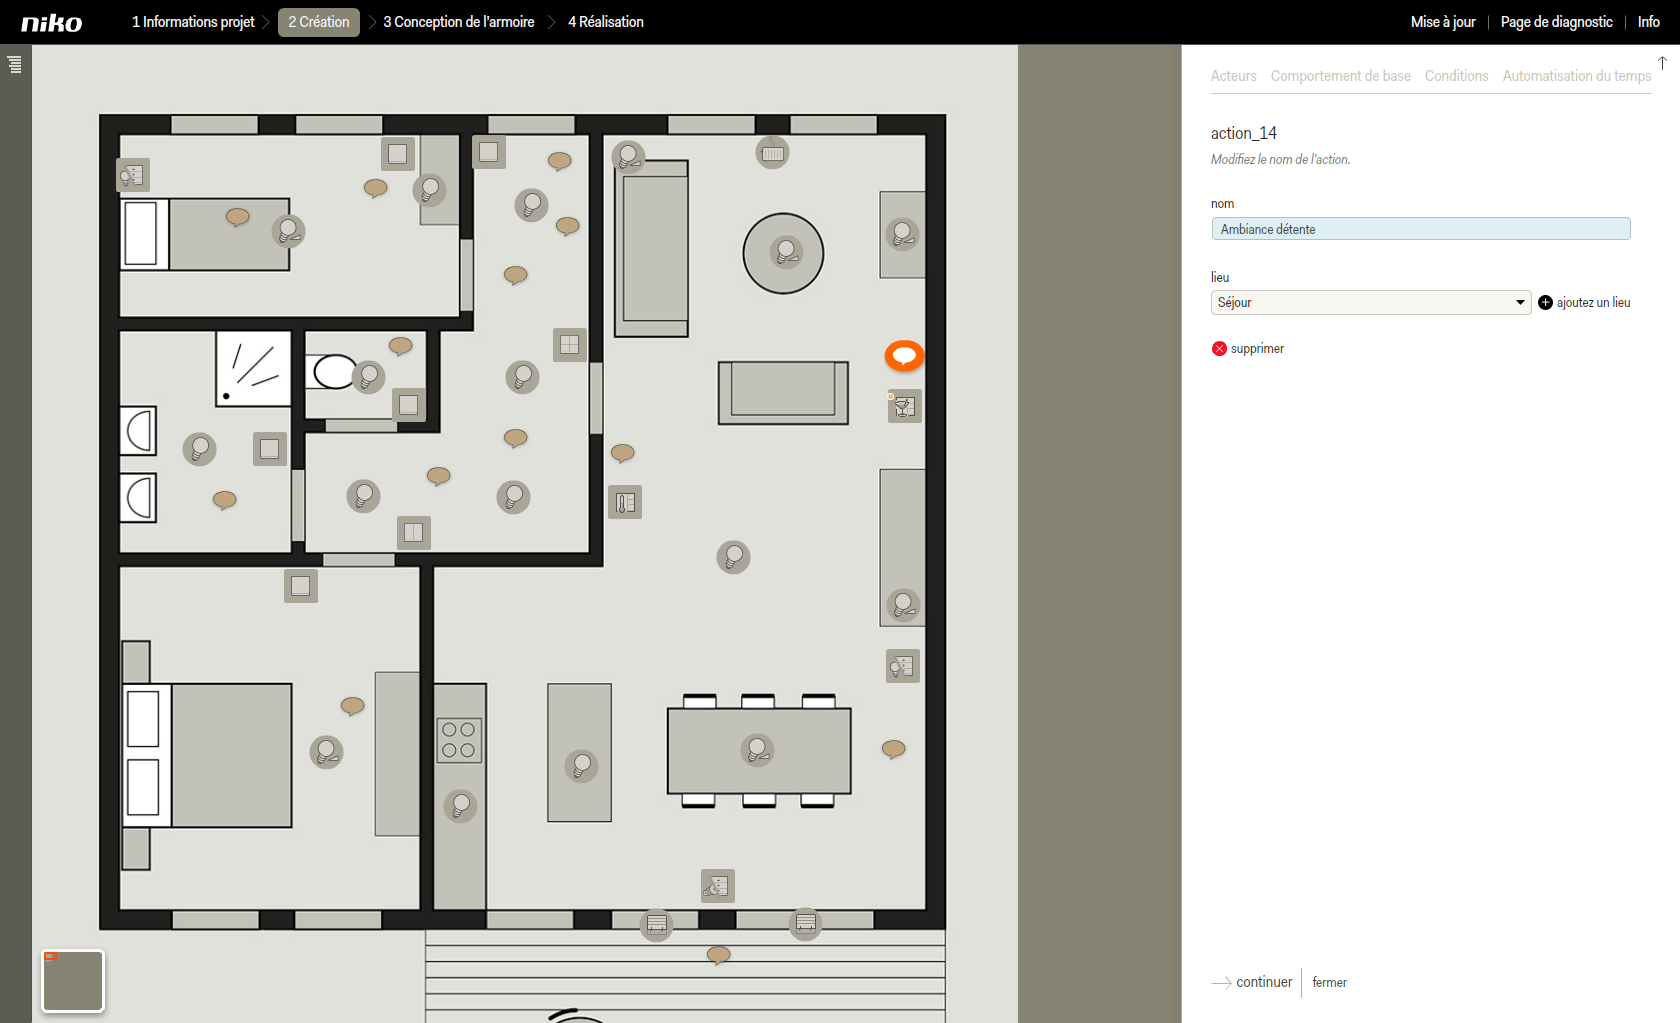
- Cliquez sur continuer pour ajouter des acteurs.
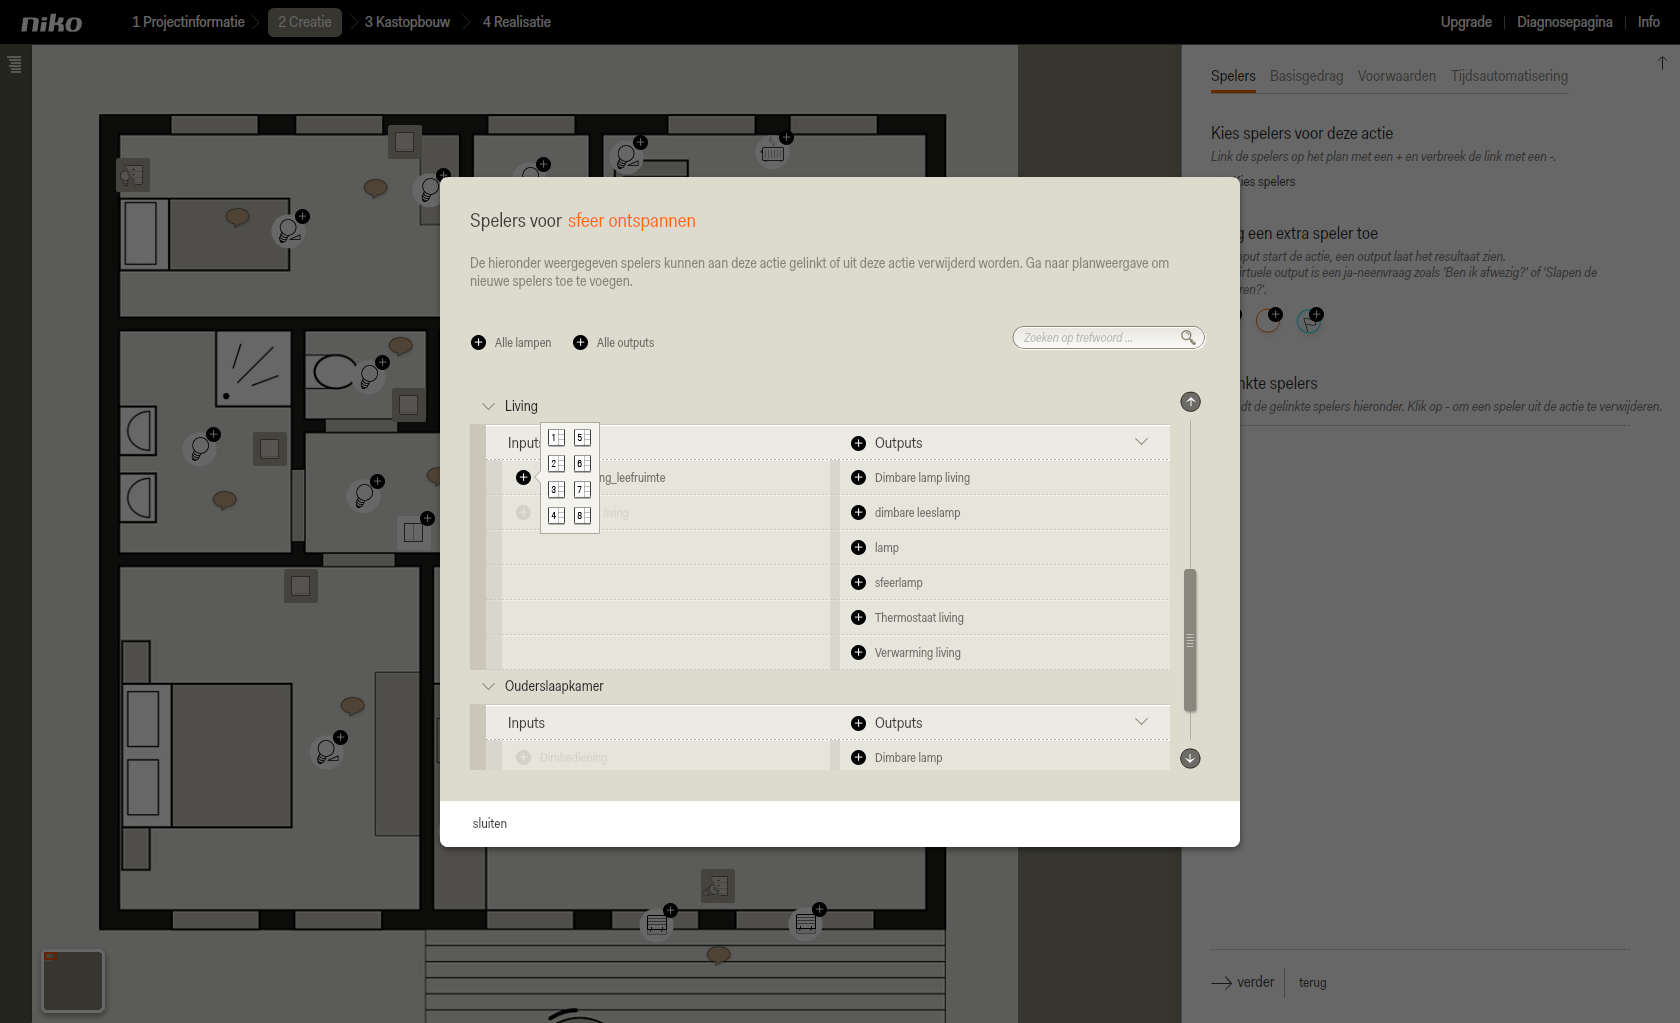
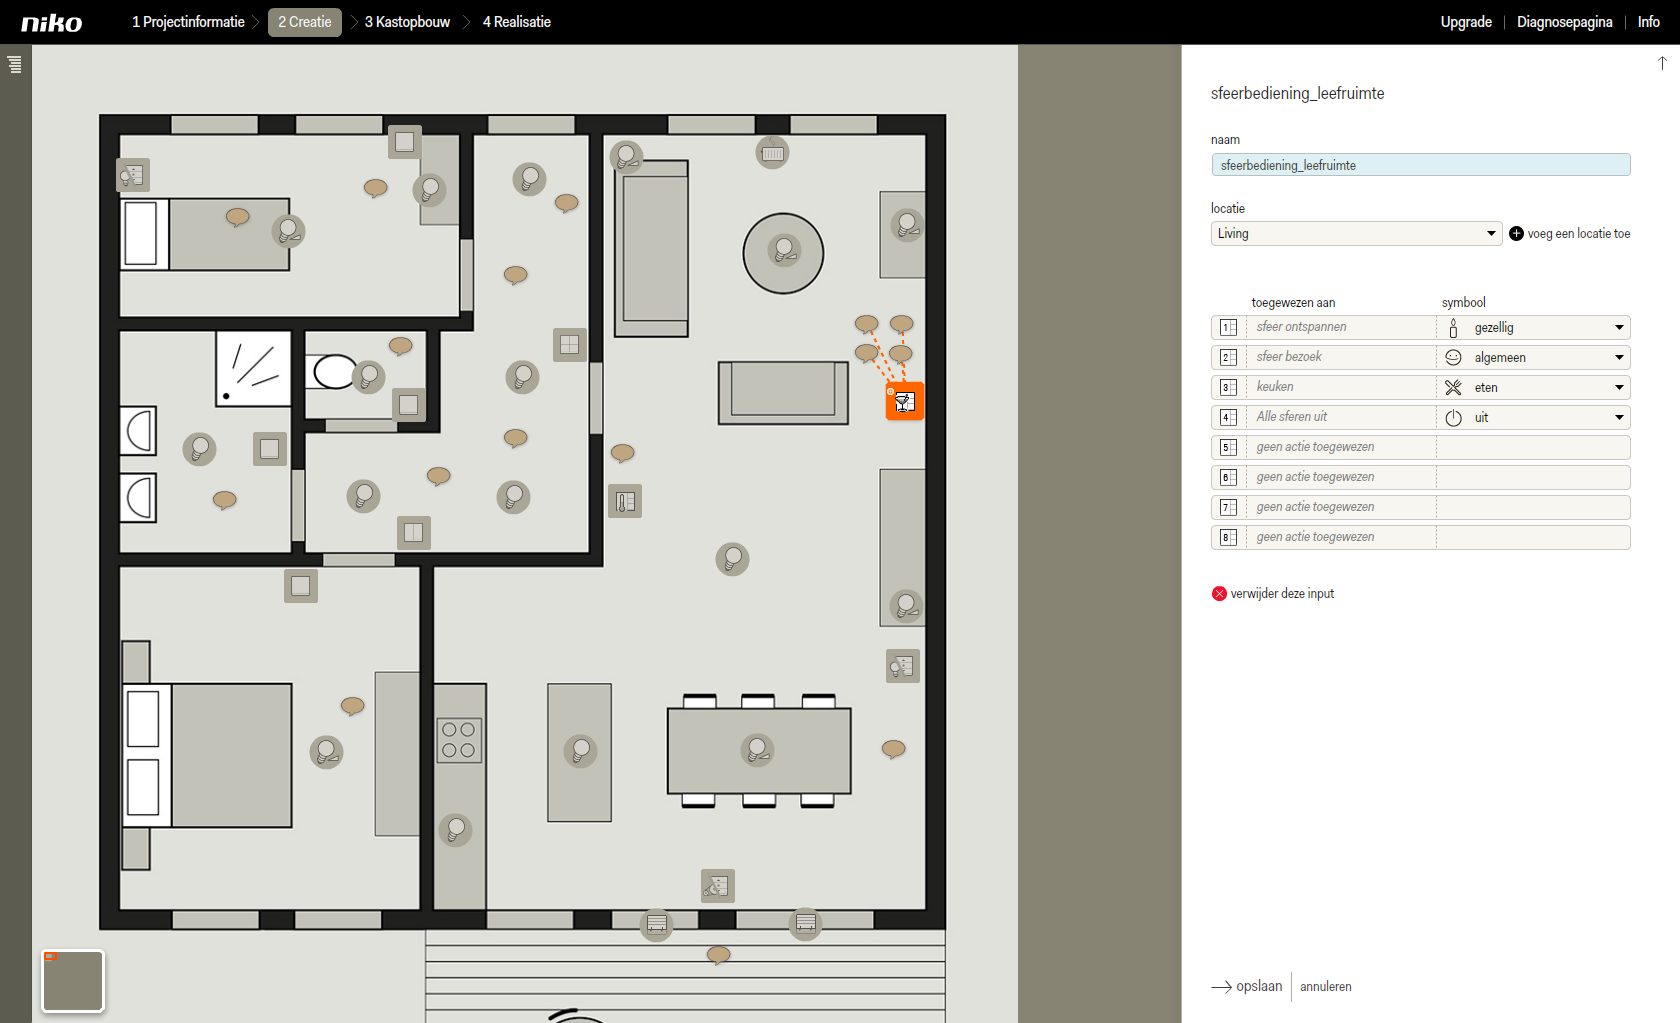
Ajouter des acteurs- Dans la fenêtre de droite, cliquez sur Choisir des acteurs.
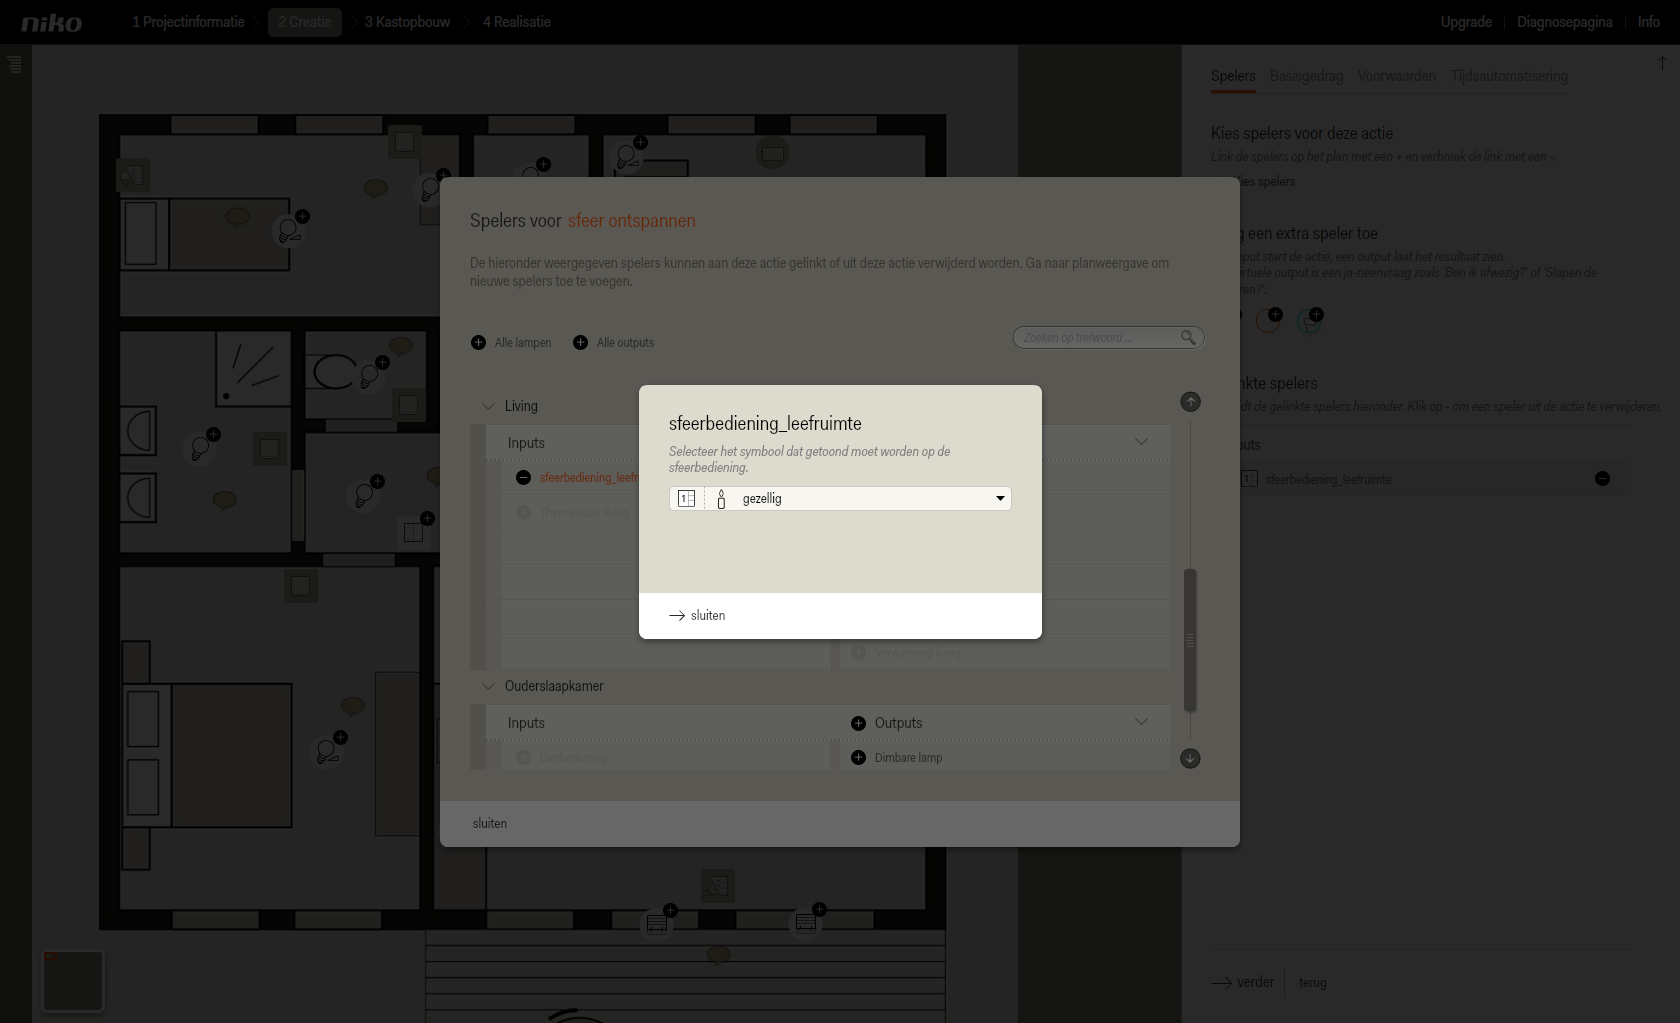
La fenêtre pop-up Acteurs pour Ambiance détente apparaît. - Dans la colonne de gauche, au niveau des entrées, cliquez sur le symbole plus devant Commande d'ambiance séjour.
Les huit touches de la commande d'ambiance apparaissent.

- Cliquez sur la première touche.
Une fenêtre pop-up s'affiche.
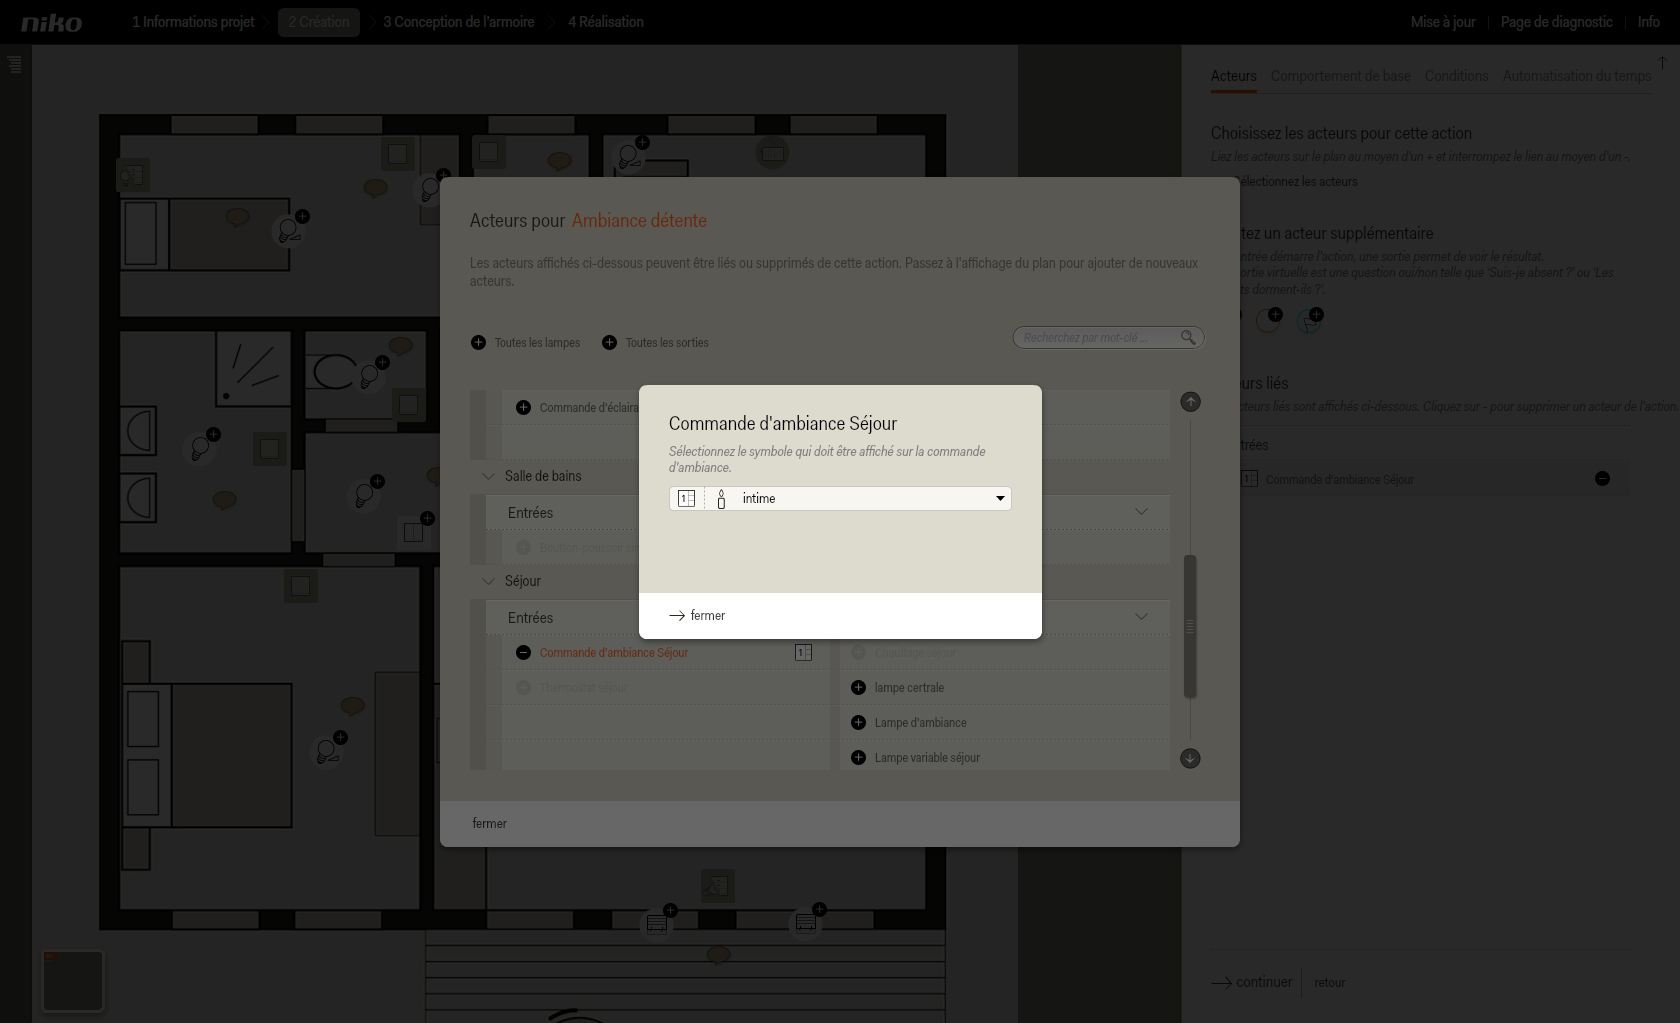
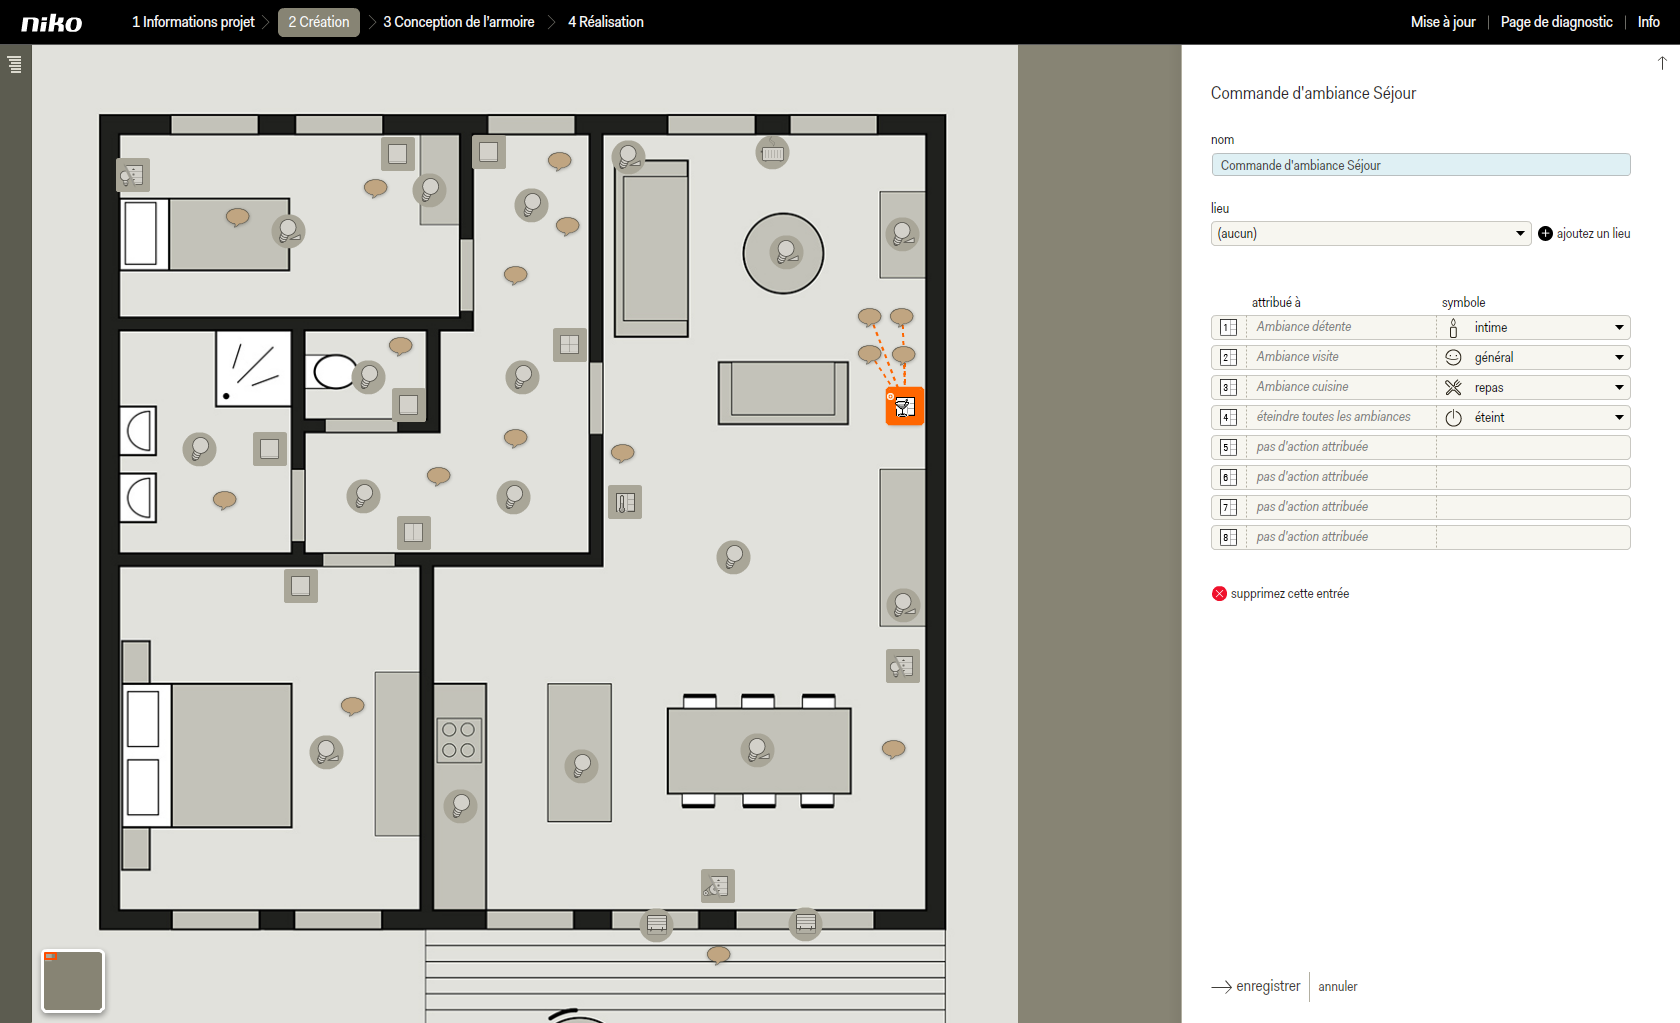
- Choisissez un symbole de la liste à choix multiple et cliquez sur fermer.
| Info |
|---|
| Le symbole choisi s'affichera sur la commande d'ambiance. |
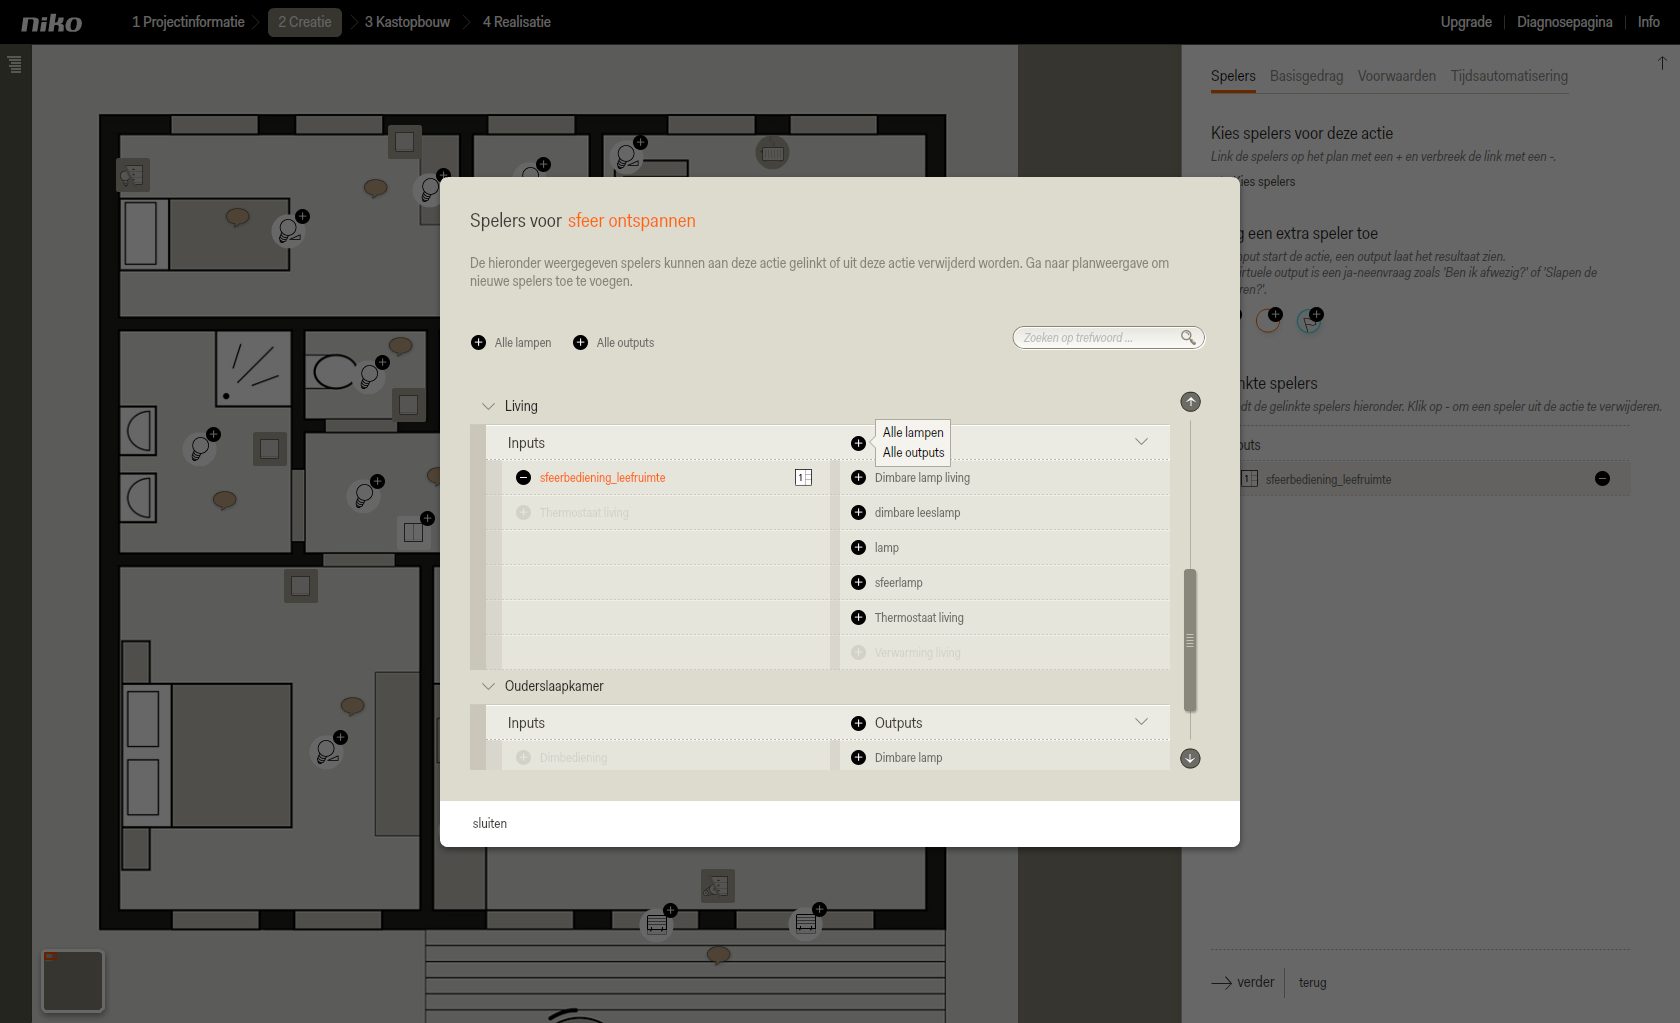
- Pour le lieu Séjour, cliquez dans la colonne de droite sur le symbole plus devant Toutes les sorties.
Vous pouvez à présent choisir Toutes les lampes ou Toutes les sorties. - Cliquez sur Toutes les lampes.
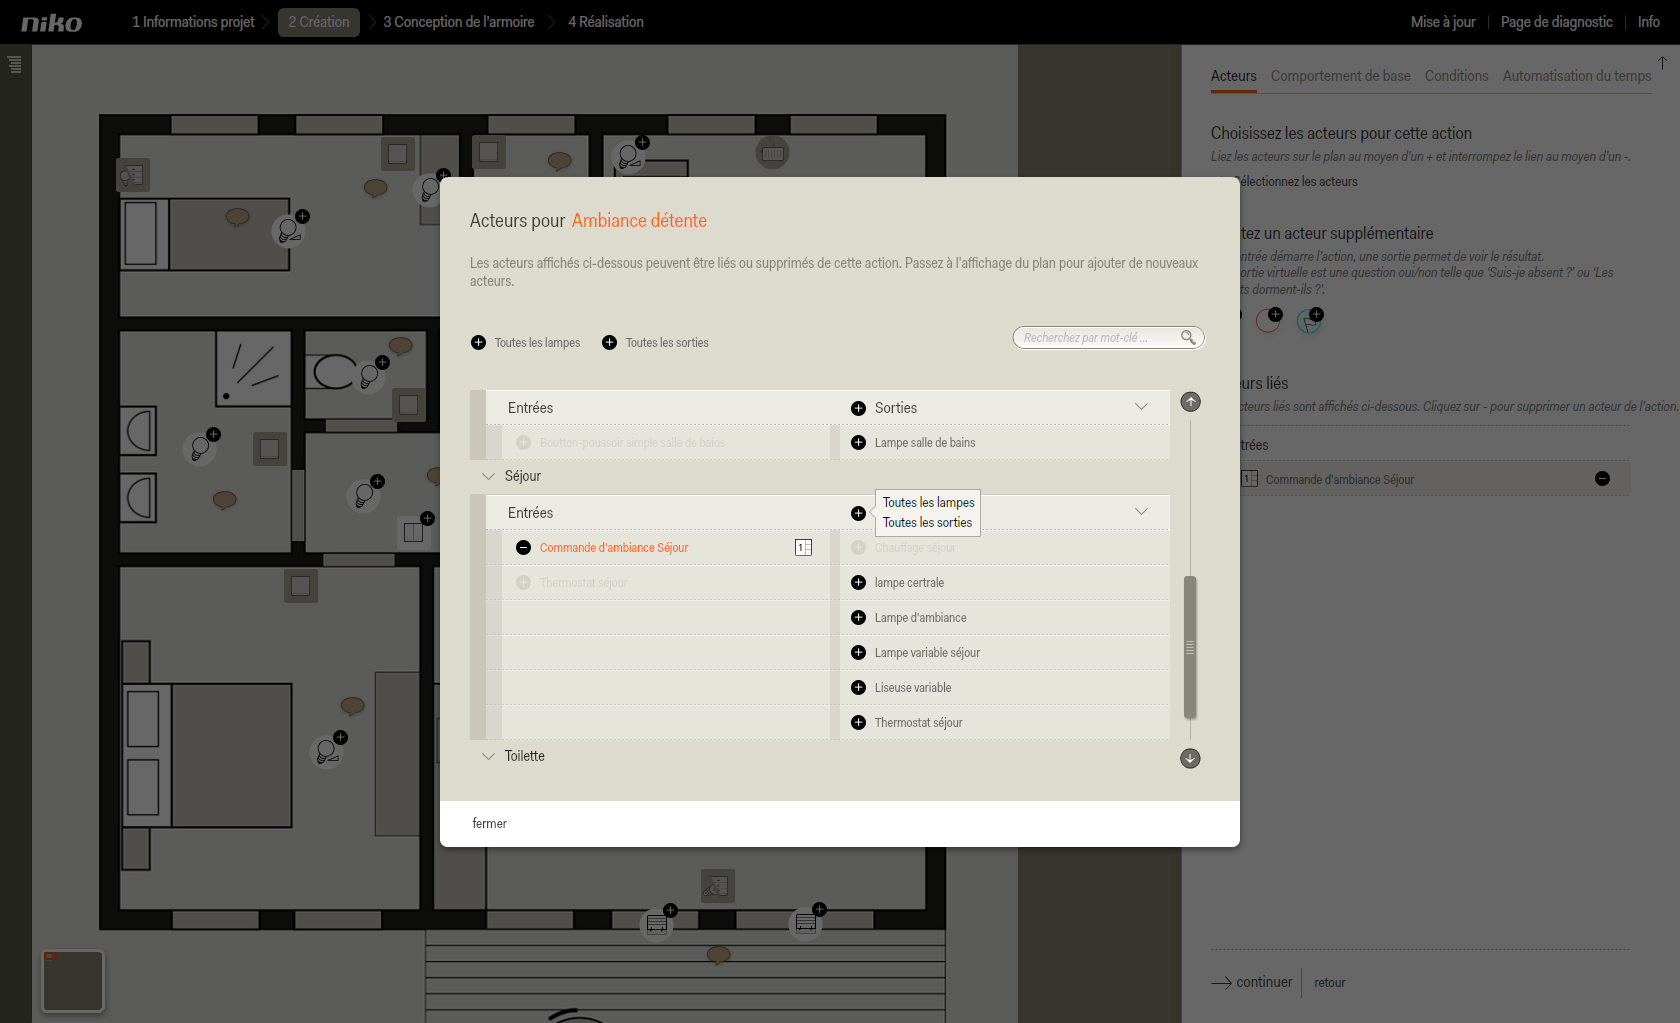
- Sélectionnez, de la même manière, toutes les lampes dans le lieu Coin-repas.
- Fermez la fenêtre pop-up.
La fenêtre de droite et le plan affichent à présent les sorties qui sont liées au bouton d'ambiance.
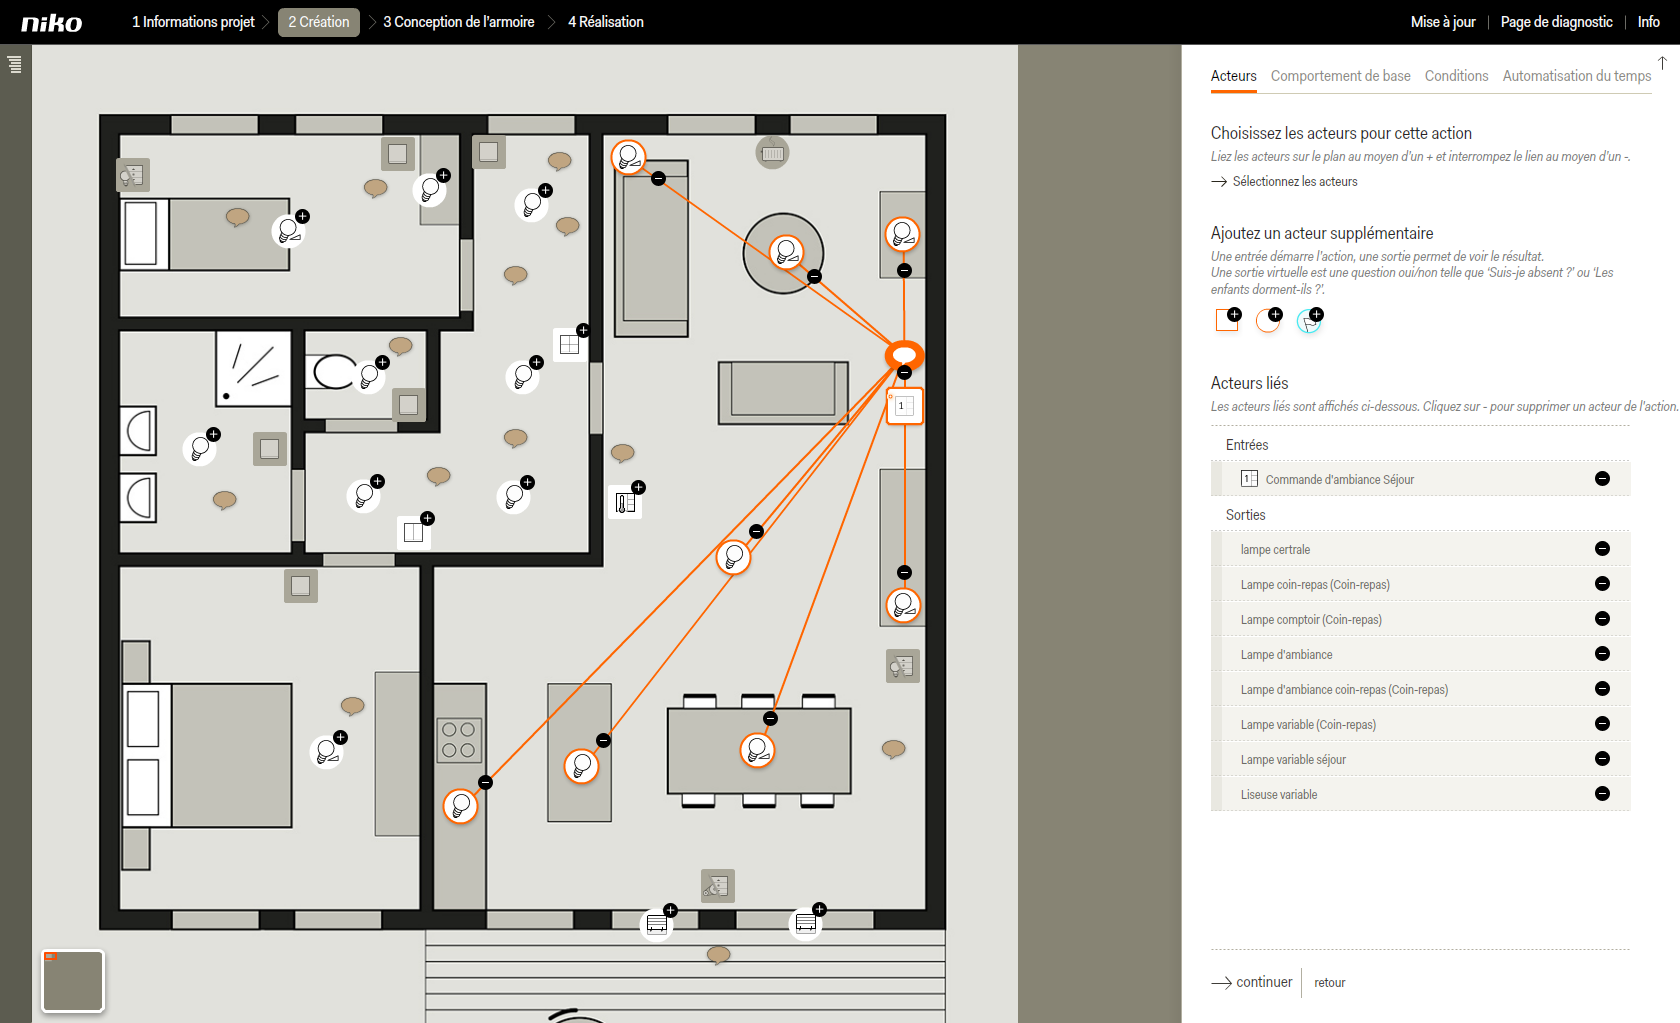
- Cliquez sur continuer pour accéder à l'onglet Comportement de base.
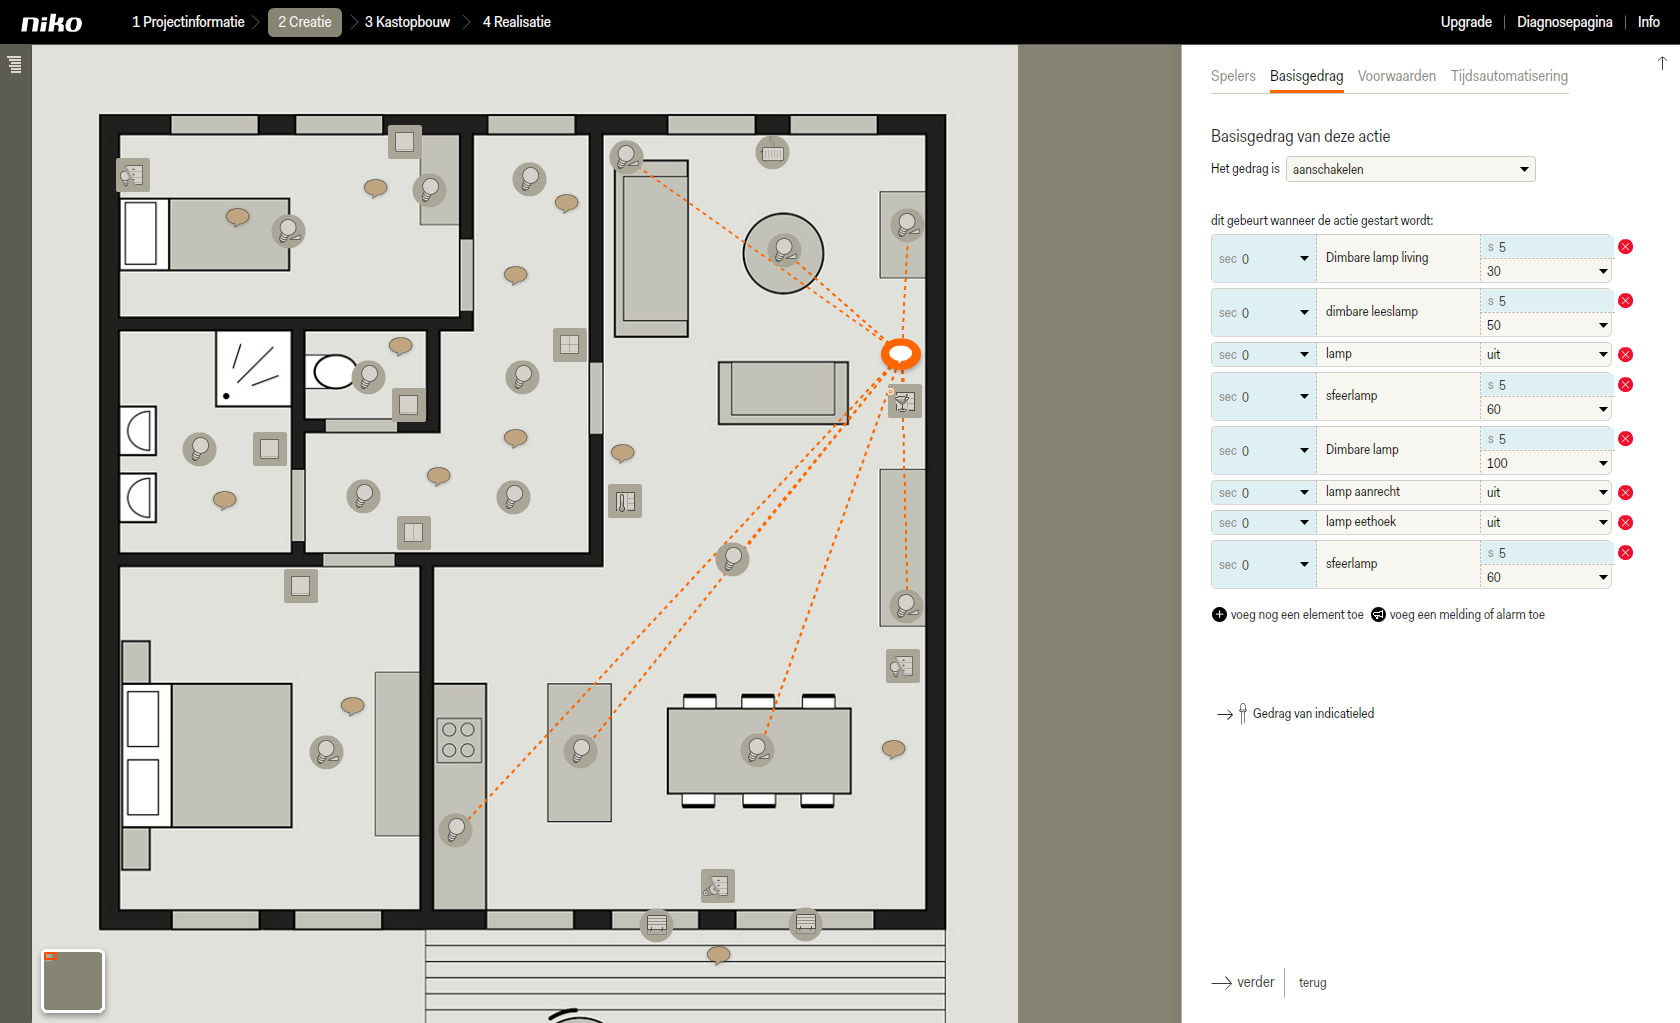
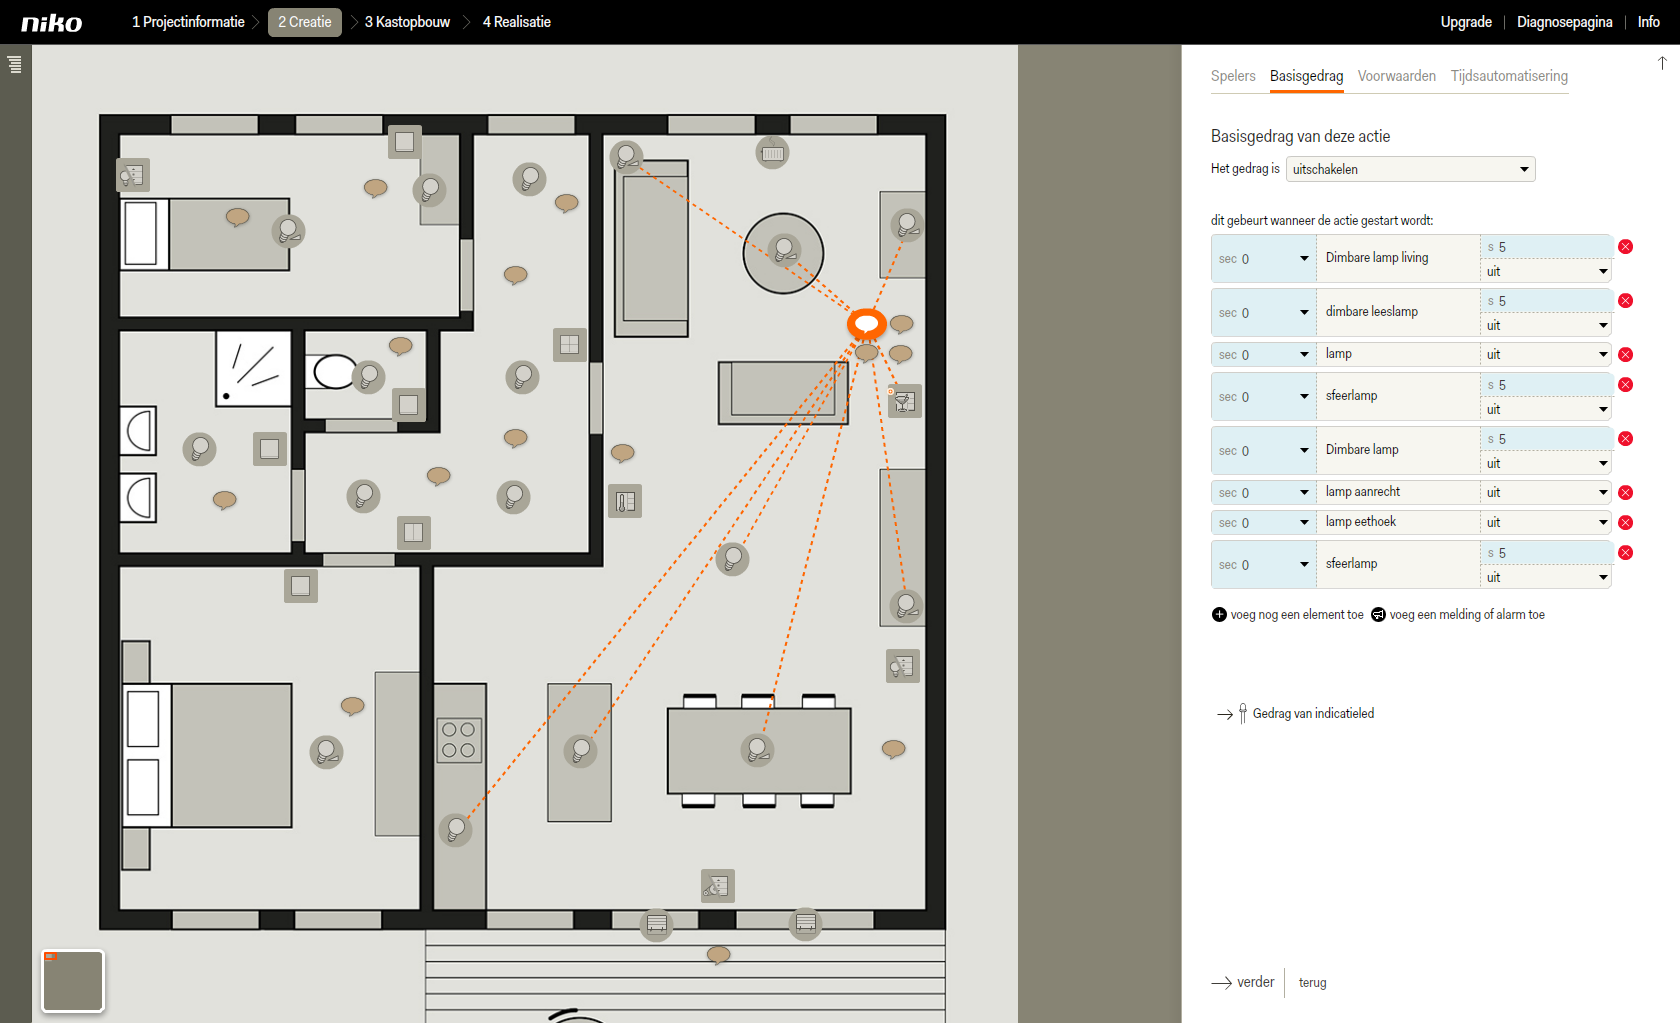
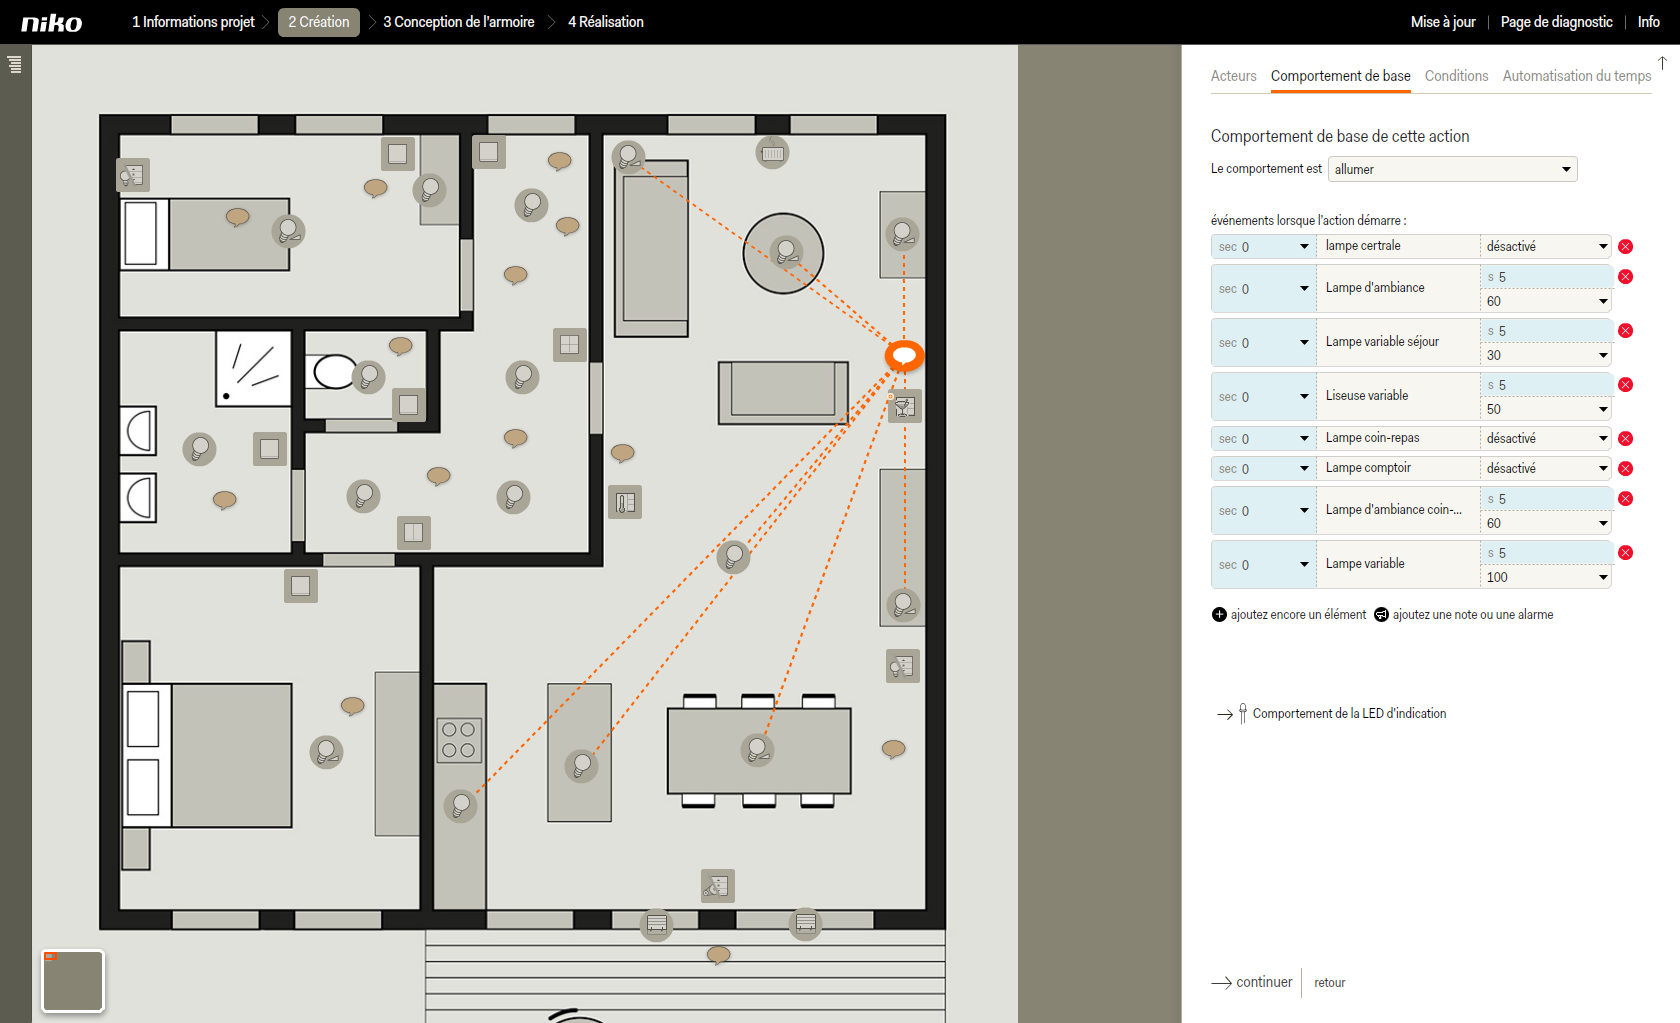
Paramétrer le comportement de base- Dans la fenêtre de droite, sélectionnez allumer en guise de comportement de base.
Une fenêtre pop-up s'affiche. - Cliquez sur OK pour fermer la fenêtre.
| Info |
|---|
| En choisissant 'allumer' comme comportement de base, le comportement de démarrage de l'ensemble des sorties liées sera par défaut 'allumé'. En choisissant 'éteindre', le comportement de démarrage sera par défaut 'éteint'. |
- Configurez, pour chaque lampe variable, les valeurs souhaitées pour cette ambiance.
Dans l'exemple ci-dessous, nous avons éteint plusieurs lampes et diminué l'intensité de quelques lampes variables afin de créer une ambiance 'détente'.
| Info |
|---|
| Pour les lampes à intensité variable, vous apercevez sur le côté droit un paramètre supplémentaire qui est réglé en standard à 5 secondes. Il s'agit de la durée d'activation, à savoir le temps que prendrait la lampe à intensité variable pour passer de 0 à 100 % d'intensité. Si la lampe à intensité variable est, par exemple, réglée à 80 % avec une durée d'activation de 5 secondes, il lui faudra 4 secondes pour briller avec une intensité de 80 %. |
- En bas de l'écran, cliquez sur continuer pour accéder à l'onglet Conditions.
Dans notre exemple, nous travaillons sans conditions. - Cliquez sur continuer pour accéder à l'onglet Automatisation du temps.
Dans notre exemple, nous travaillons sans automatisation du temps. - Cliquez sur enregistrer pour revenir à l'écran d'accueil de l'étape Création.
- Répétez ces étapes pour créer les ambiances 'visite' et 'cuisine'.
Créer un bouton 'Tout éteint'- Rendez-vous dans Création dans la barre de menu en haut.
- Cliquez sur ajoutez une action.
- Attribuez un nom (par exemple 'Toutes les ambiances éteintes') et un lieu à l'action et glissez-la vers l'endroit adéquat sur le plan.
- Cliquez sur continuer.
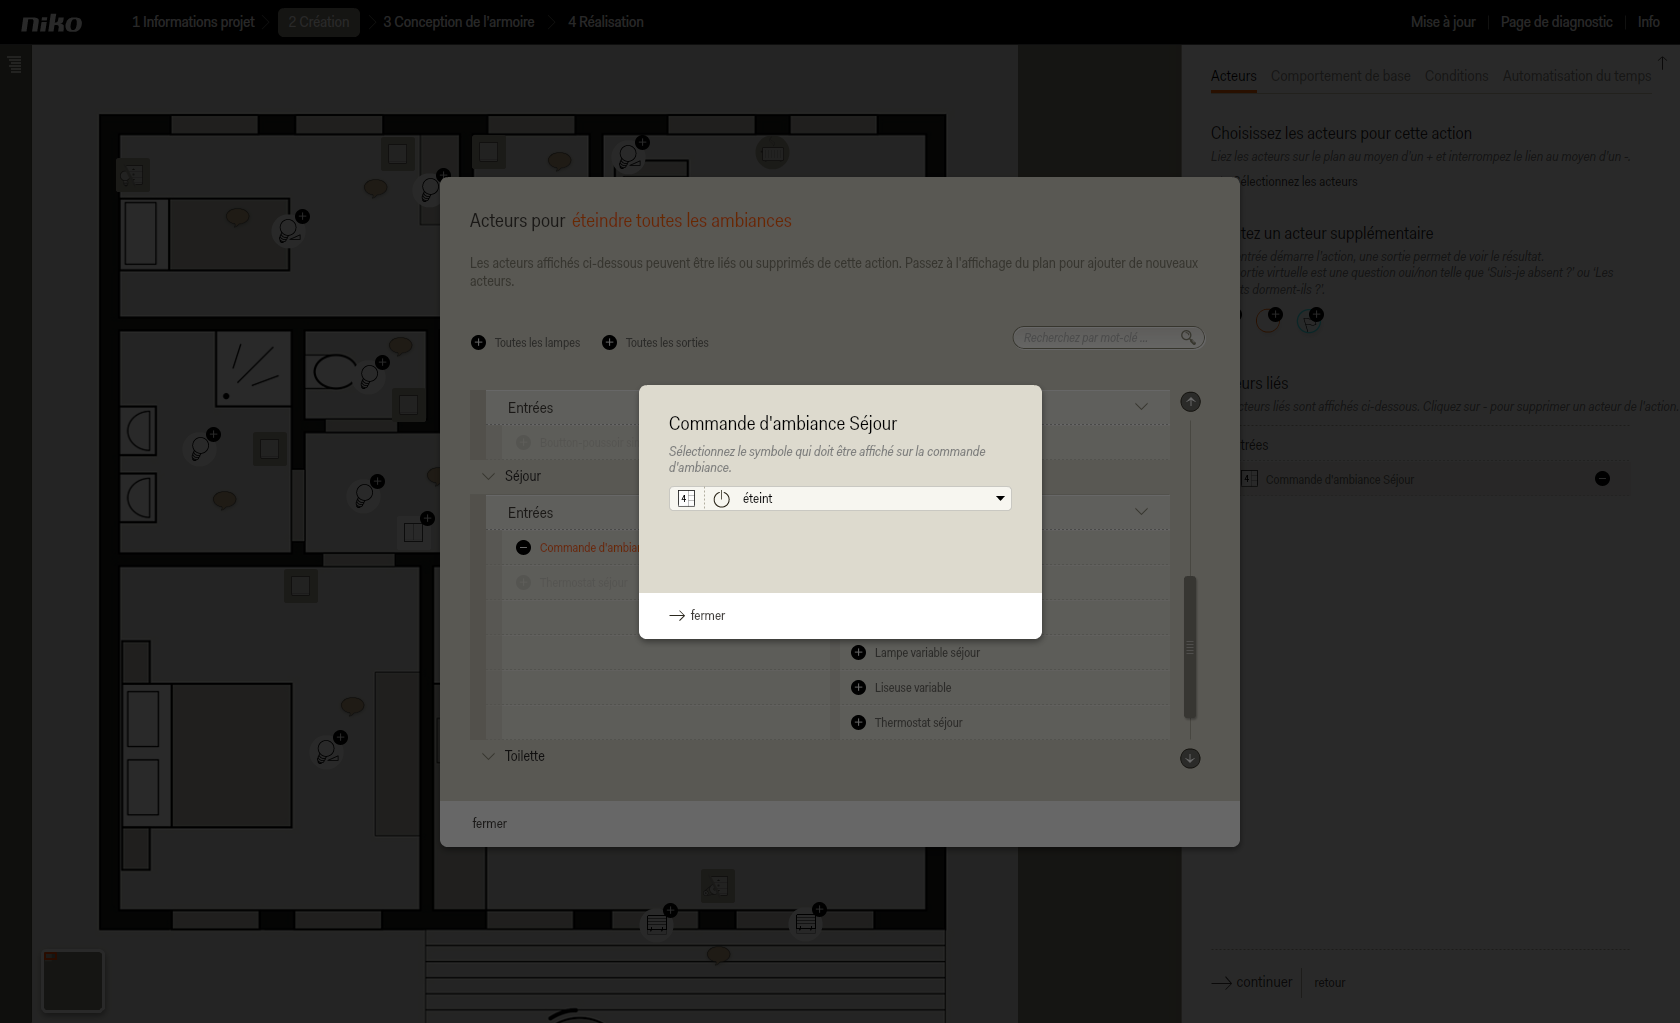
Sélectionner l'entrée- Cliquez sur Choisir les acteurs.
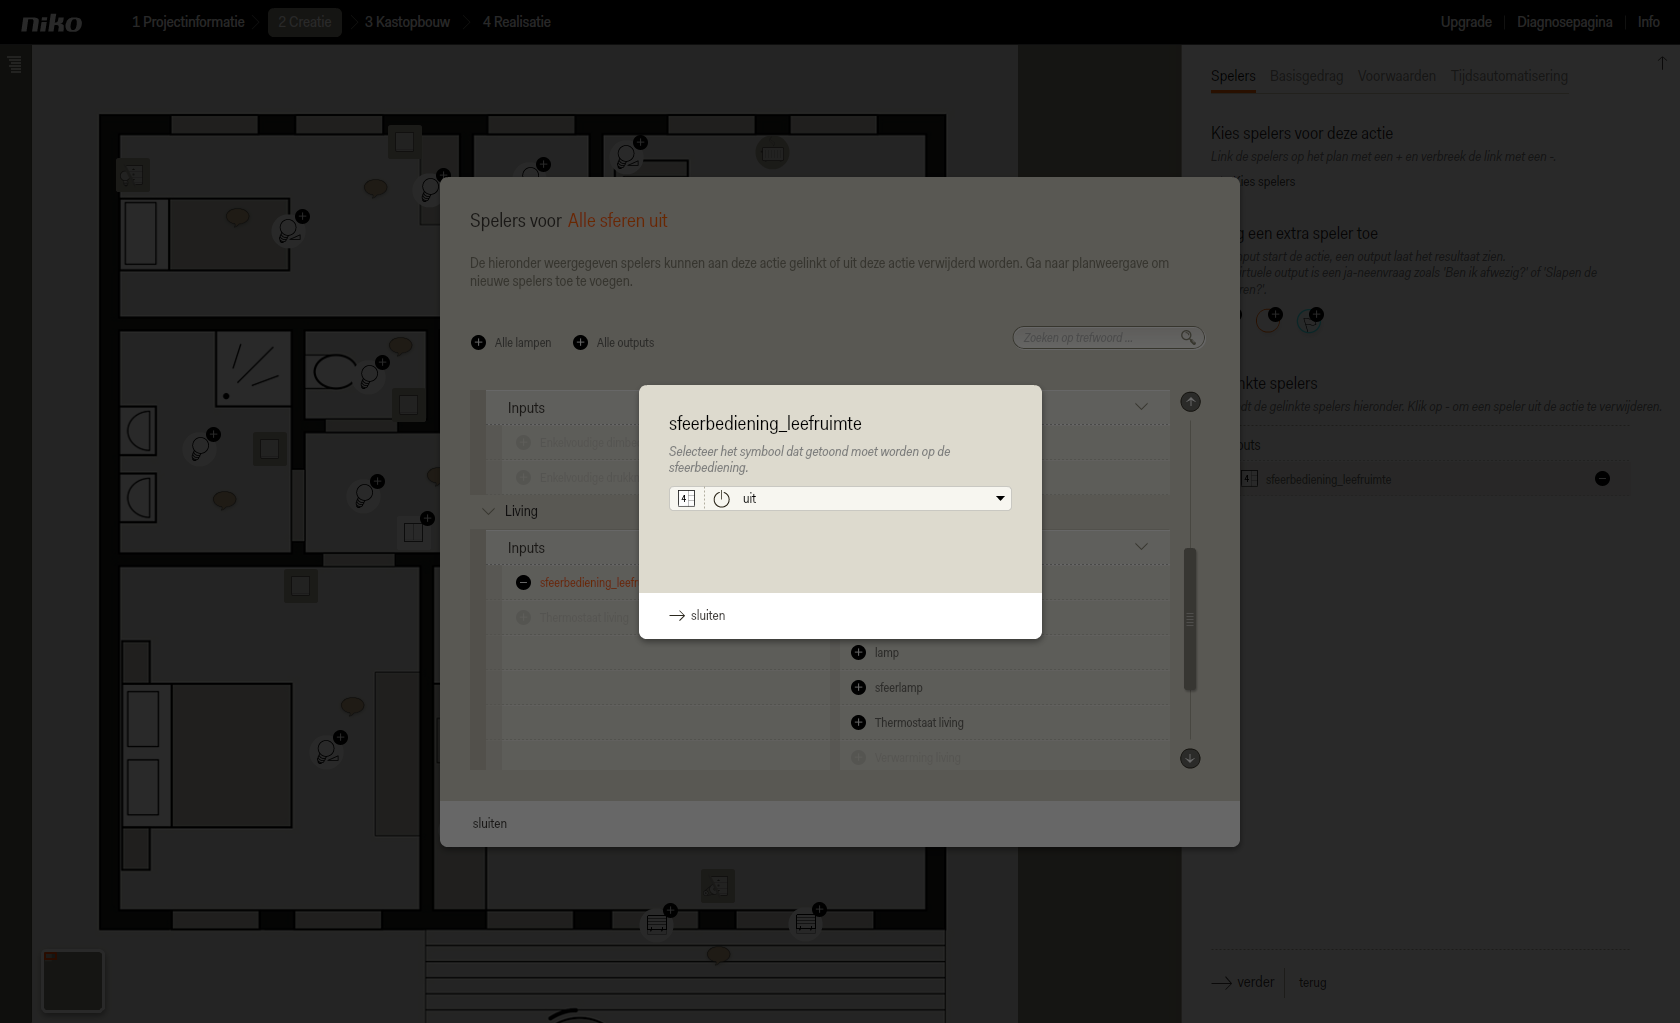
La fenêtre pop-up Acteurs pour Toutes les ambiances éteintes s'affiche. - Pour le lieu Séjour, cliquez dans la colonne de gauche sur le symbole plus devant Commande d'ambiance séjour.
- Sélectionnez la touche que vous souhaitez utiliser (dans ce cas, la quatrième touche).
- Sélectionnez le symbole éteint.
Sélectionner les sorties- Pour les lieux Séjour et Coin-repas, cliquez dans la colonne de droite sur le symbole plus devant Sorties.
- Sélectionnez Toutes les lampes.
- Cliquez sur fermer.
- Cliquez sur continuer pour accéder à l'onglet Comportement de base.
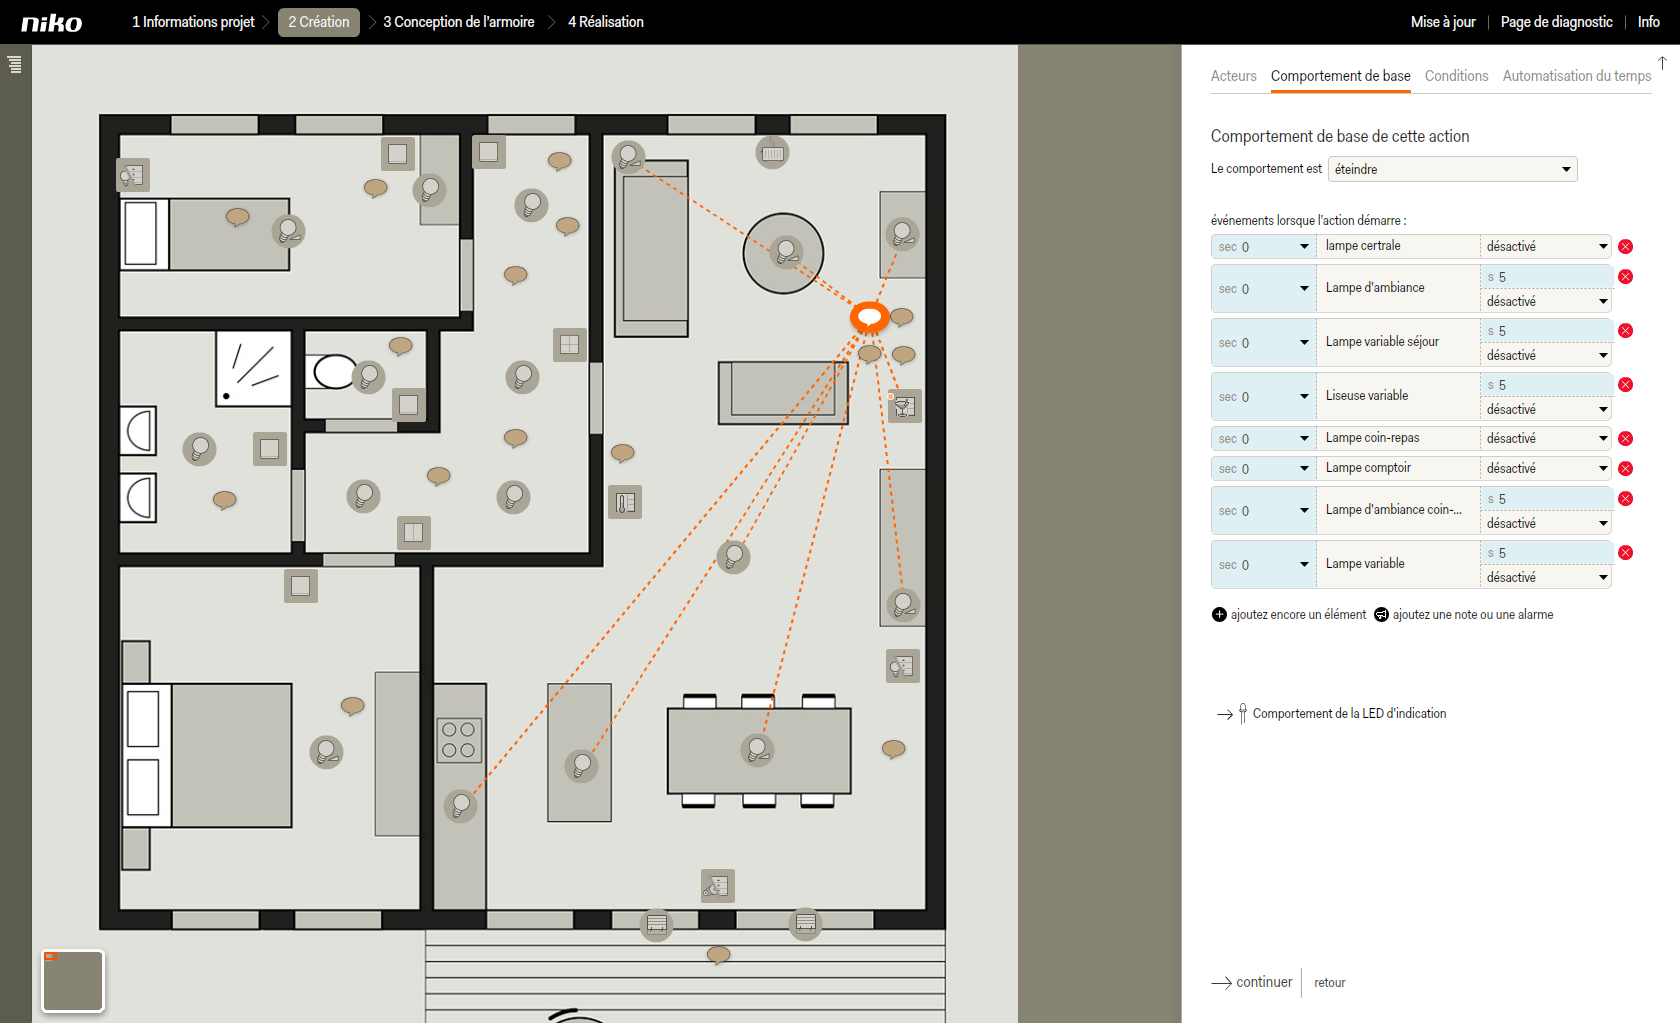
Sélectionner le comportement de base- Sélectionnez éteindre en guise de comportement de base.
| Info |
|---|
| En choisissant 'éteindre' comme comportement de base, le comportement de démarrage de l'ensemble des sorties liées sera par défaut 'éteint'. En choisissant 'allumer', il sera par défaut 'allumé'. |
- Cliquez sur continuer pour accéder à l'onglet Conditions.
- Cliquez sur continuer pour accéder à l'onglet Automatisation du temps.
- Dans l'onglet Automatisation du temps, cliquez sur enregistrer.
RésultatVous avez programmé trois ambiances et un bouton « Toutes les ambiances éteintes » sur la commande d'ambiance. - En cliquant sur la commande d'ambiance sur le plan, vous obtiendrez un aperçu dans la fenêtre de droite.
|