Mood control
Press 

You can't switch off the activated mood by pressing
Starting/stopping an action
The largest symbol shows the status of this action:
• If
Press

• If
Press

Dimmer control
1. The symbol shows the status of this lamp. Press the name of the dimming action to switch the dimmed circuit on or off. If the dimmed circuit is switched on when you press here, then you will switch the circuit off. Switch the circuit on again, and the dimmer will revert to the programmed light intensity it was at before it was switched off.
2. Press t 

3. Press the + or - button to respectively increase or lower the light intensity (by 10 %). If you adjust the light intensity with the (single or double) dimming control, the dimming percentage will change by 1 %. This will appear on the touchscreen.
Ventilation control
1. Press 
The + and - buttons will appear:

2. Modify the speed with the + and - buttons.
The possible speeds of the ventilation regulation are:

Roll-down shutter control
1. Press
The arrow buttons will appear:

2. Press the up or down arrow buttons to respectively open or close the roll-down shutters. If the roll-down shutters are open, only the down arrow button appears. If the roll-down shutter is closed, you will only see the up arrow button.
3. Press the pause symbol to make the roll-down shutter stop in the desired position:

Awning control
You can control the awning in the same way as for the roll-down shutter.
The symbol indicates that it is the awning which is being controlled.

Thermostat
You cannot adjust the programming of the thermostat on the touchscreen. You need to do this on the thermostat itself. The current temperature is shown in the temperature symbol. Immediately to the right, the desired temperature will appear:

To the far right of this action, in the same action tab, there is a menu. Press the down arrow to open this menu:

In this menu, you can choose between the various pre-programmed programmes and temperature levels. Select the desired programme.
Press the up arrow to close this menu.
To modify the current temperature for a certain length of time:
1. Press 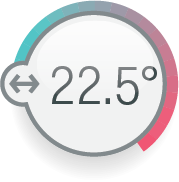
The + and - buttons will appear:

De + en - toetsen verschijnen:
2. Press the + or - button to respectively increase or lower the temperature (by 0.5 °C).
The adjusted temperature will stay active for a maximum of 24 hours. The initially configured programme will be tempora- rily deactivated, which is indicated by a diagonal stripe through the symbol for this programme.