Use case
Your customer wants to create 3 different scenes controlled by the first button of a double push button (with LEDs).
|
Push |
Scene |
|---|---|
|
First push |
Scene 1 = deactivate all the lighting. |
|
Second push |
Scene 2 = activate all the lighting. |
|
Third push |
Scene 3 = activate only one lamp. |
|
Fourth push |
= Scene 1 |
The only difference with a mood control is that you cannot select a specific scene. You have to scroll (one way) between the different scenes.
Procedure
Creating the controls and the devices
-
Create a double push button with LEDs (PB1).
-
Create the virtual devices (VIRT1 to VIRT3):
-
VIRT1: virtual device controlled by PB1
-
VIRT2 and VIRT3: to make the 3 combinations for the 3 scenes
-
-
Create the lighting (LAMP1 and LAMP2).

Creating the routine
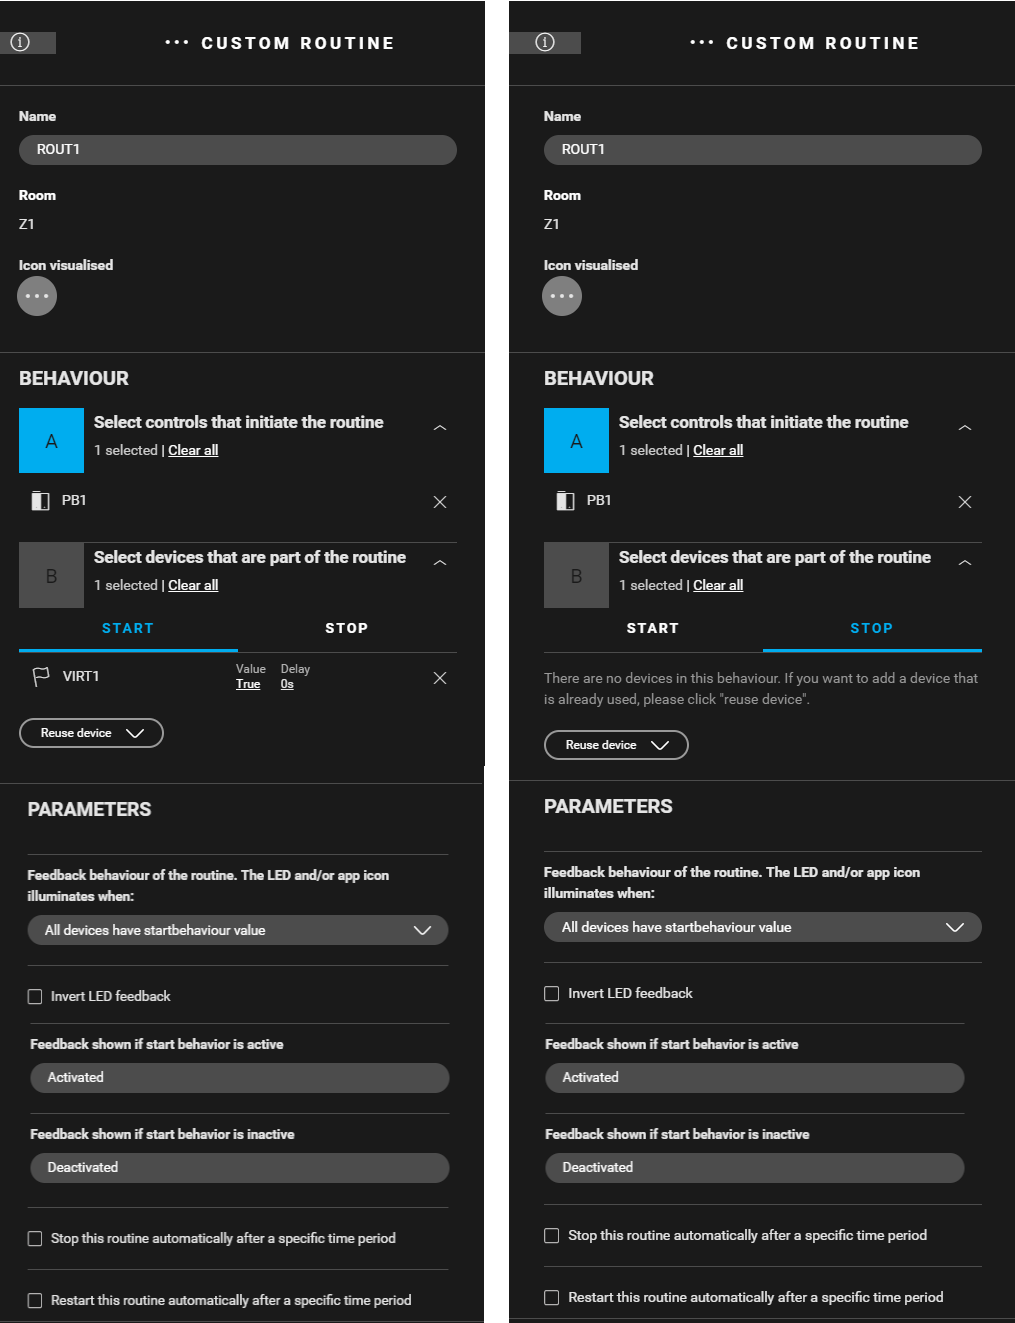
Create a custom routine (ROUT1) to activate VIRT1 with the first button of PB1. Use the following behaviour:
-
Control that initiates the routine: button 1 of the push button (PB1).
-
Devices that are part of the routine: VIRT1
-
Start behaviour: VIRT1: Value = true, Delay = 0 s
-
Stop behaviour: leave empty
-

Creating the conditions
Create 3 conditions which at each button press (PB1) check the programmed scene and switch to the next scene.
-
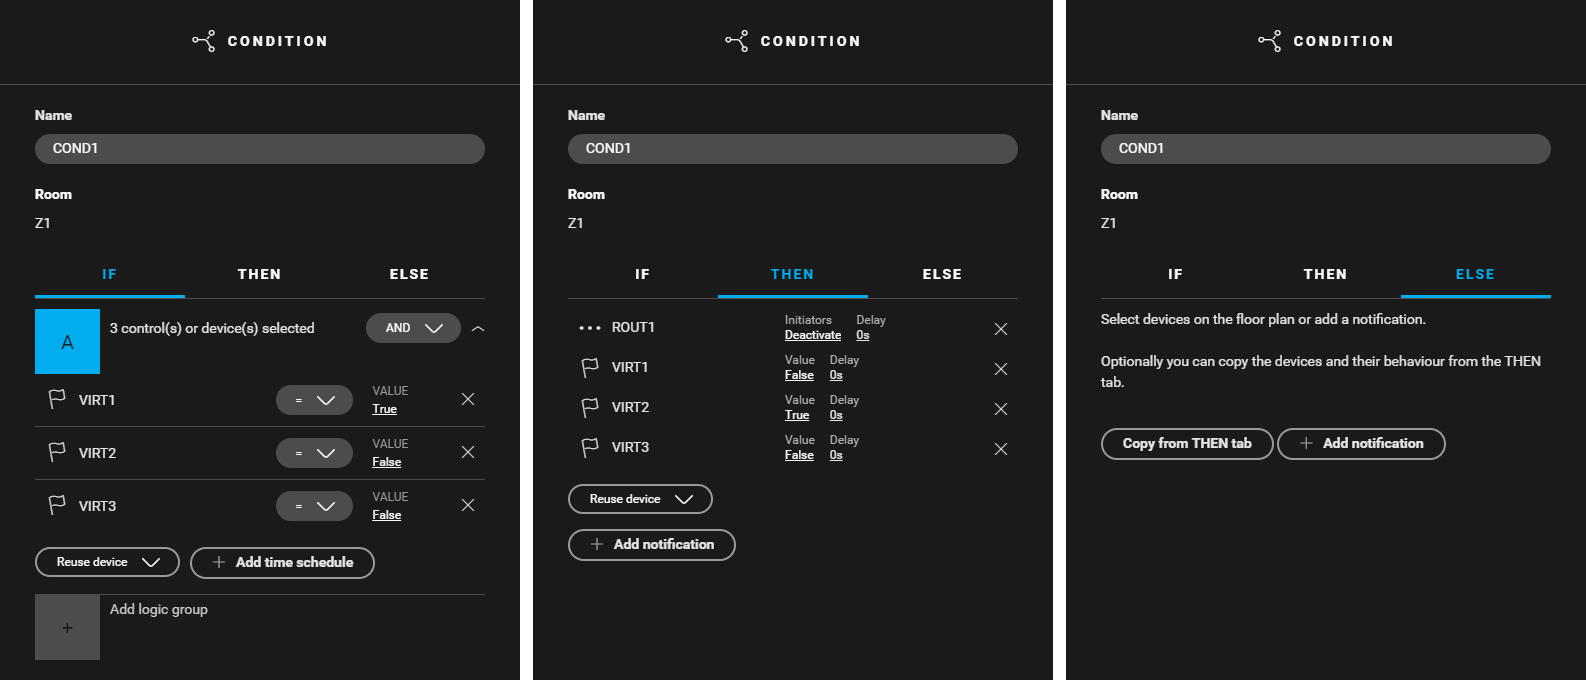
Create a condition (
COND1
) for pushing PB1 the first time (VIRT1). Use the following logic:
-
IF (VIRT1: Value = true) and (VIRT2: Value = false) and (VIRT3: Value = false)
-
THEN (ROUT1: Initiators = deactivate) and (VIRT1: Value = false) and (VIRT2: Value = true) and (VIRT3: Value = false)
-
ELSE leave empty
-
-
Create a condition (
COND2
) for pushing PB1 for the second time (VIRT2). Use the following logic:
-
IF (VIRT1: Value = true) and (VIRT2: Value = true) and (VIRT3: Value = false)
-
THEN (ROUT1: Initiators = deactivate) and (VIRT1: Value = false) and (VIRT2: Value = false) and (VIRT3: Value = true)
-
ELSE leave empty
-
-
Create a condition (
COND3
) for pushing PB1 for the third time. Use the following logic:
-
IF (VIRT1: Value = true) and (VIRT2: Value = false) and (VIRT3: Value = true)
-
THEN (ROUT1: Initiators = deactivate) and (VIRT1: Value = false) and (VIRT2: Value = false) and (VIRT3: Value =false)
-
ELSE leave empty
-
Create 3 conditions for the scenes using VIRT2 and VIRT3.
-
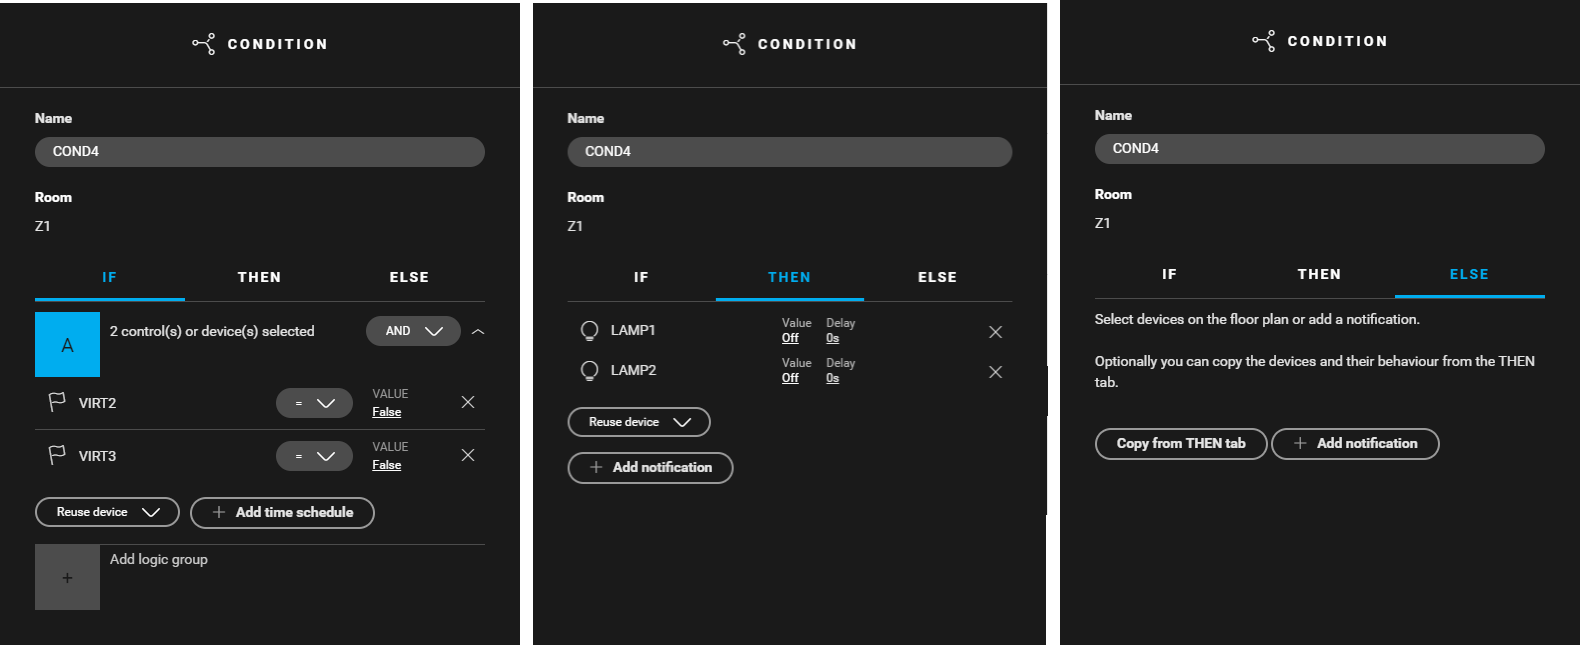
Create a condition (
COND4
) for deactivating all the lighting. Use the following logic:
-
IF (VIRT2: Value = false) and (VIRT3: Value = false)
-
THEN (LAMP1: Value = off) and (LAMP2: Value = off)
-
ELSE leave empty
-
-
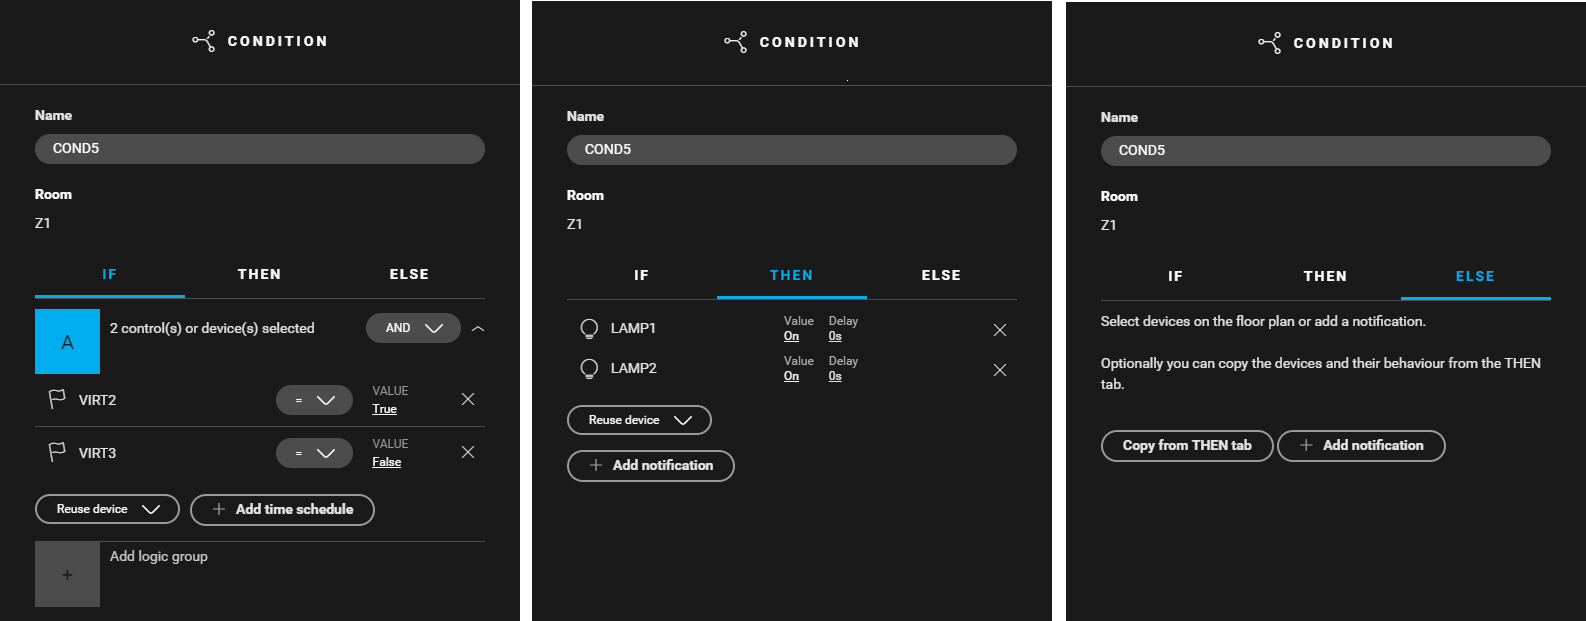
Create a condition (
COND5
) for activating all the lighting. Use the following logic:
-
IF (VIRT2: Value = true) and (VIRT3: Value = false)
-
THEN (LAMP1: Value = on) and (LAMP2: Value = on)
-
ELSE leave empty
-
-
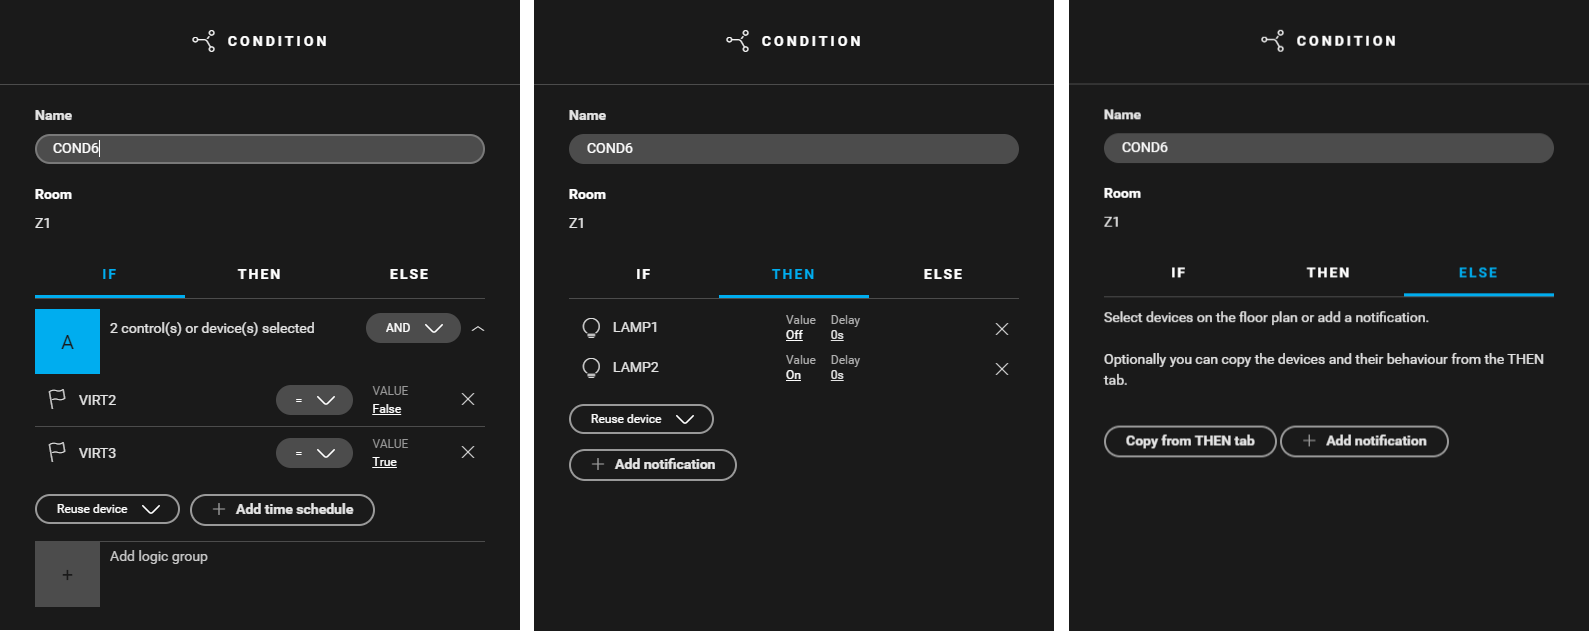
Create a condition (
COND6
) for activating all the lighting. Use the following logic:
-
IF (VIRT2: Value = false) and (VIRT3: Value = true)
-
THEN (LAMP1: Value = off) and (LAMP2: Value = on)
-
ELSE leave empty
-

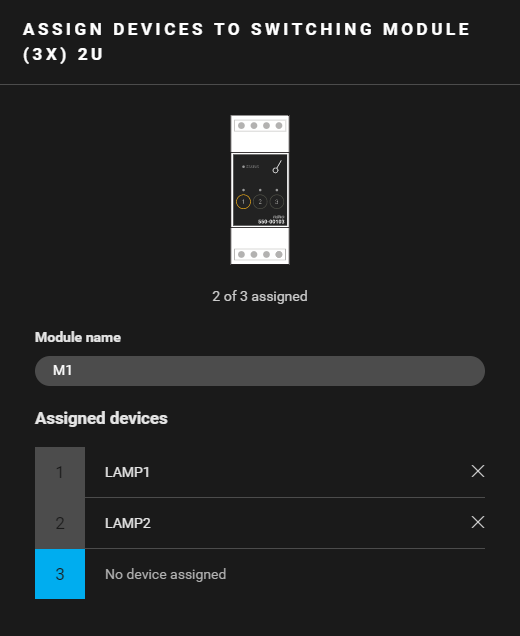
Filling the cabinet and addressing the devices
|
Fill the cabinet with ... |
and address the following devices ... |
|---|---|
|
a switching module (3x) 2U ( MOD1 ) |
|
Example
Click here to download the programming example (nhc2 file).