Use case
Your customer wants to activate the lighting for 4 hours using a single push button with LED. When the button is pressed again within these 4 hours, an extra 4 hours is added to the remaining time. During the activation period of the lighting, the LED on the button remains activated.
E.g.
-
The button is pressed. The lamp and the LED on the button are switched on for 4 hours.
-
Three hours later the button is pressed again. The lamp and the LED on the button are activated for another 4 hours.
-
The lamp and the LED on the button are turned off after 7 hours.
In this example, lighting is used, but you can also use this manner of programming in combination with ventilation, heating,...
Procedure
Creating the controls and the devices
-
Create the single push button with LED (PB1).
-
Create the virtual devices (VIRT1 and VIRT2).:
-
Create the lighting (LAMP1).

Creating the routines
-
Create a custom routine (
ROUT1
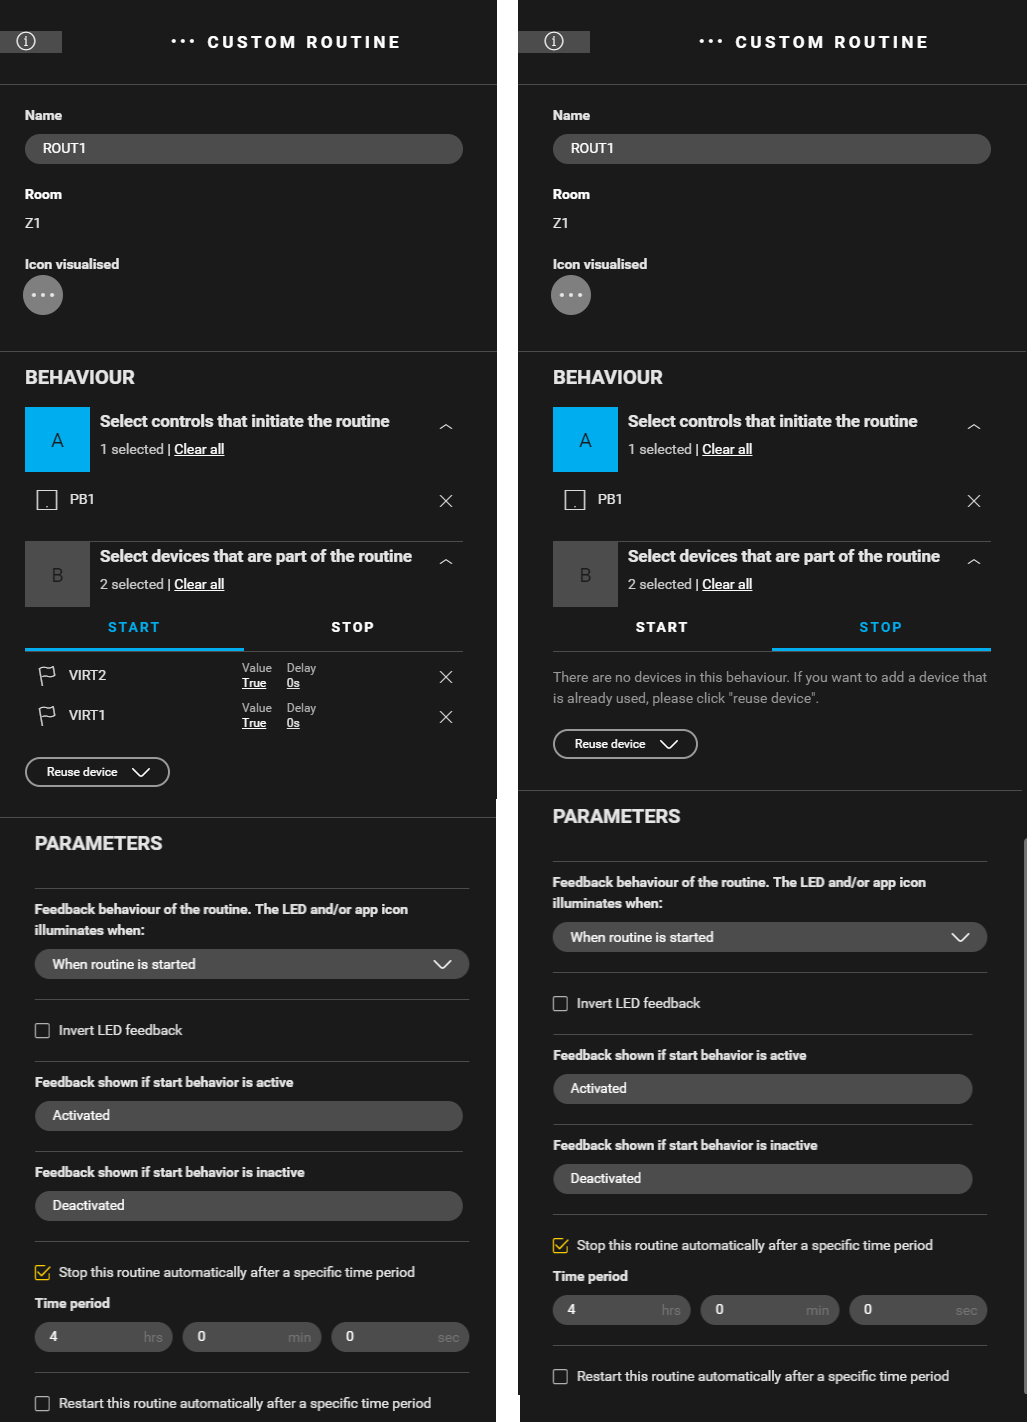
) to activate VIRT1 and VIRT2 with PB1 and activate the LED for 4 hours. Use the following behaviour:
-
Control that initiates the routine: button (PB1)
-
Devices that are part of the routine: VIRT1 and VIRT2
-
Start behaviour: (VIRT1: Value = true) and (VIRT2: Value = true)
-
Stop behaviour: leave empty
-
-
Set the following parameters:
-
Feedback behaviour of the routine. The LED illuminates when the routine is started.
-
Check "Stop this routine automatically after..." and set the time period to 4 hours.
-
-
-
Create a custom routine (
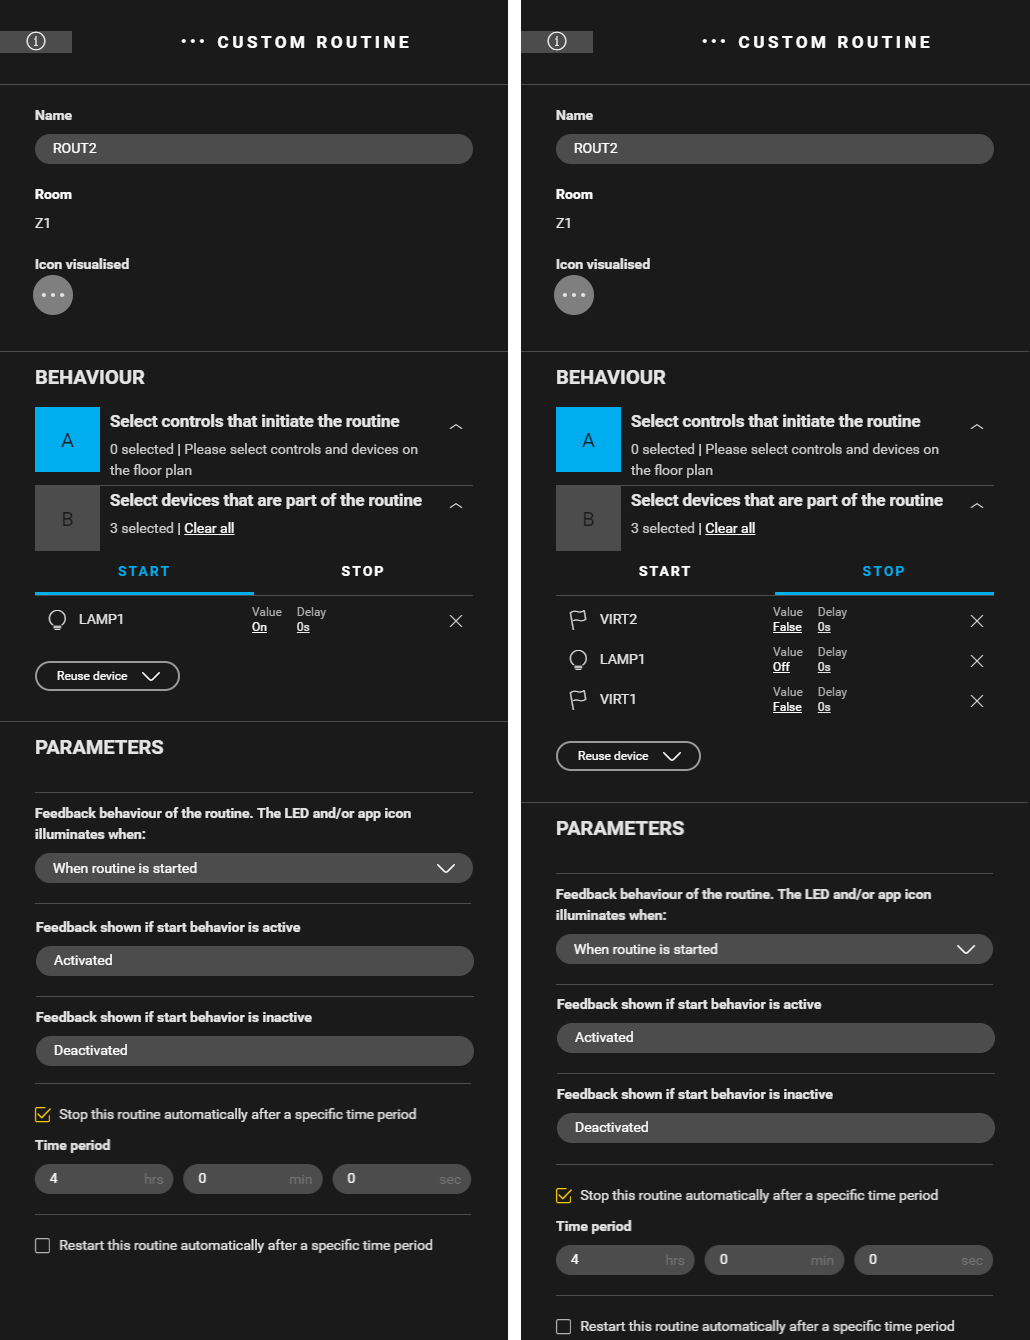
ROUT2
) to control the lighting. Use the following behaviour:
-
Control that initiates the routine: leave empty
-
Devices that are part of the routine: VIRT1, VIRT2 and LAMP1
-
Start behaviour: (LAMP1: Value = on)
-
Stop behaviour: (VIRT1: Value = false) and (VIRT2: Value = false) and (LAMP1: Value = off)
-
-
Set the following parameters:
-
Feedback behaviour of the routine. The LED illuminates when the routine is started.
-
Check "Stop this routine automatically after..." and set the time period to 4 hours.
-
-

By setting the specified parameters in ROUT1, the LED on the button follows the behaviour of VIRT1 and VIRT2. The LED is deactivated when both VIRT1 and VIRT2 are false. VIRT1 and VIRT2 are set to false when the lighting was activated 4 hours after the last button press.
Creating the condition
Create a condition (COND1) for controlling the LED on the push button. The LED remains activated until 4 hours after the last button press. Use the following logic:
-
IF (VIRT1: Value = true) and (VIRT2: Value = true)
-
THEN (ROUT2: Initiators = activate) and (VIRT2: Value = false)
-
ELSE leave empty

Only set 1 virtual device to false in the THEN clause. In this way, the LED remains activated. A second button press initiates COND1.
Filling the cabinet and addressing the device
|
Fill the cabinet with ... |
and address the following device ... |
|---|---|
|
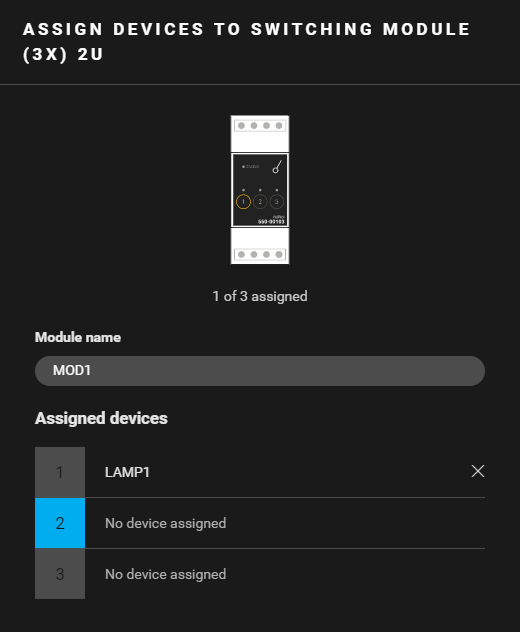
a switching module (3x) 2U ( MOD1 ) |
the lighting LAMP1. |
Example
Click here to download the programming example (nhc2 file).