Use case
Your customer wants to link the external video unit, with 1 illuminated touch button and an extra bell button, with the touchscreen and/or the app. The installation is equipped with an electrical door lock and a chime.
Procedure
Creating the controls and the access control elements
-
Create an external video unit with 1 illuminated touch button (VDS1).
-
Create a push button interface as bell button (=extra bell) (PB1).
-
Create a door lock (LOCK1).
-
Create a chime (CHIME1).

-
You can also use a single push button (with LED) as an extra bell button. In this case the push button is connected directly on the bus.
-
When you use a push button interface (550-20000) as an extra bell button in the programming software, you cannot use the extra inputs to control other devices. Physically, only 1 input is connected to the bus. The other 3 are not used.
Creating the routines
-
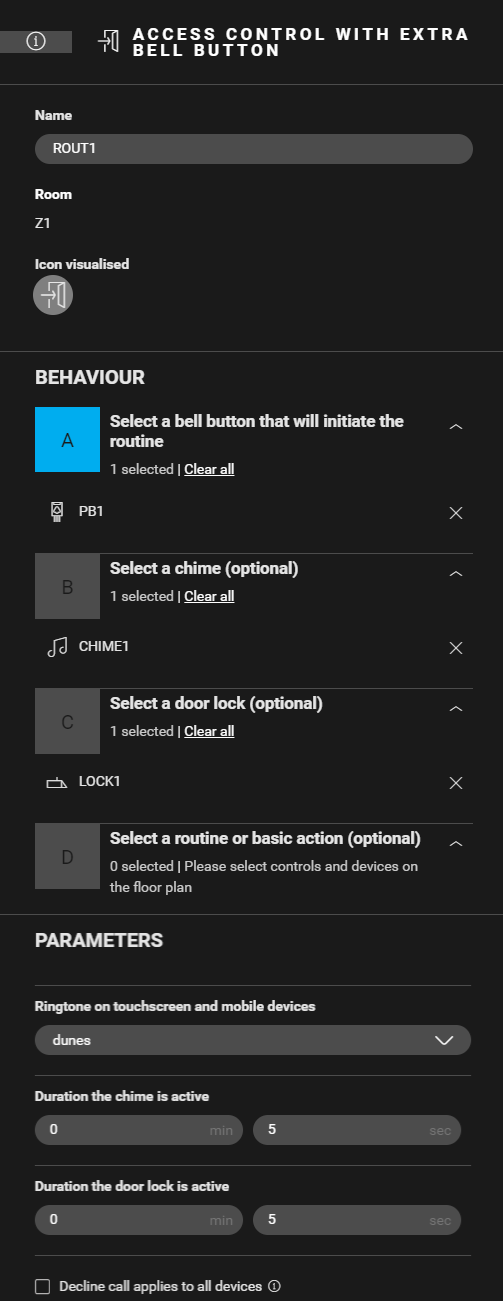
Create a routine Access control with extra bell button (
ROUT1
). Configure the following behaviour:
-
Select the extra bell button (PB1)
-
Select the chime.
-
Select the door lock.
-
(optional) In the parameters, select a different ringtone and the duration of both the chime and the door lock.
-
-
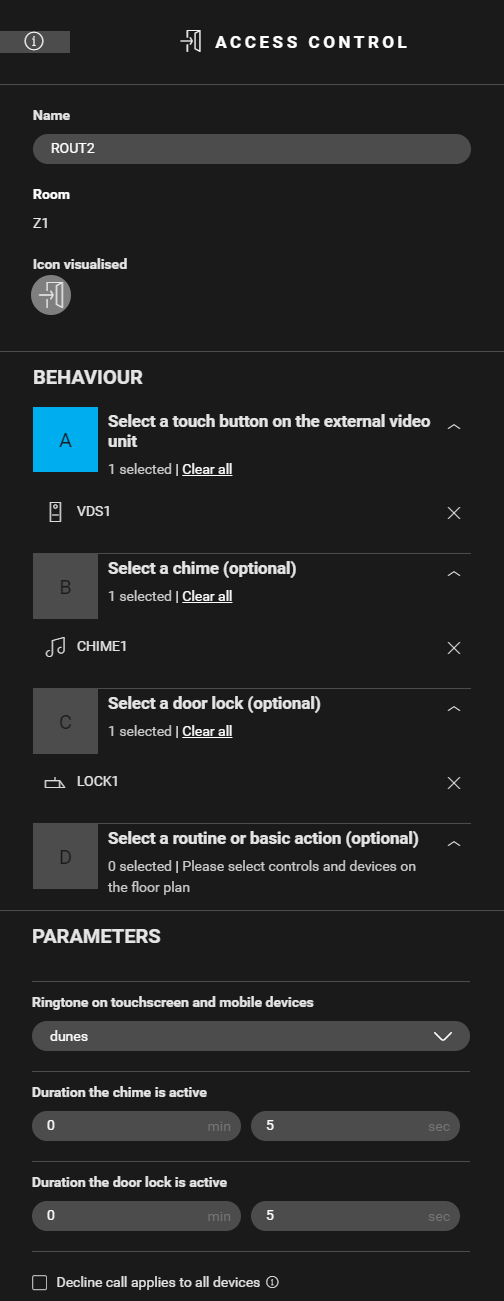
Create a routine Access control (
ROUT2
) for the bell button on the external video unit. Configure the following behaviour:
-
Select the external video unit (VDS1).
-
Select the chime.
-
Select the door lock.
-
(optional) In the parameters, select a different ringtone and the duration of both the chime and the door lock.
-

Calls initiated from the extra bell button arrive only on the touchscreen, not in the app.
Calls initiated from the external video unit arrive both on the touchscreen and in the app.
Editing the touchscreen profile
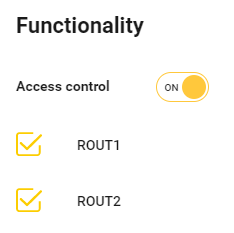
To be able to answer the call with the touchscreen, turn on the access control functionality in the touchscreen profile. You can find the touchscreen profile(s) in the Dashboard menu.
Filling the cabinet and addressing the devices
|
Fill the cabinet with ... |
and address the following devices ... |
|---|---|
|
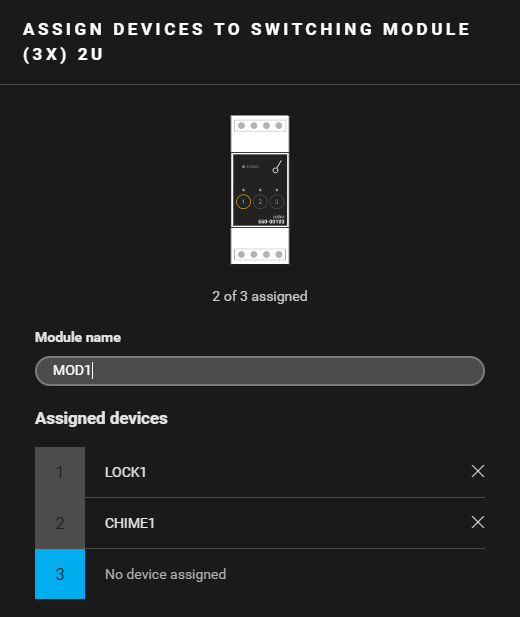
a switching module (3X) 2U ( MOD1 ) |
|
Example
Click here to download the programming example (nhc2 file).