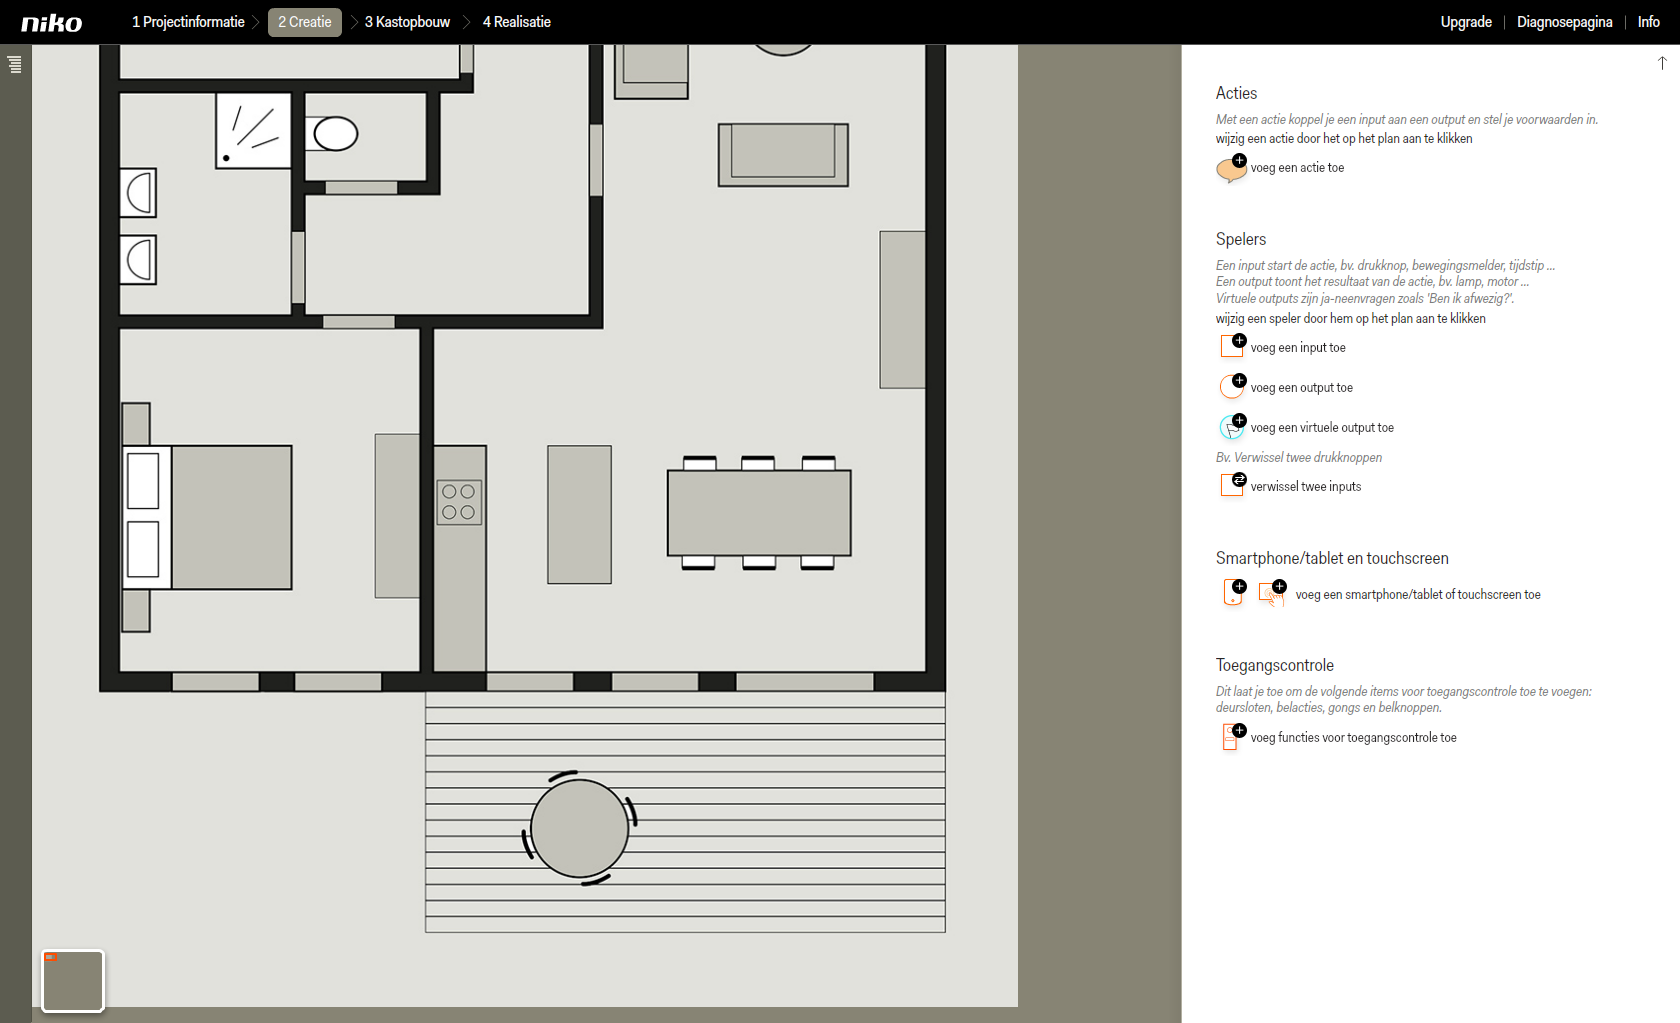
SituationDans ce plan par étapes, un mini détecteur sur la terrasse est lié à un circuit d'éclairage variable. L'objectif consiste à paramétrer l'éclairage sur faible intensité dès qu'il fait obscur et sur intensité élevée lorsqu'un mouvement est détecté. Point de départLe point de départ de ce plan par étapes est un projet dont les Informations projet ont déjà été complétées et pour lequel un plan a été dessiné ou téléchargé. Ajouter un Mini détecteur- Cliquez sur Création en haut de l'écran.
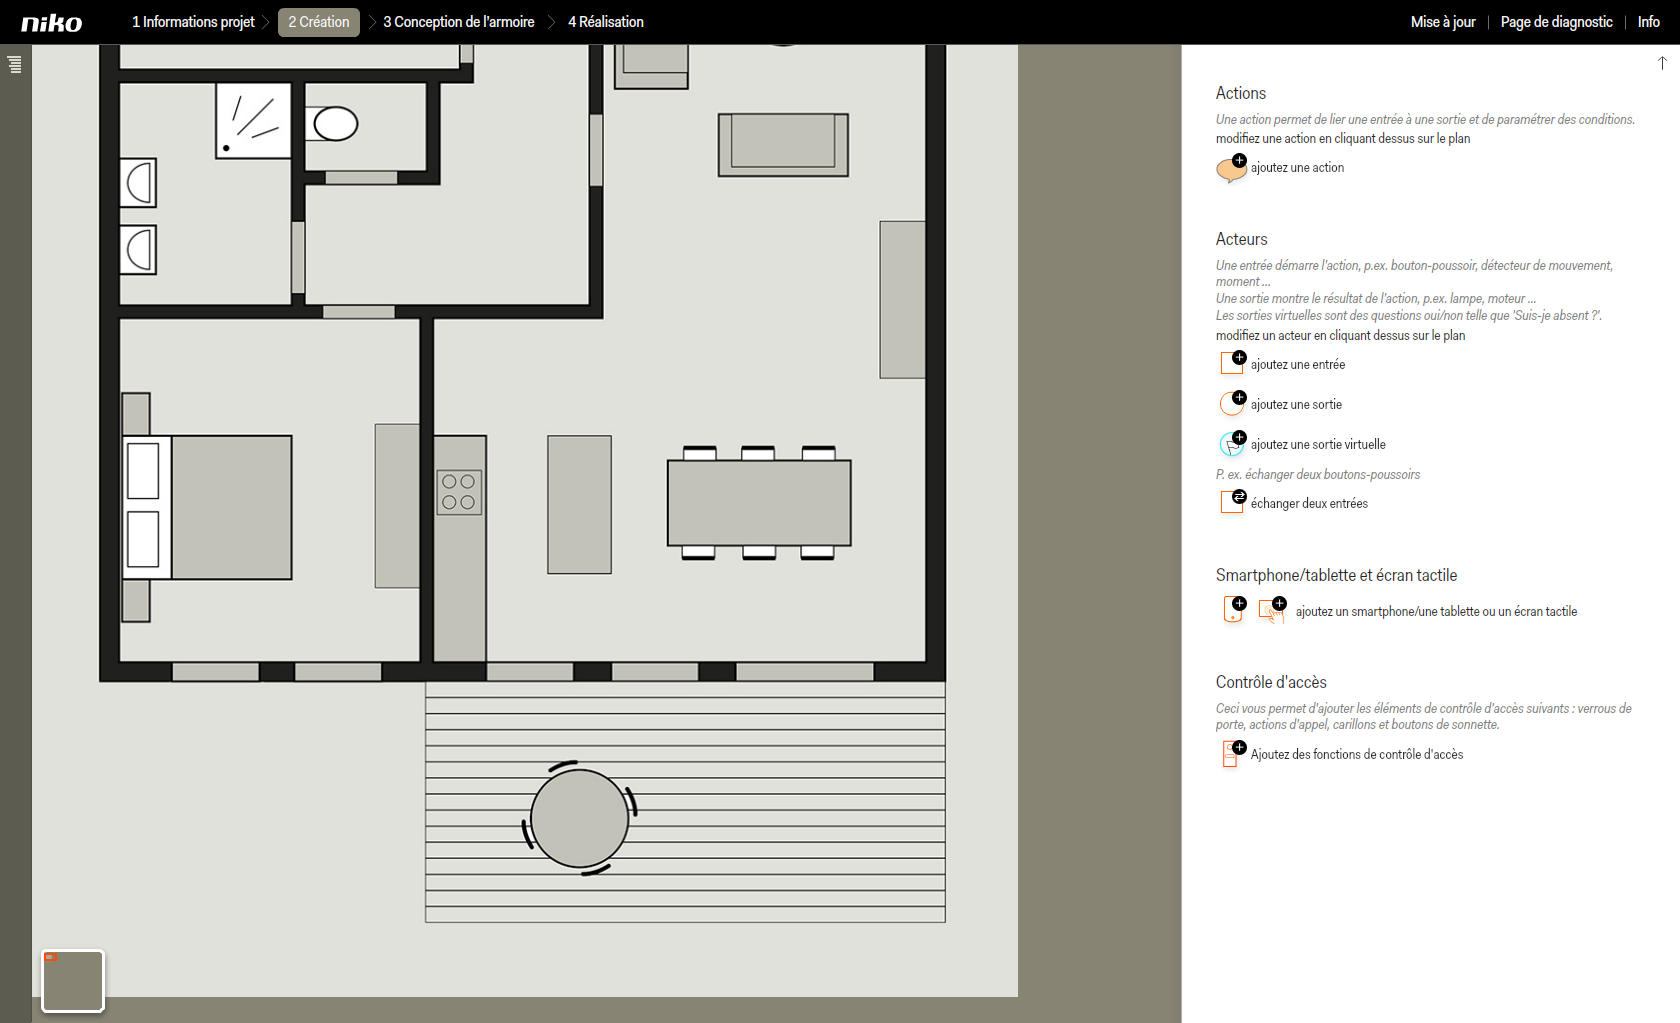
- Cliquez sur ajoutez une sortie.
- Cliquez sur mini détecteur dans la liste déroulante de la partie droite de l'écran. La sortie apparaît sur le plan.
- Faites glisser le mini détecteur au bon endroit et donnez-lui un nom reconnaissable.
- Choisissez un lieu existant dans la liste déroulante ou cliquez sur ajoutez un lieu si celui-ci n'a pas encore été défini.
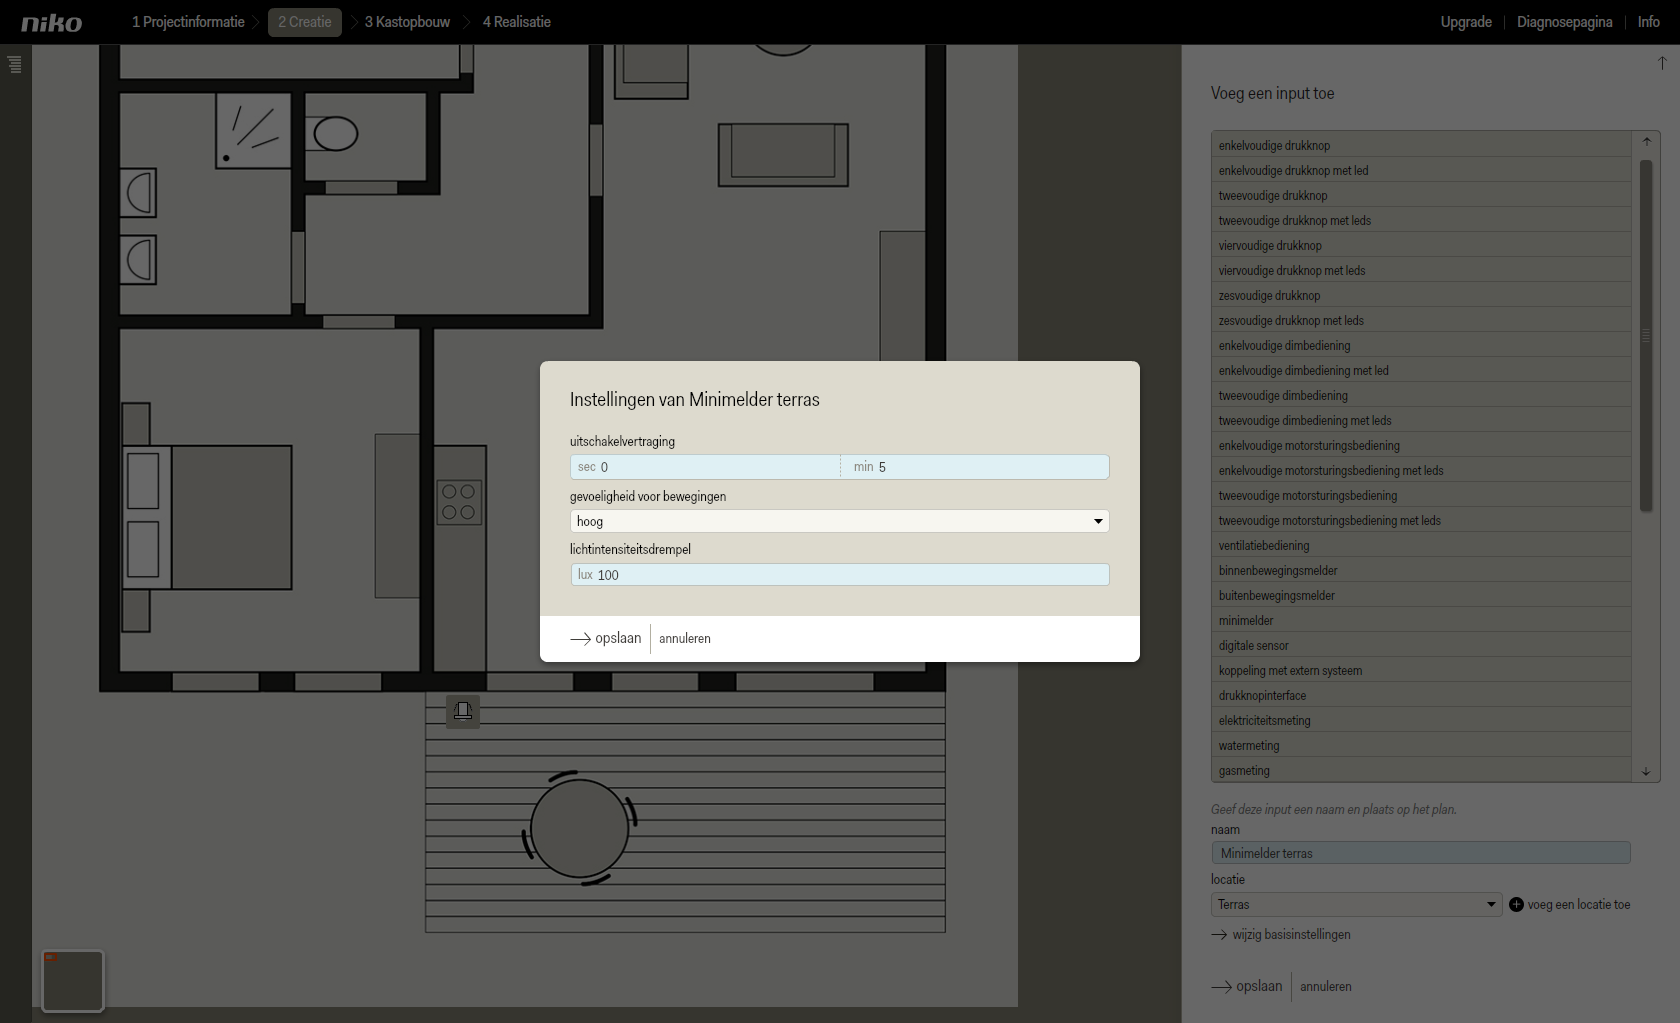
- Cliquez sur modifiez les réglages de base. Une fenêtre contextuelle s'affiche.
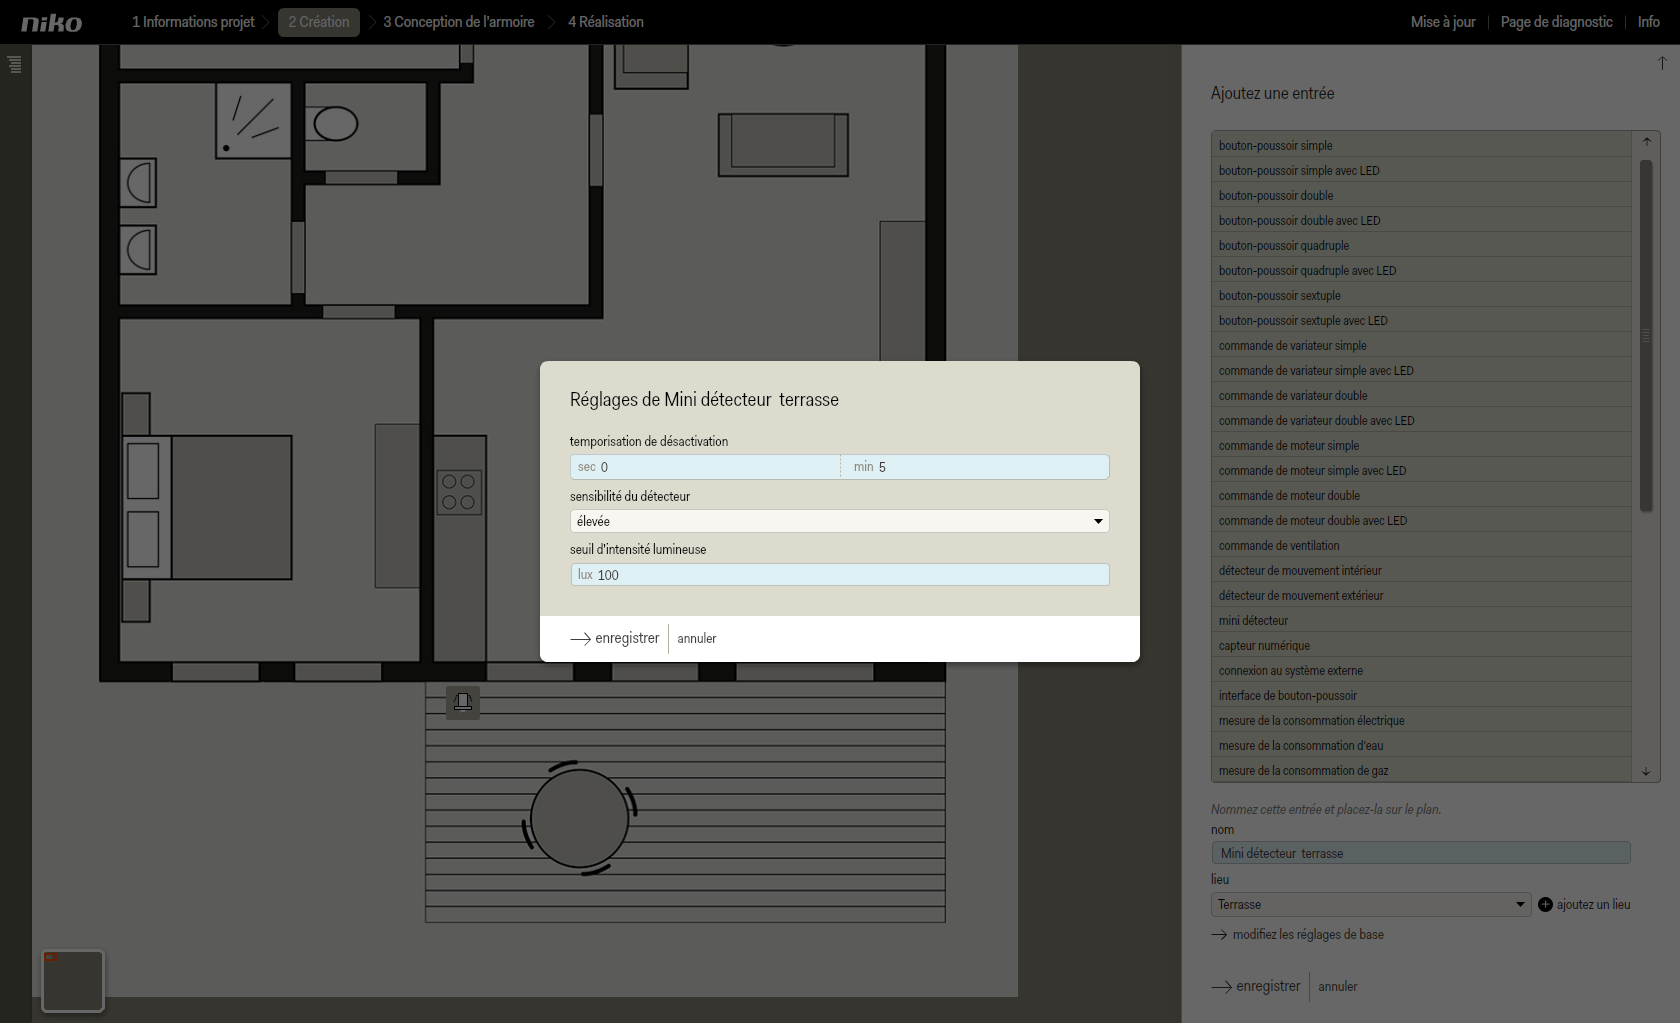
- Si nécessaire, modifiez la temporisation de désactivation, la sensibilité au mouvement et le seuil d’intensité lumineuse.
| Info |
|---|
La temporisation de désactivation est le temps écoulé entre le dernier mouvement détecté et l'activation du comportement d'arrêt. Le réglage d'usine de la temporisation de désactivation est 5 minutes mais celui-ci peut être adapté de 1 s à 59 min 59 s.
La sensibilité au mouvement est expliquée dans ce scénario.
Le seuil d'intensité lumineuse est la valeur que le détecteur applique pour basculer entre obscurité et éclairage. Une valeur indicative à cet égard est 100 lux. |
- Cliquez sur Enregistrer pour fermer la fenêtre contextuelle.
- Cliquez sur enregistrer pour revenir à l'écran d'accueil de l'étape Création.
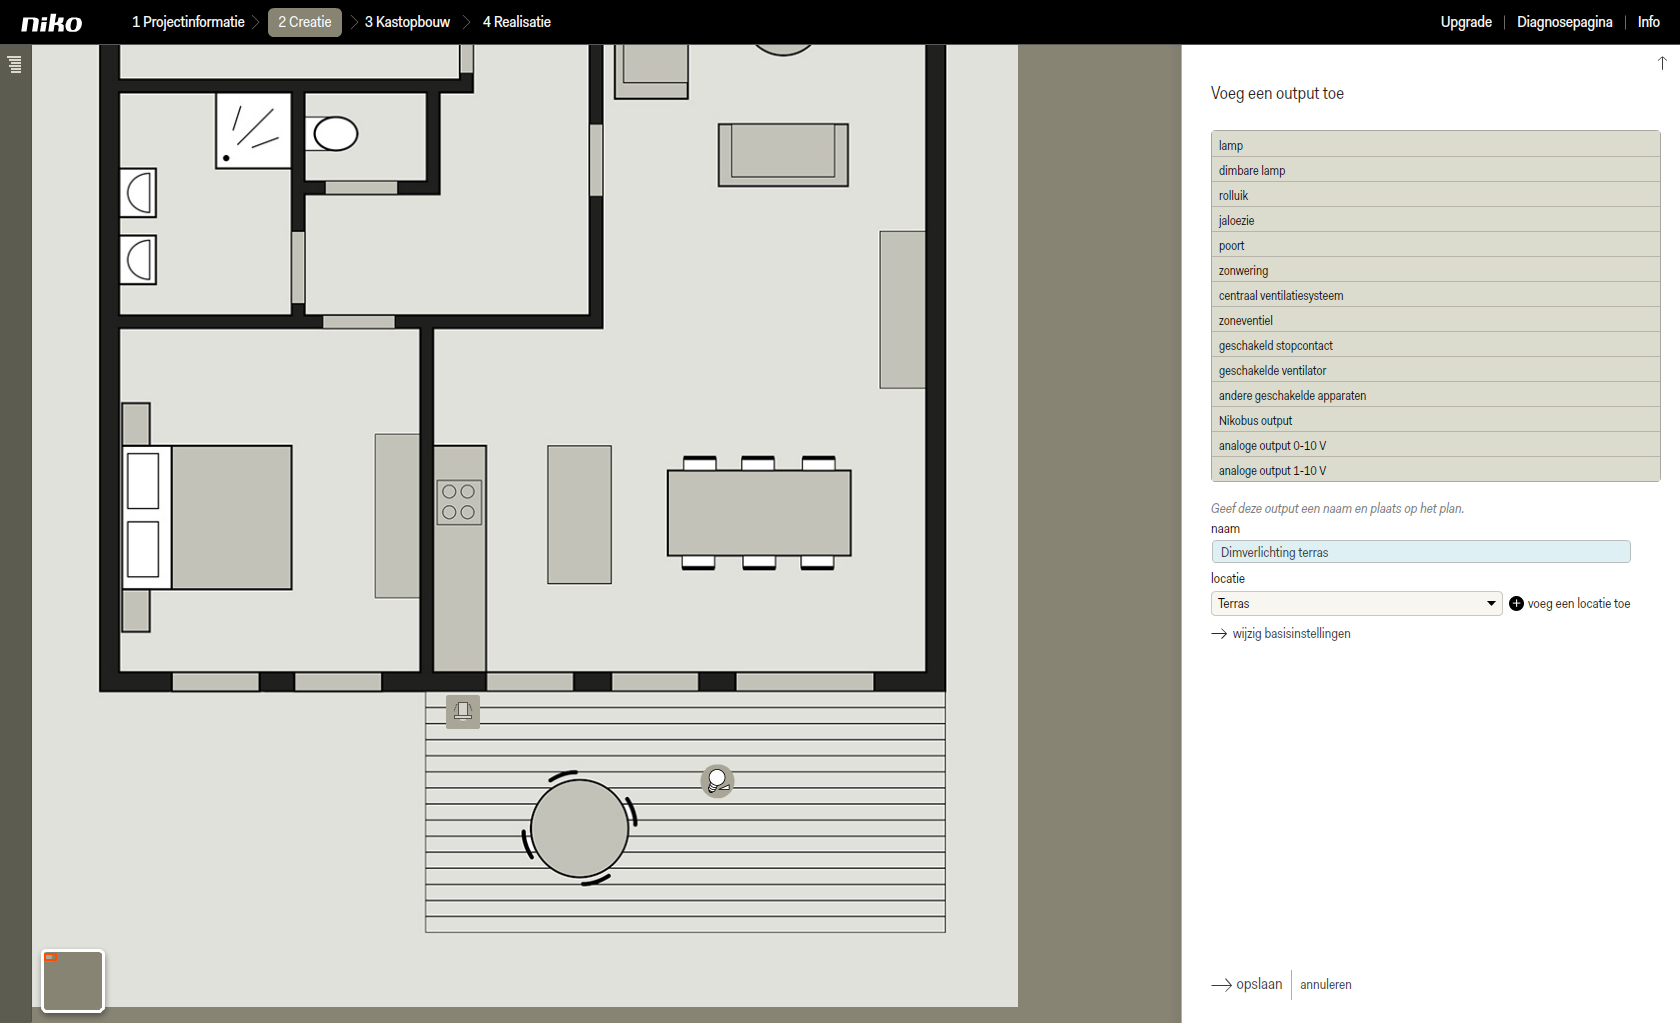
Ajouter une lampe variable- Cliquez sur ajoutez une sortie.
- Cliquez sur lampe à intensité variable dans la liste déroulante de la partie droite de l'écran. La sortie apparaît sur le plan.
- Faites glisser la lampe variable au bon endroit et donnez-lui un nom reconnaissable.
- Choisissez un lieu existant dans la liste déroulante ou cliquez sur ajoutez un lieu si celui-ci n'a pas encore été défini.

- Cliquez sur enregistrer pour revenir à l'écran d'accueil de l'étape Création.
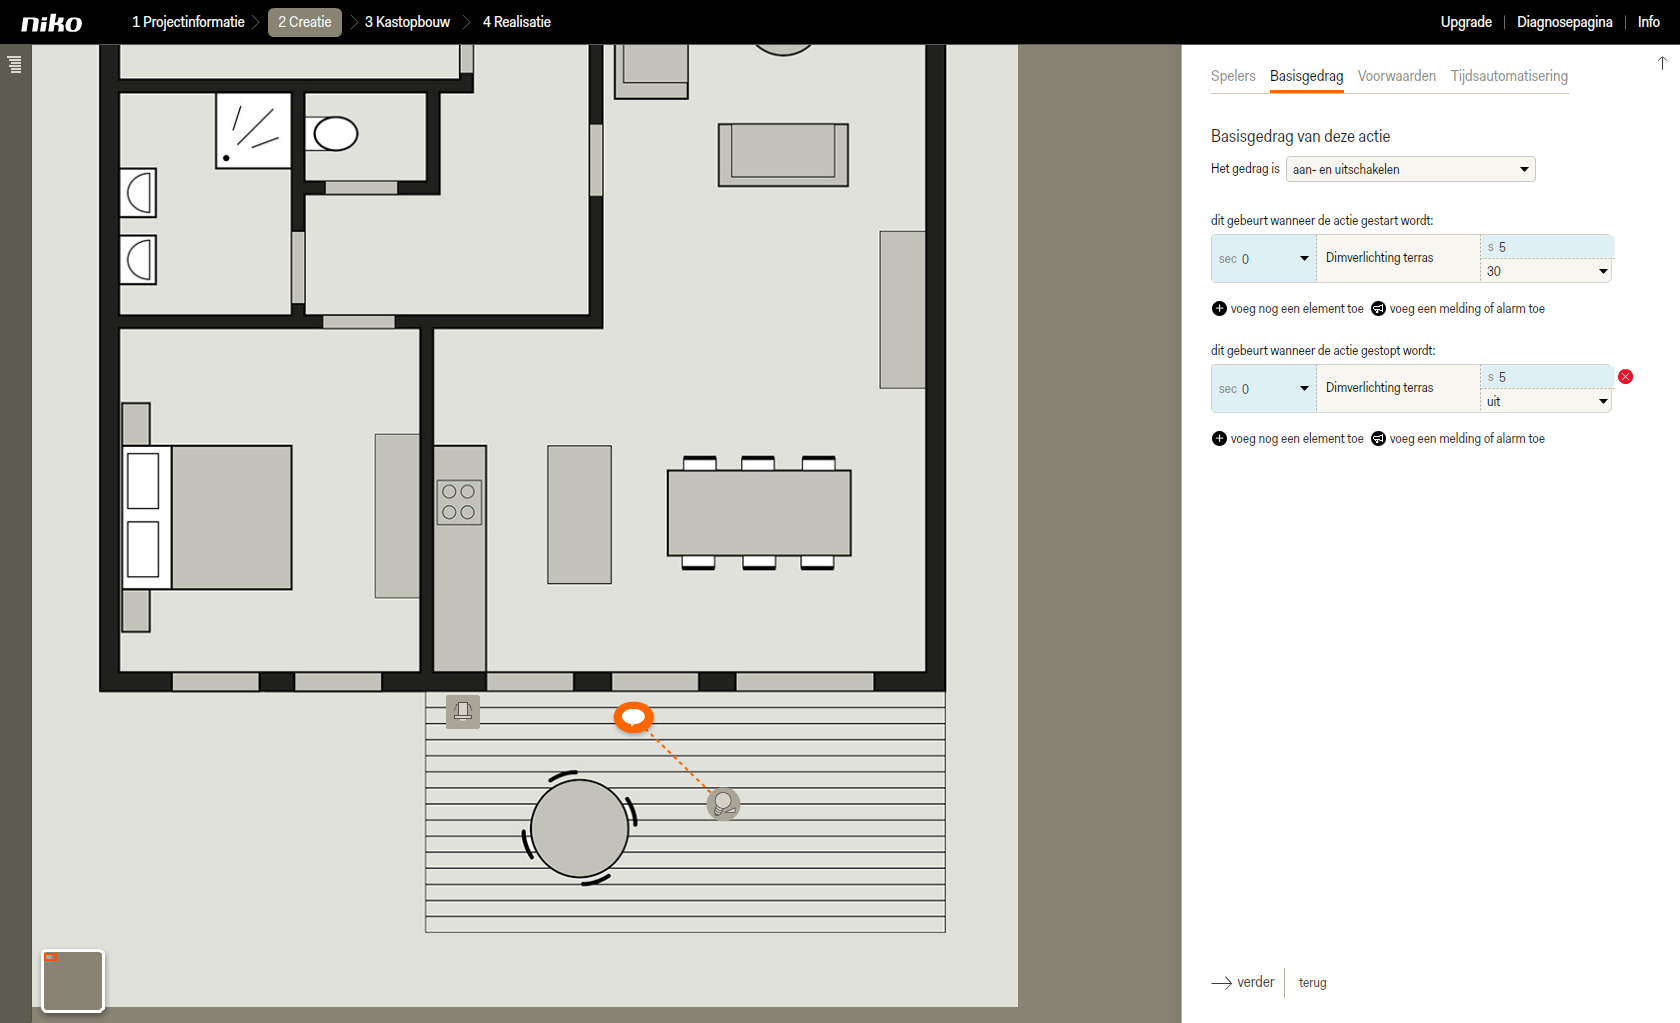
Créer une action 'Réglage faible lampe à intensité variable'
| Info |
|---|
| Cette action fera automatiquement passer l'éclairage variable sur 30 % lorsqu'il fait obscur. |
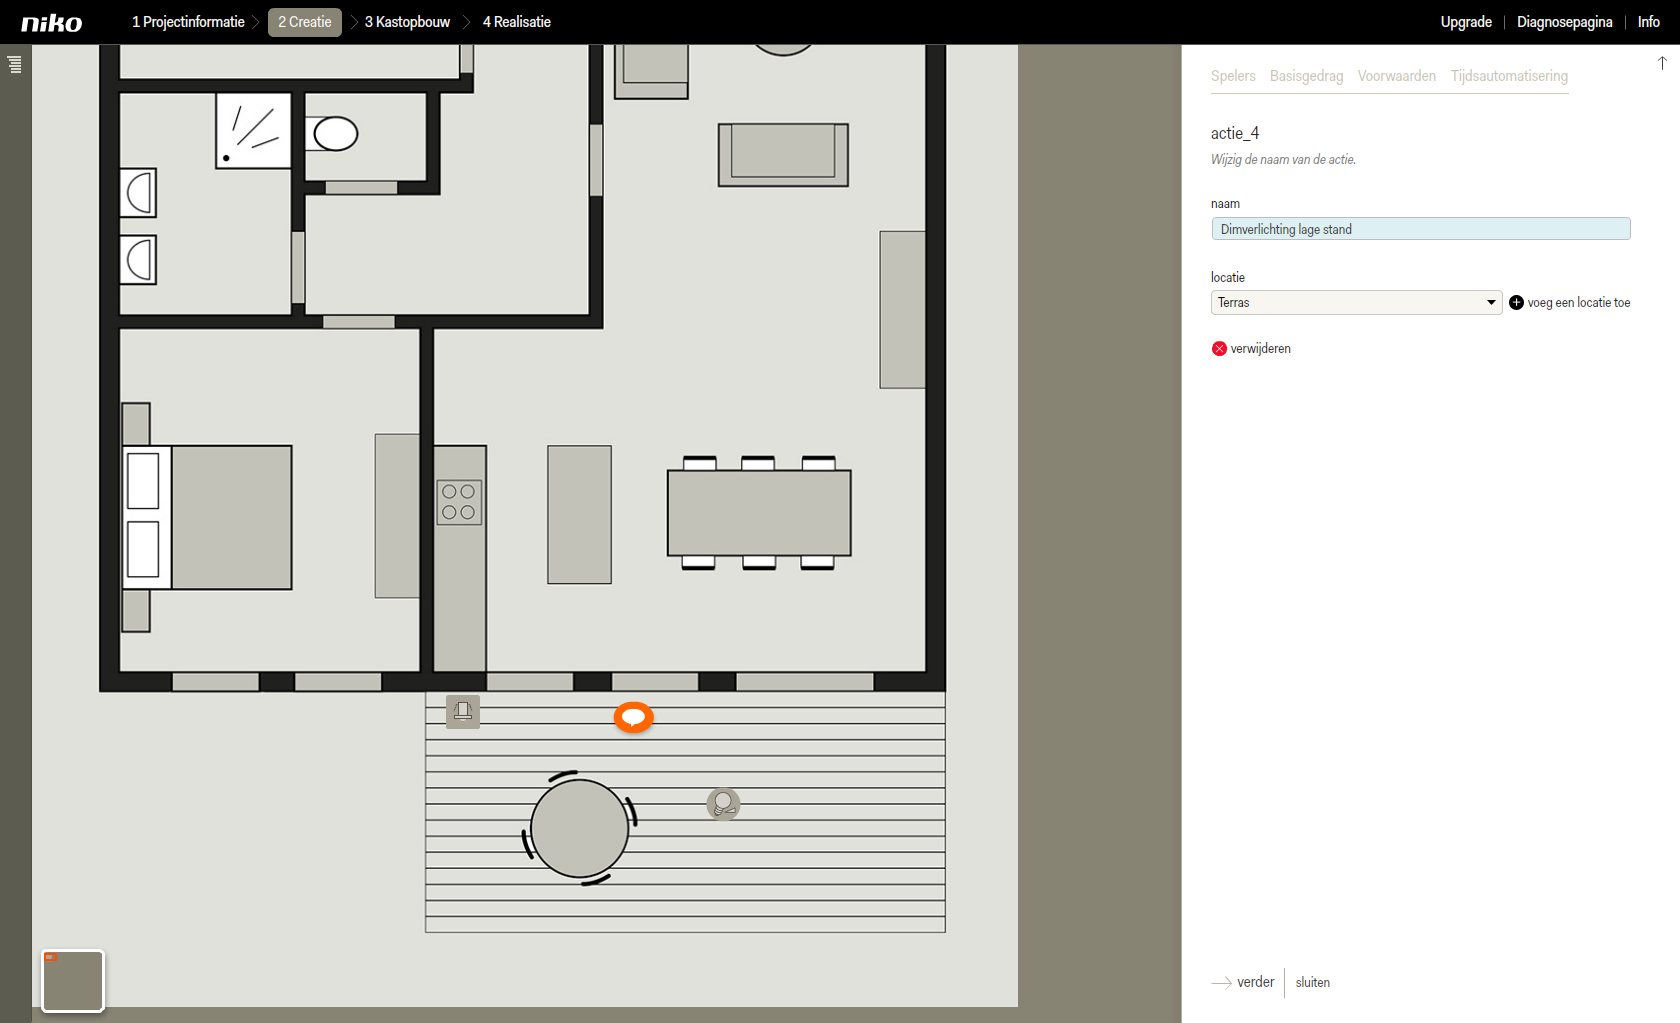
- Cliquez sur ajoutez une action. L'action apparaît sous forme d'info-bulle dans le plan.
- Faites glisser l'action vers un lieu logique et clair pour vous, par exemple au niveau de l'entrée ou sortie pertinente.
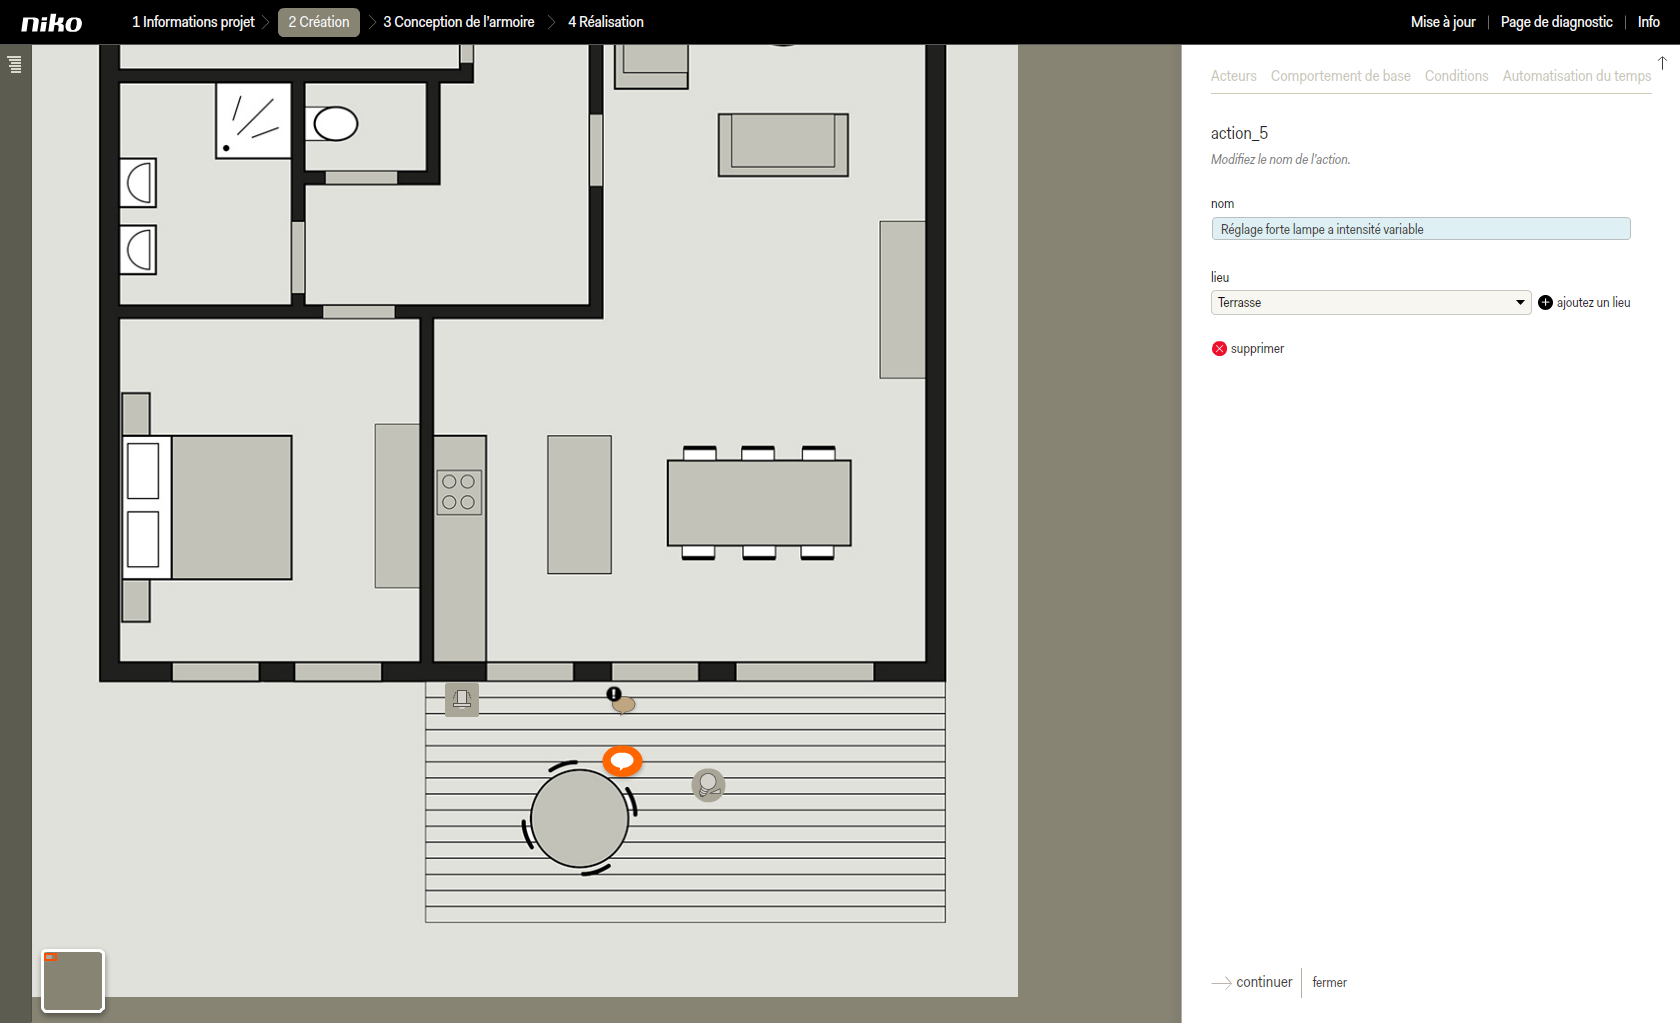
- Donnez un nom à l'action.
- Choisissez un lieu existant dans la liste déroulante ou cliquez sur ajoutez un lieu si celui-ci n'a pas encore été défini.
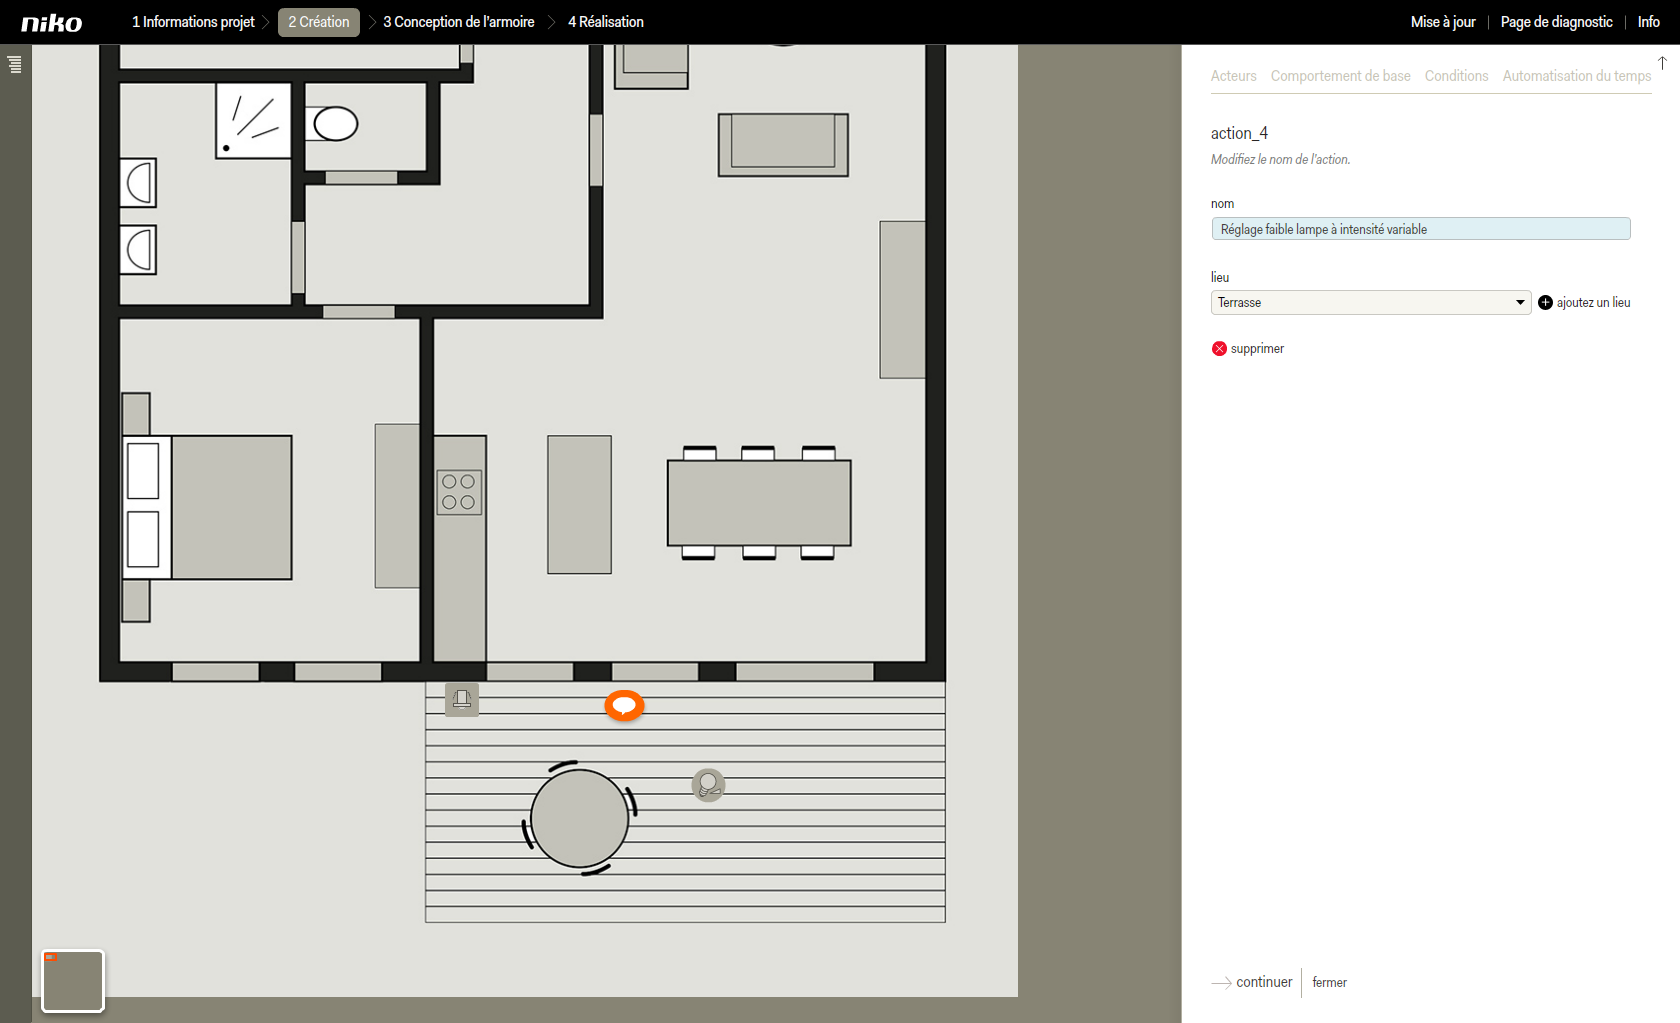
- Cliquez sur continuer pour accéder à l'onglet Acteurs.
- Cliquez sur la lampe variable sur le plan pour l'ajouter à l'action en tant qu'acteur.
| Info |
|---|
| Ce type d'automatisation ne contient pas d'entrées en tant qu'acteurs. Vous vous limitez donc ici à sélectionner les sorties qui doivent être commandées. |

- Cliquez sur Continuer pour accéder à l'onglet Comportement de base.
- Sous comportement de base modifiez l'intensité de la lampe variable sur 30 %.

- Cliquez sur continuer pour accéder à l'onglet Conditions.
- Cliquez sur ajoutez une condition.
- Donnez un nom à la condition, par exemple Obscurité.
| Info |
|---|
| Veillez à ajouter un nom évident à la condition pour pouvoir l'identifier immédiatement en cas de modification ultérieure éventuelle. |
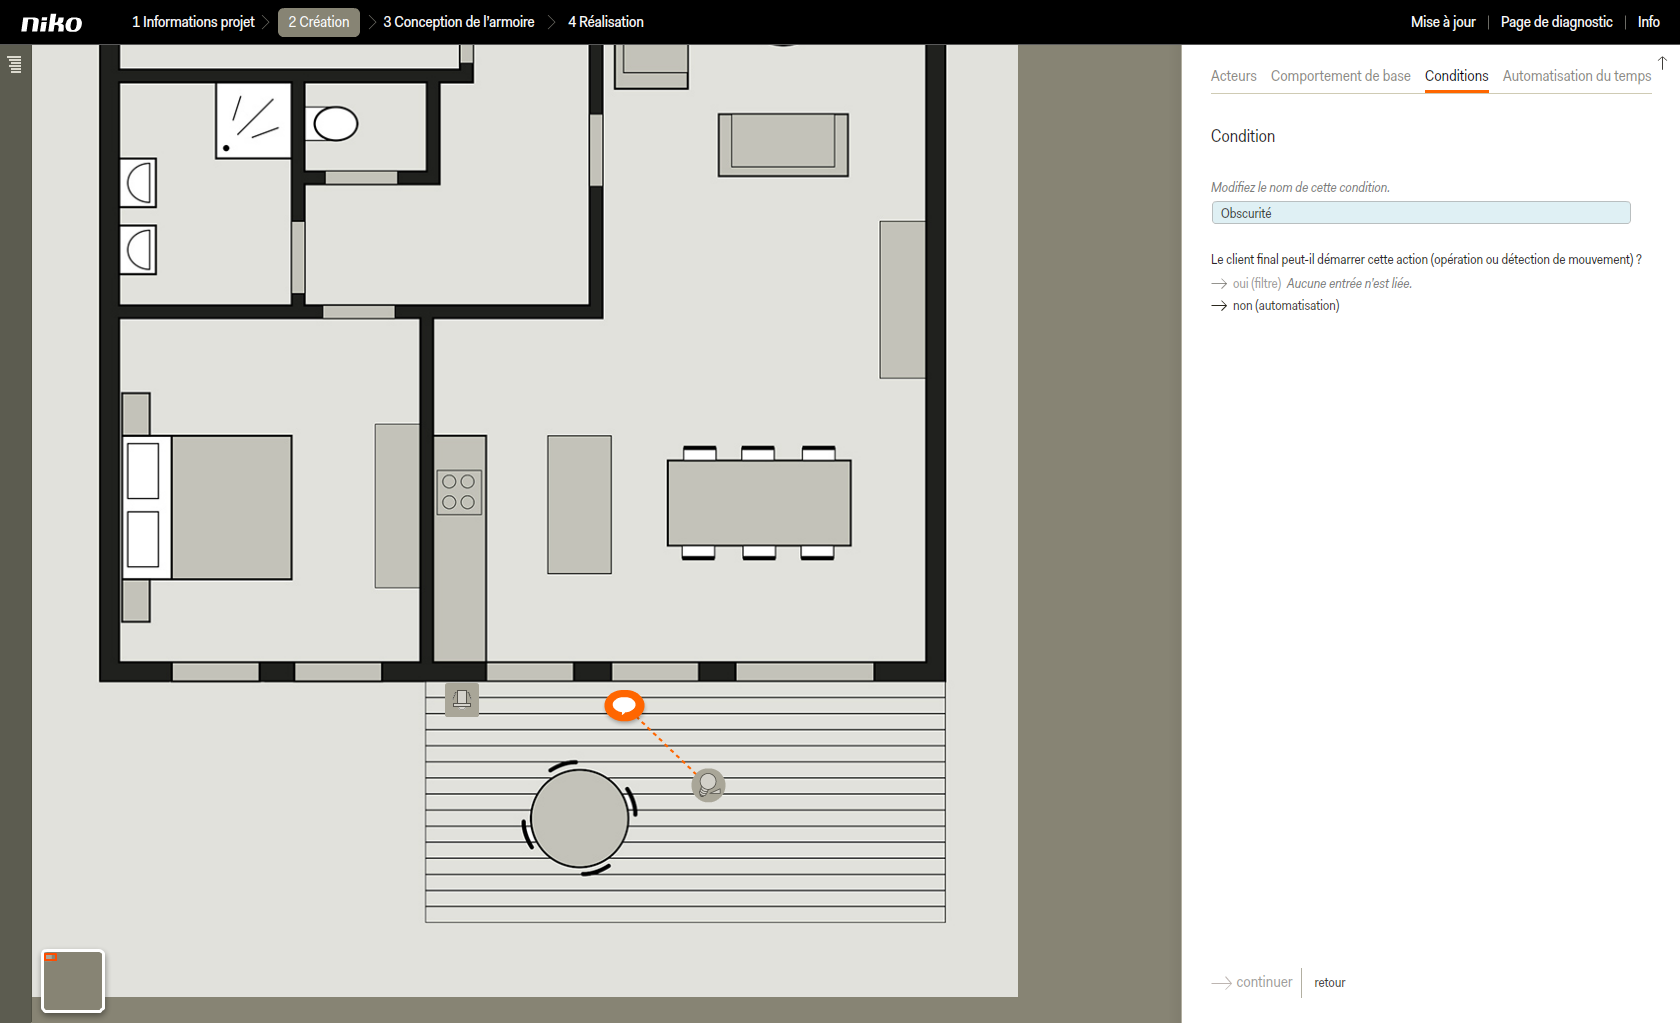
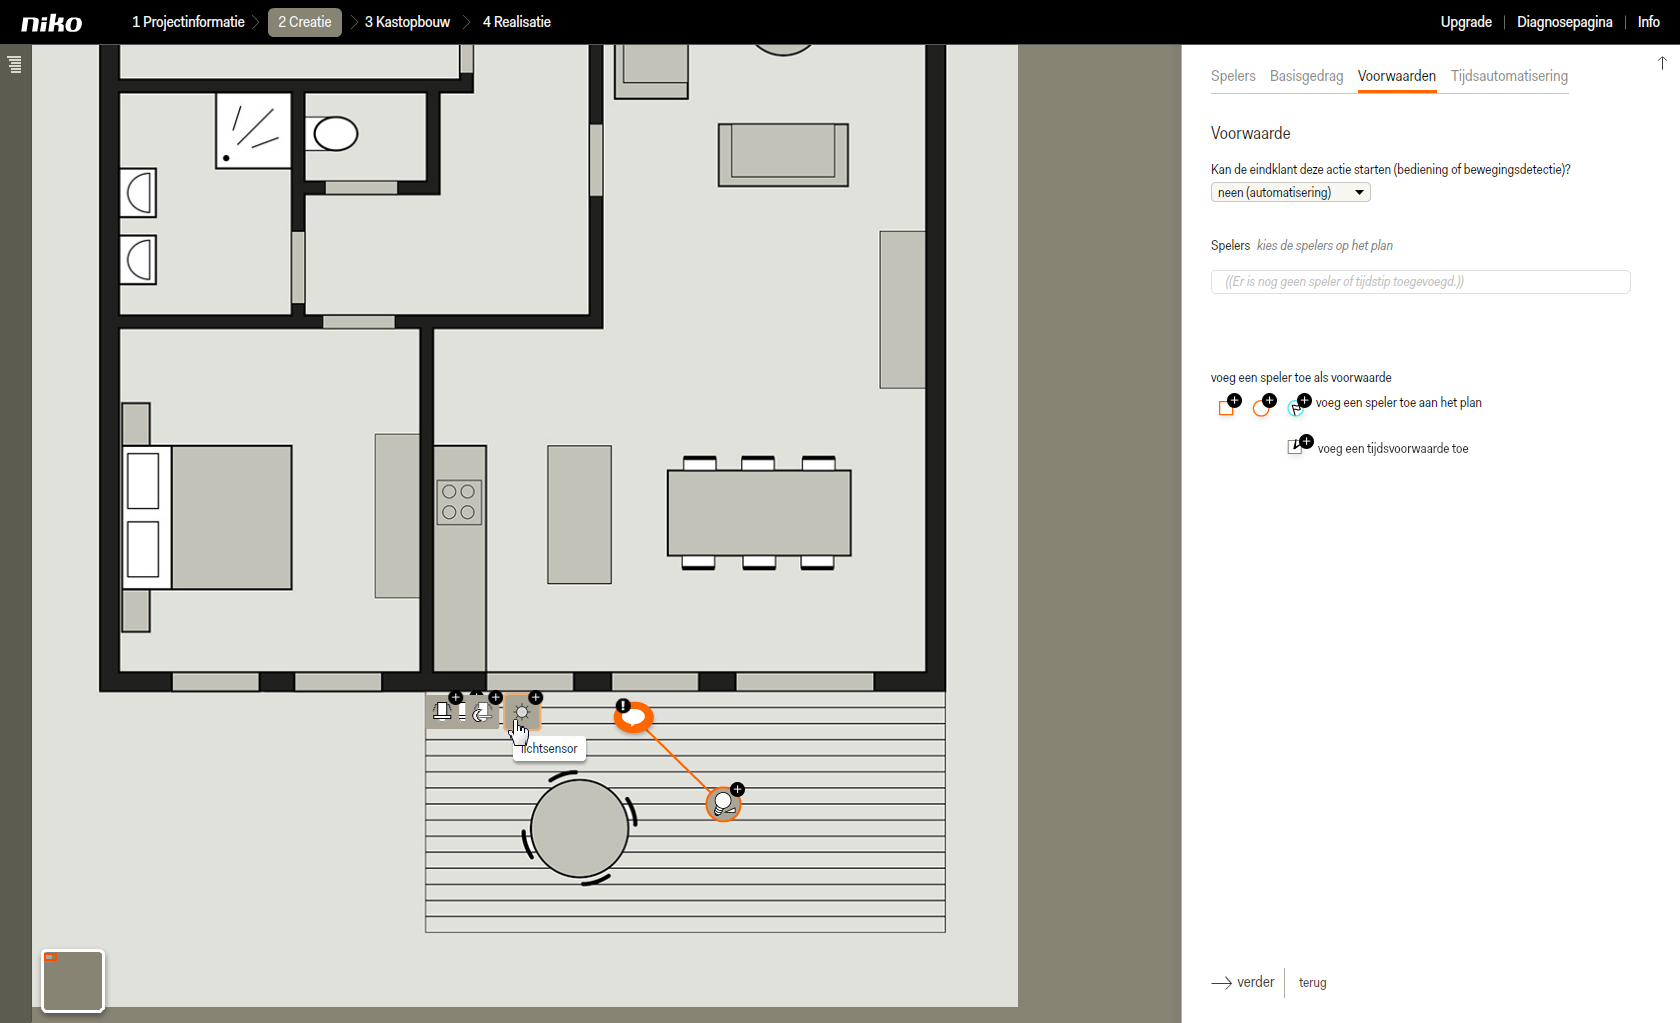
- Cliquez sur non (automatisation).
| Info |
|---|
| Vous n'avez pas ajouté d'entrées à cette action, le client ne peut donc pas la démarrer lui-même. |
- Cliquez sur le mini détecteur dans le plan. Trois applications s'affichent.
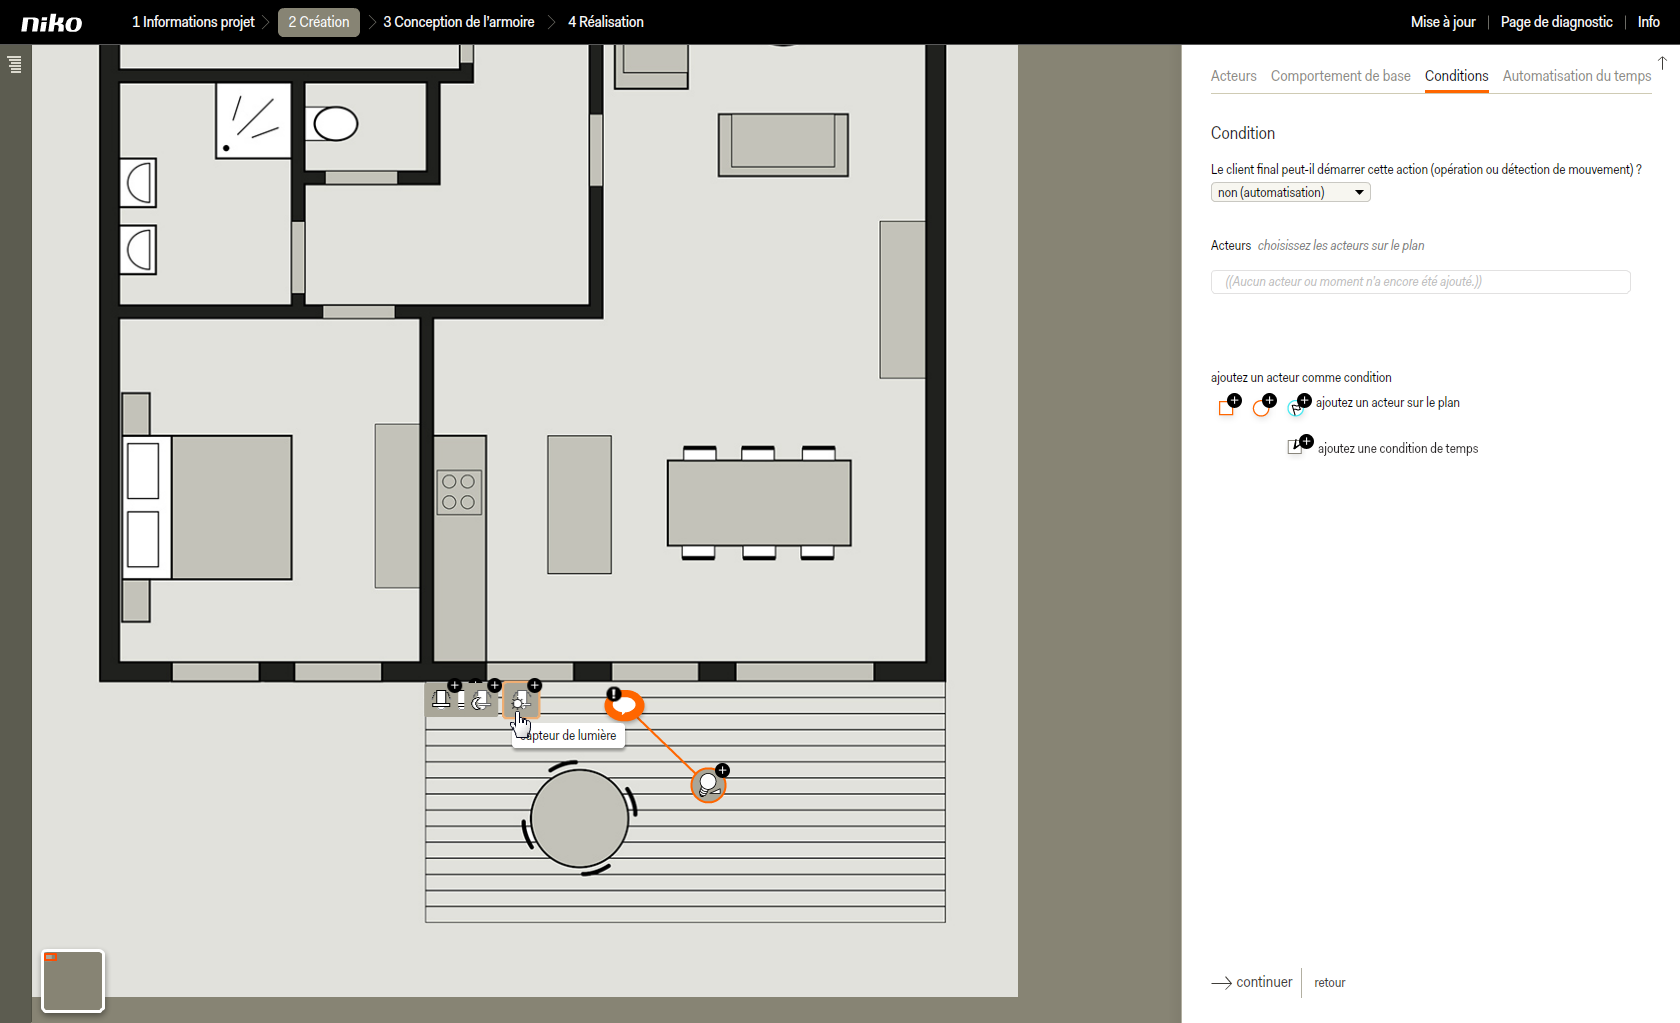
- Cliquez sur l'application capteur de lumière (à droite).
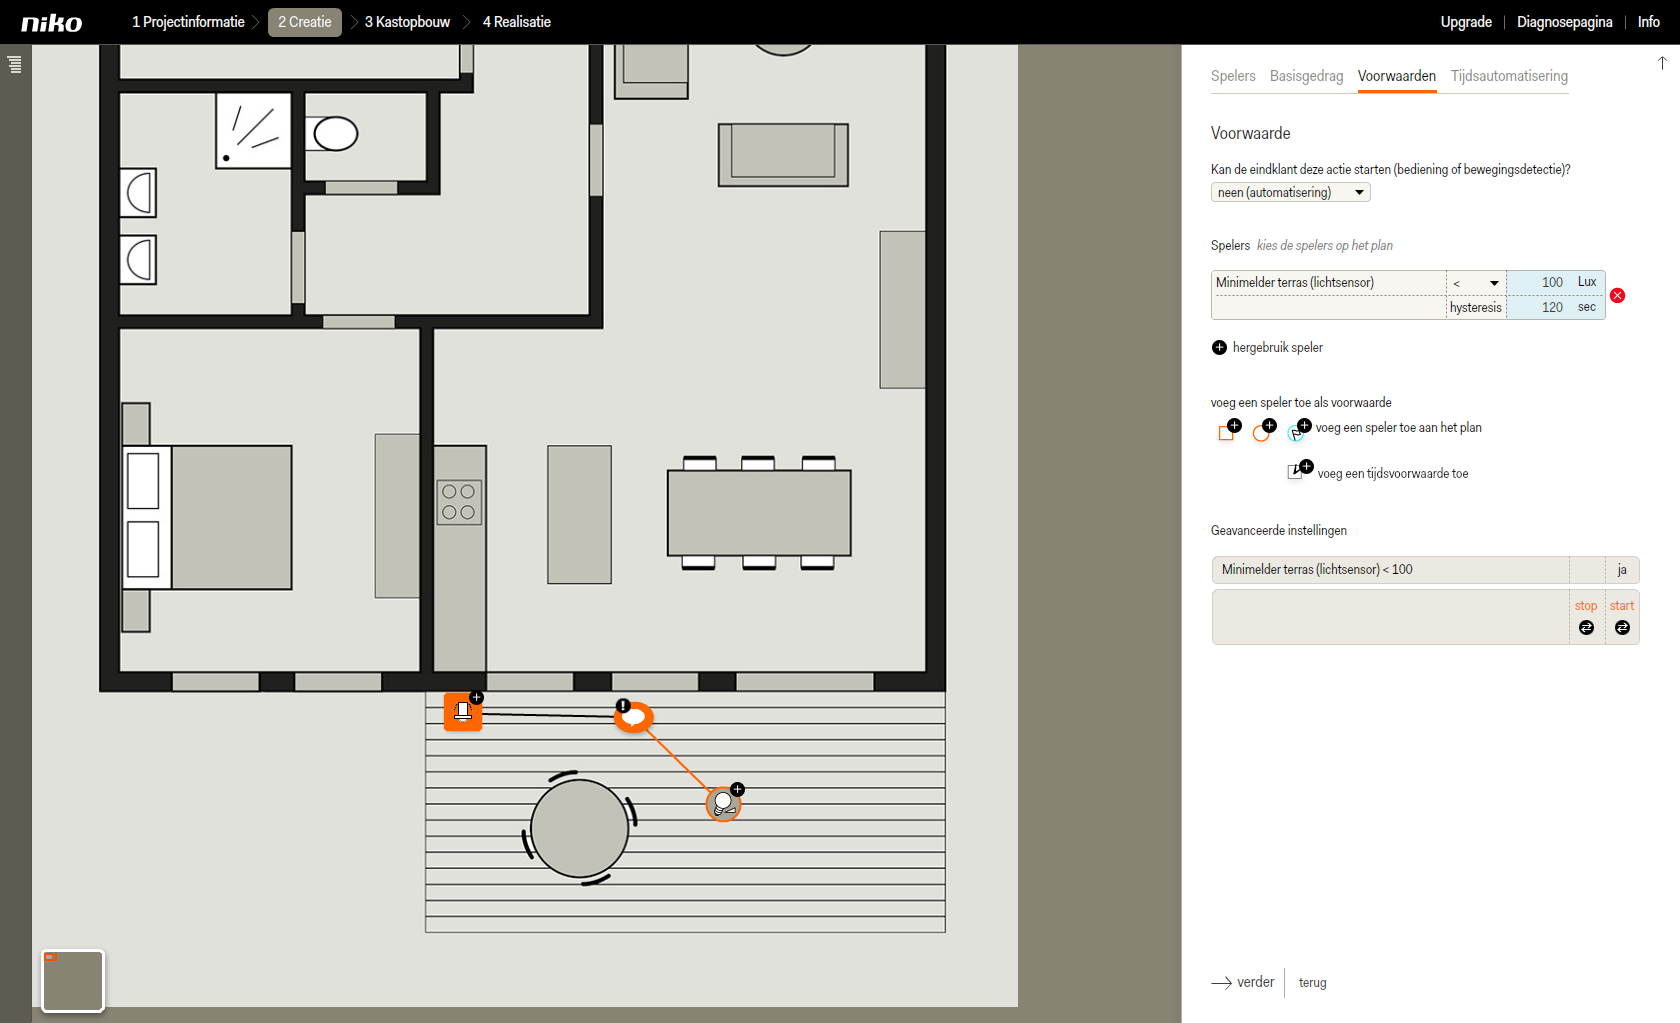
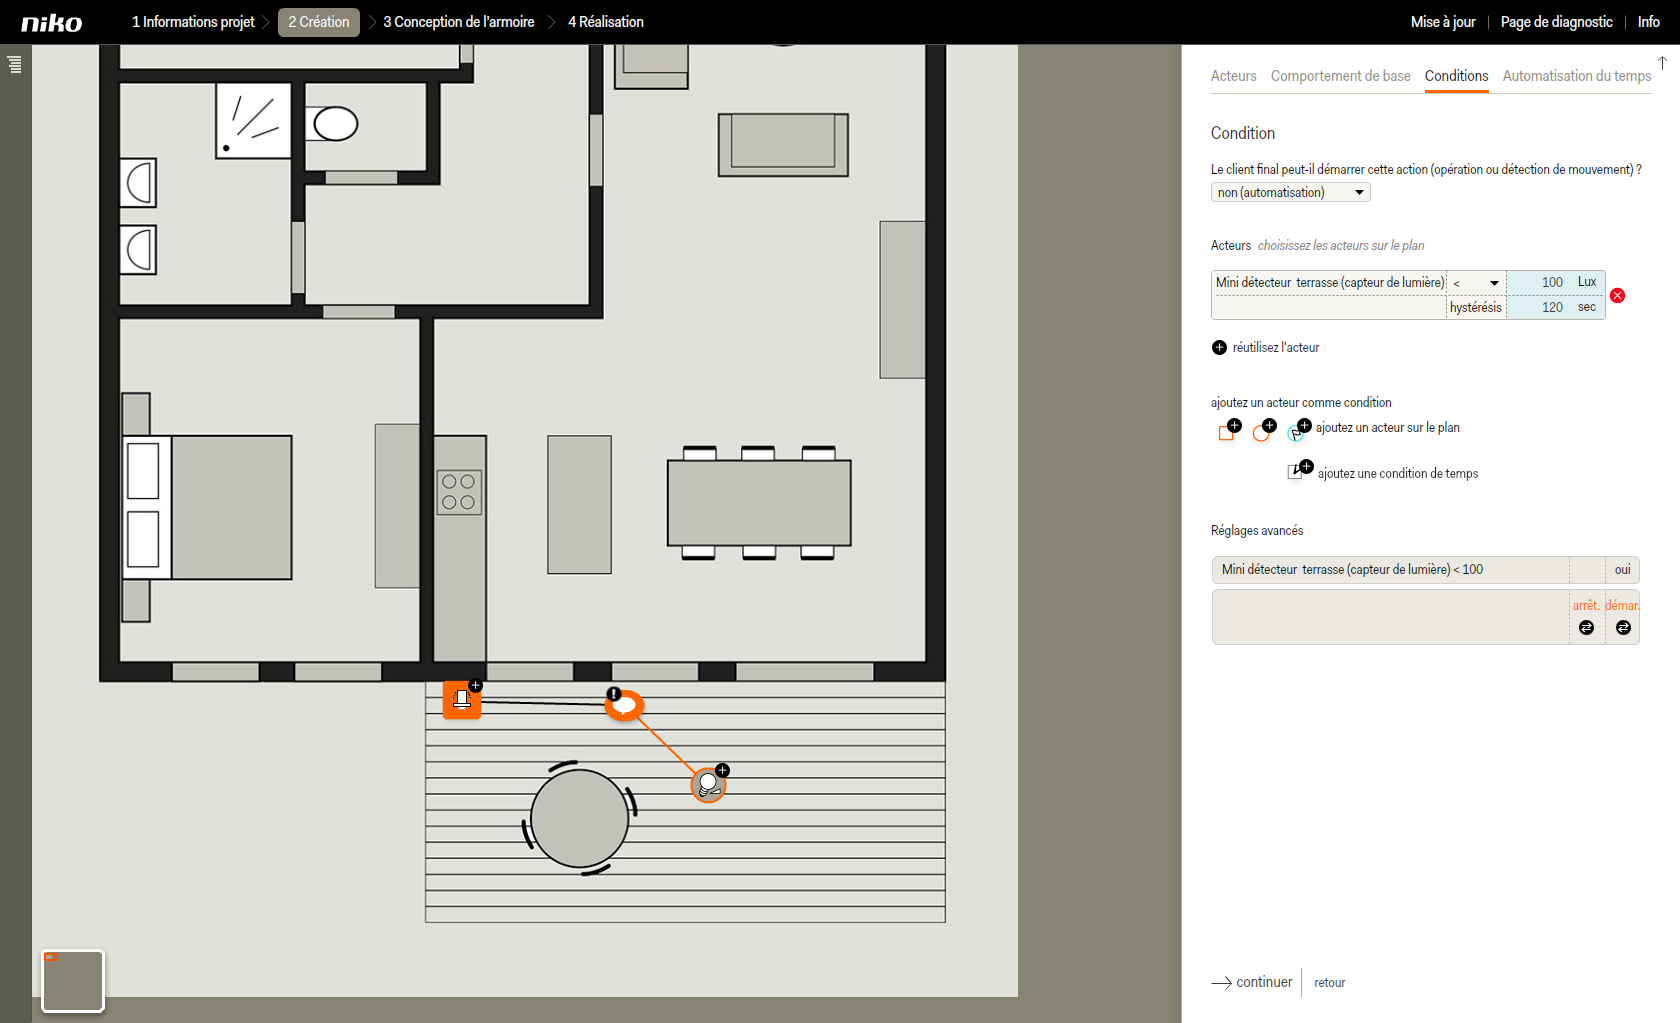
Le mini détecteur est lié à l'action par une ligne noire. - Adaptez les réglages de l'acteur de condition sur < (inférieur à) 100 lux.
- Adaptez l'hystérésis par exemple sur 120 s.
| Info |
|---|
| Vous pouvez bien entendu choisir ces paramètres vous-même. Les valeurs utilisées dans le plan par étapes sont indicatives pour un bon fonctionnement du détecteur. |
- Vous trouverez sous les réglages avancés un tableau reprenant toutes les combinaisons possibles entre les différents acteurs de condition.
- Parcourez chaque colonne et cliquez sur le bouton noir en dessous pour indiquer ce qu'il doit se passer dans ce cas. Vous avez le choix entre démarrer, arrêter ou slash (/). L'option / (slash) signifie qu'il ne doit rien se passer.
- Paramétrez l'action démarrer lorsqu'il fait obscur (oui) et arrêt lorsqu'il fait clair.
- Cliquez sur continuer pour accéder à l'onglet Automatisation du temps.
- Cliquez sur Enregistrer pour revenir à l'écran d'accueil de l'étape Création.
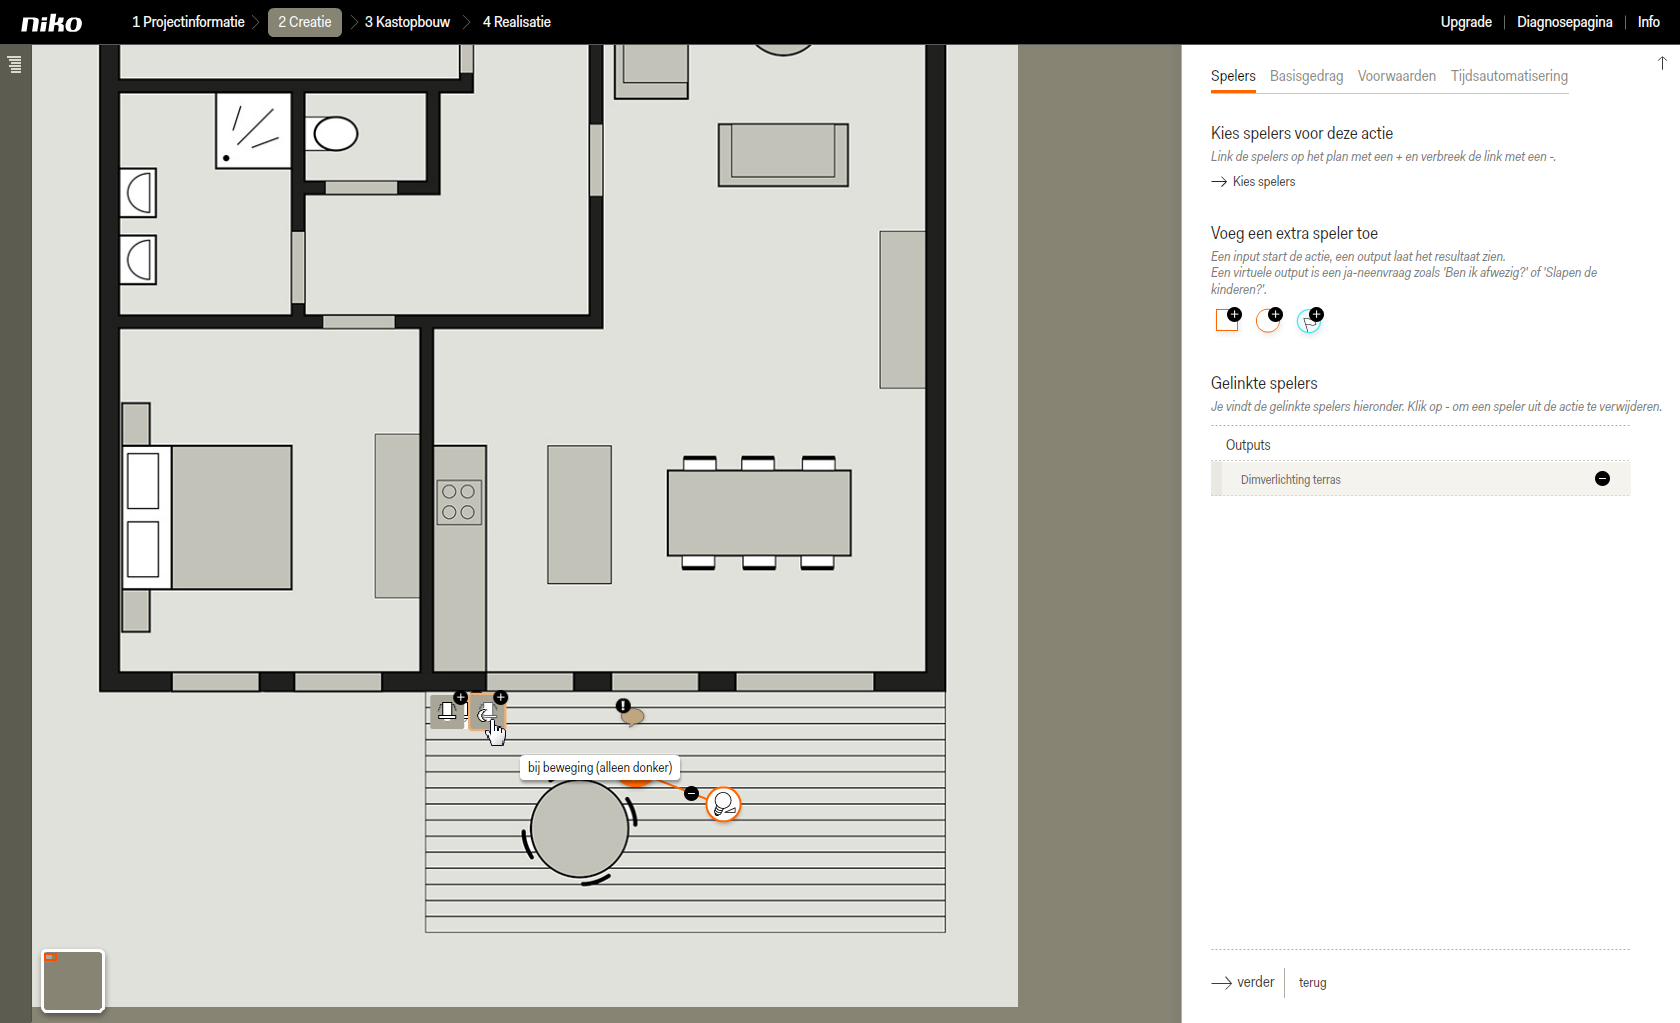
Créer une action 'Réglage élevée lampe à intensité variable'- Cliquez sur ajoutez une action. L'action apparaît sous forme d'info-bulle dans le plan.
- Faites glisser l'action vers un lieu logique et clair pour vous, par exemple au niveau de l'entrée ou sortie pertinente.
- Donnez un nom à l'action.
- Choisissez un lieu existant dans la liste déroulante ou cliquez sur ajoutez un lieu si celui-ci n'a pas encore été défini.
- Cliquez sur continuer pour accéder à l'onglet Acteurs.
- Cliquez sur la lampe variable sur le plan pour la lier à l'action.
- Cliquez sur le mini détecteur dans le plan. Deux applications s'affichent.
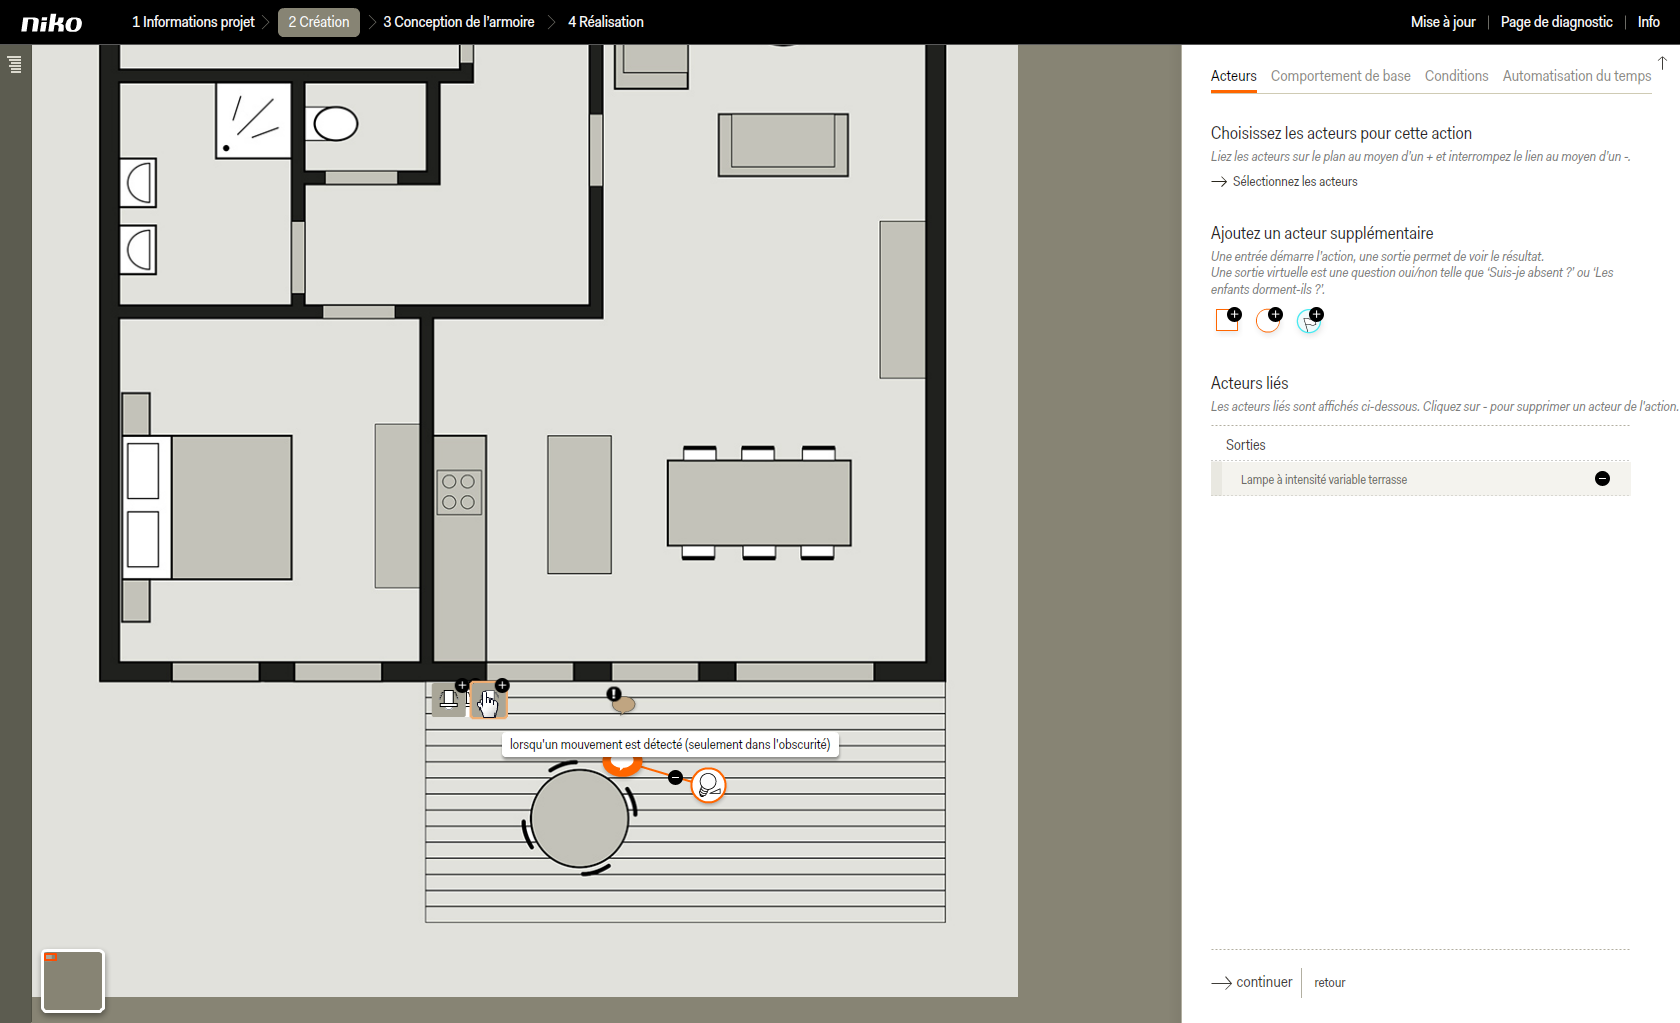
- Cliquez sur l'application lorsqu’un mouvement est détecté (seulement dans l’obscurité).
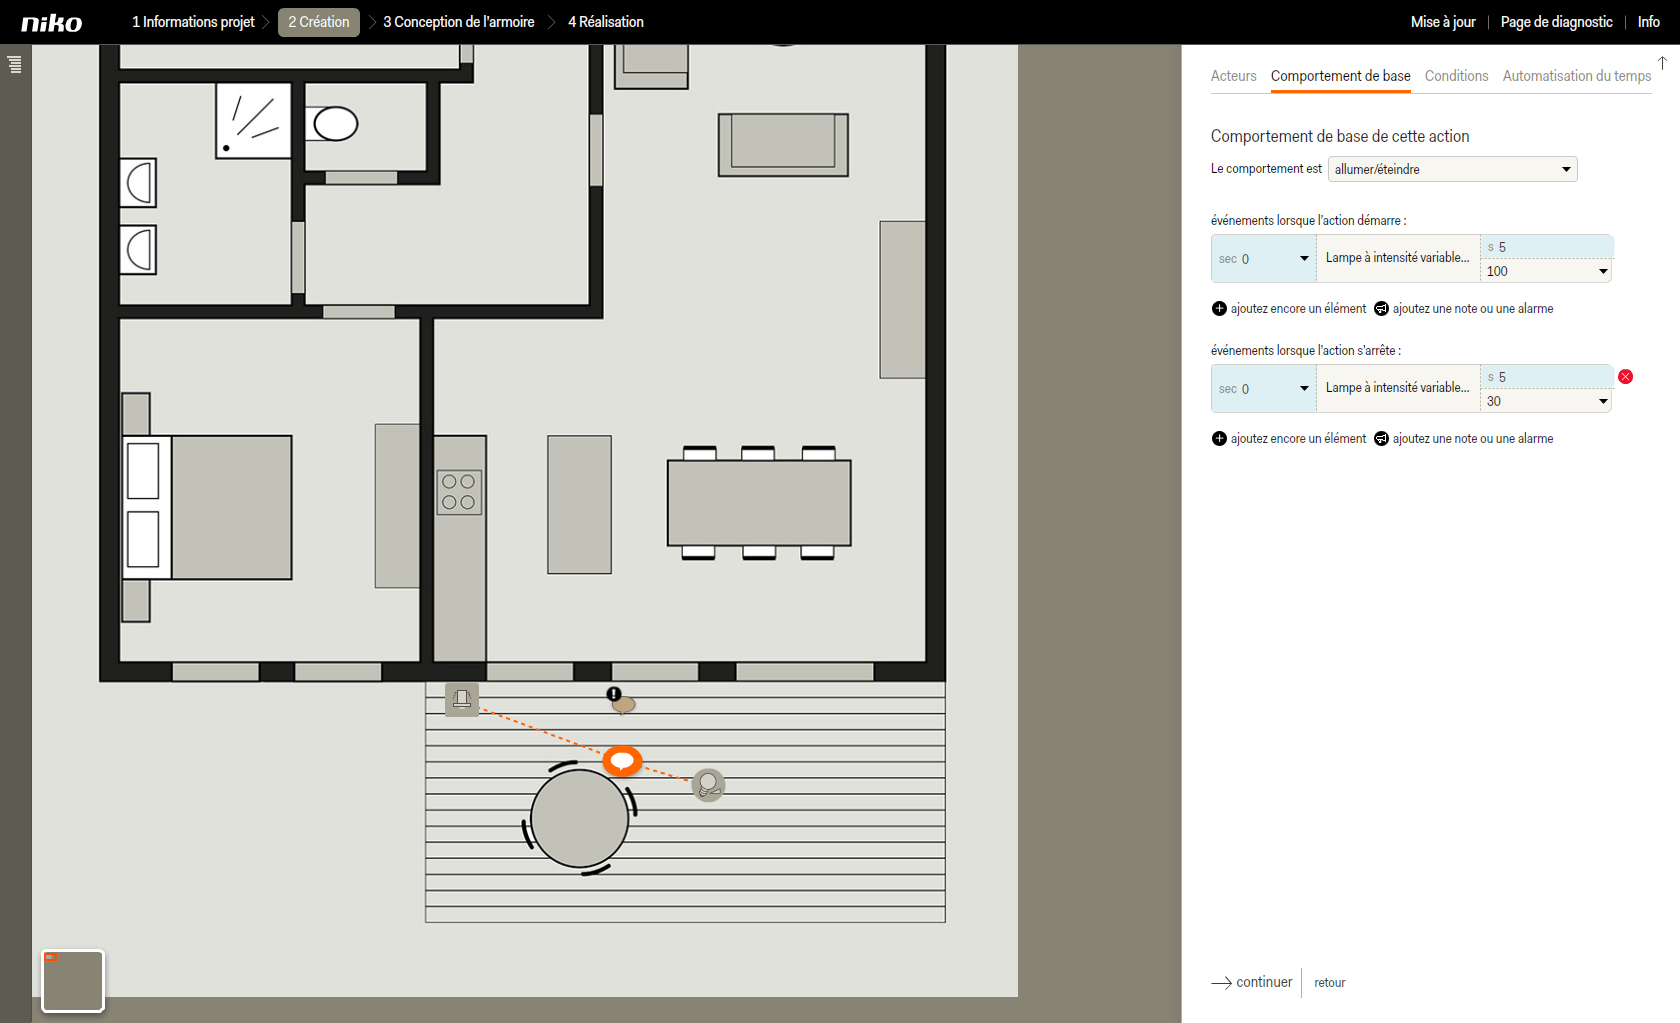
- Cliquez sur Continuer pour accéder à l'onglet Comportement de base.
Étant donné que vous avez paramétré une temporisation de désactivation dans les réglages de base du mini détecteur, vous ne devez pas dans l'onglet comportement de base paramétrer de temporisation pour le comportement d’arrêt. - Sous comportement d'arrêt, modifiez l'intensité de la lampe variable sur 30 %.
- Cliquez sur continuer pour accéder à l'onglet Conditions.
- Cliquez sur continuer pour accéder à l'onglet Automatisation du temps.
- Cliquez sur Enregistrer pour revenir à l'écran d'accueil de l'étape Création
RésultatVous pouvez maintenant poursuivre avec l'étape Disposition de l'armoire et Réalisation.
|