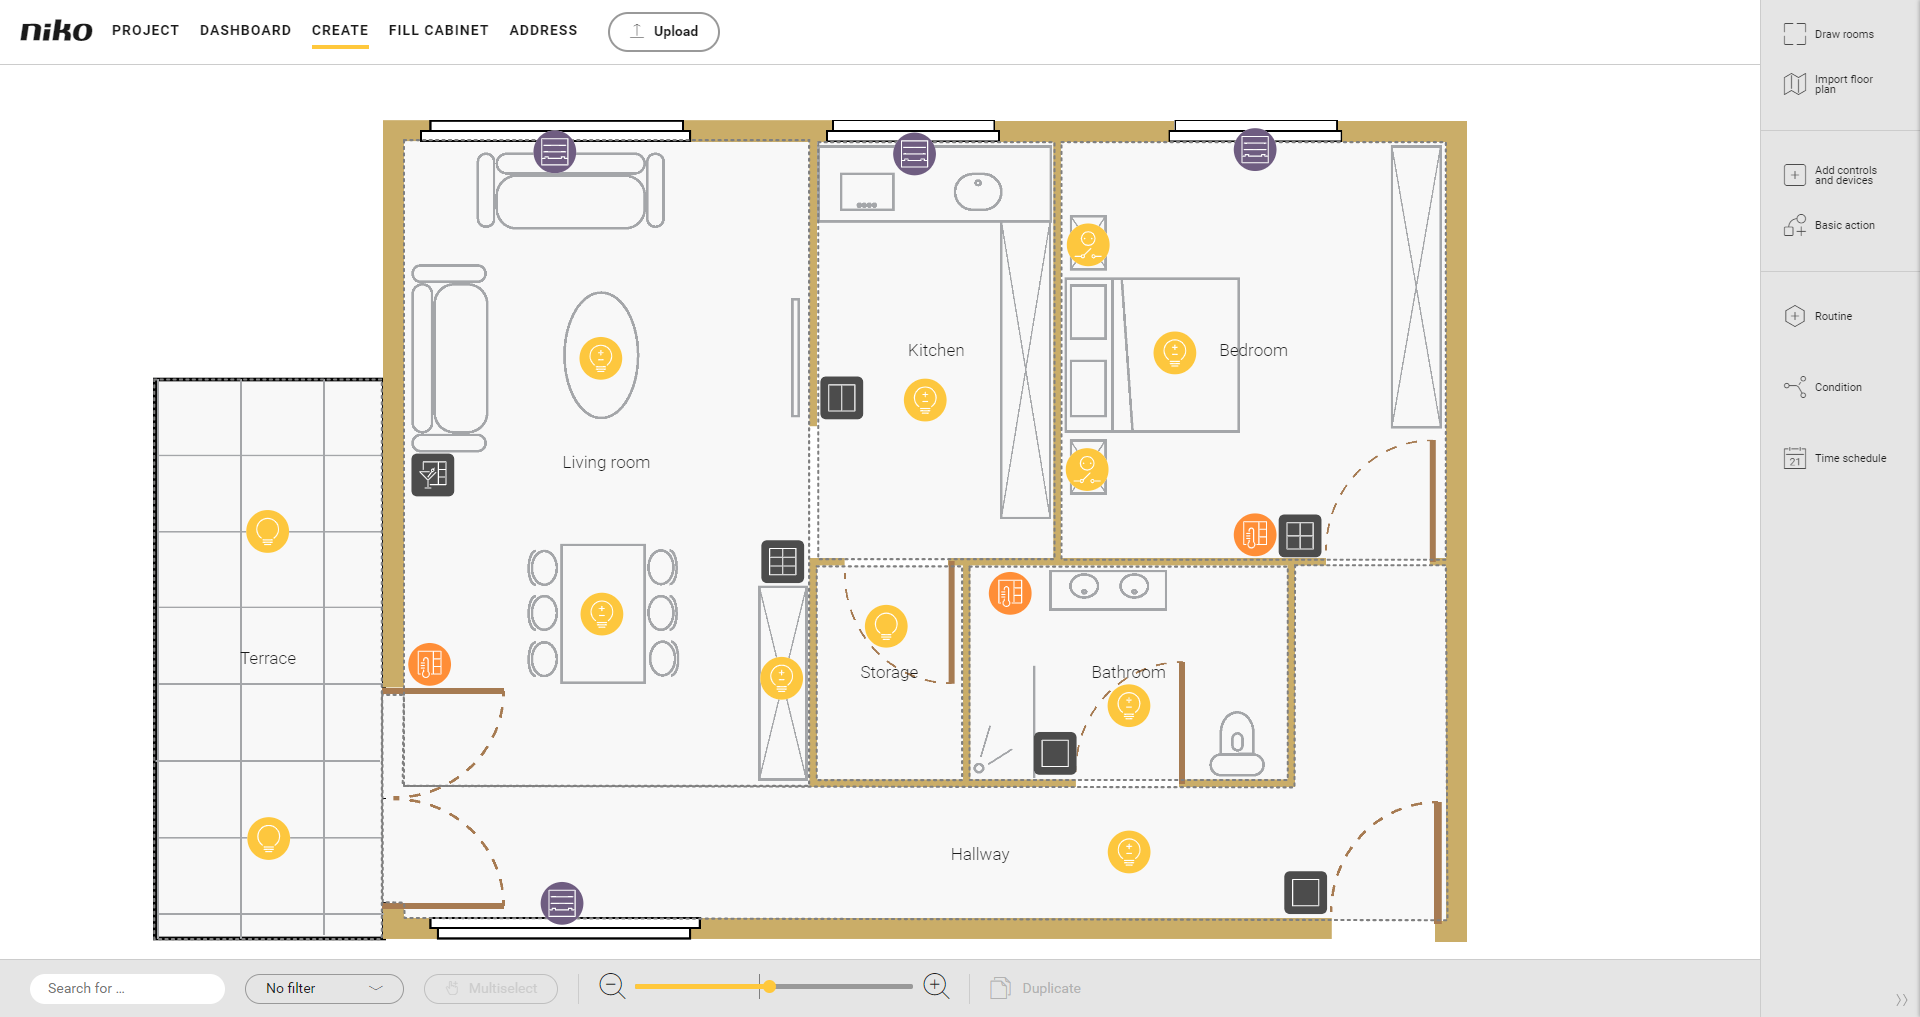
Qu'est-ce-que le Mode panique ?La routine Mode panique vous permet d'effrayer les visiteurs indésirables. À l'aide d'une seule commande, vous pouvez allumer l'éclairage et/ou le faire clignoter et choisir, en même temps, l'état prédéfini d'autres appareils. Après une certaine période à régler par l'utilisateur, le Mode panique est automatiquement désactivé. Le même bouton panique permet d'activer et de désactiver le Mode panique. Point de départProcédure- Dans la barre d'outils de droite, cliquez sur le bouton Routine.
Résultat :
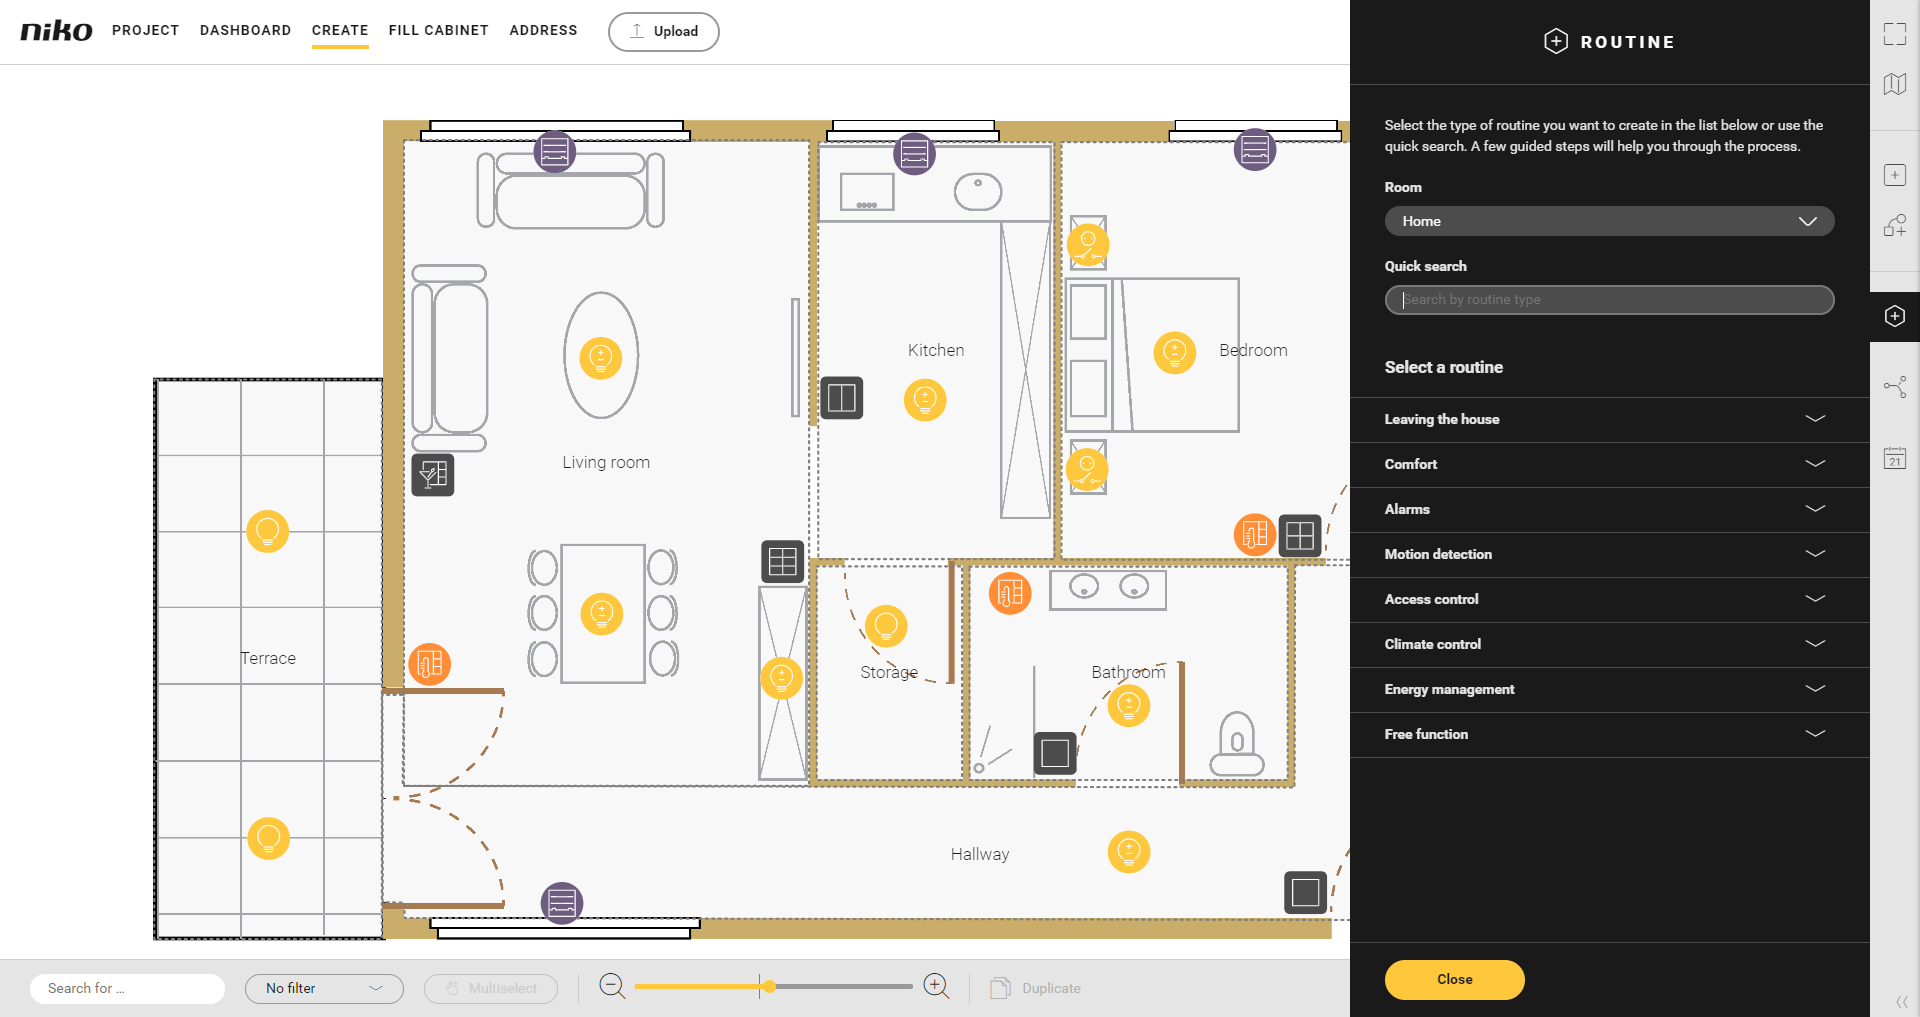
La fenêtre partielle Routine apparaît.
 - Choisissez la pièce comme suit :
- Choisissez dans la liste déroulante Pièce.
- Cliquez sur la pièce dans le plan de travail.

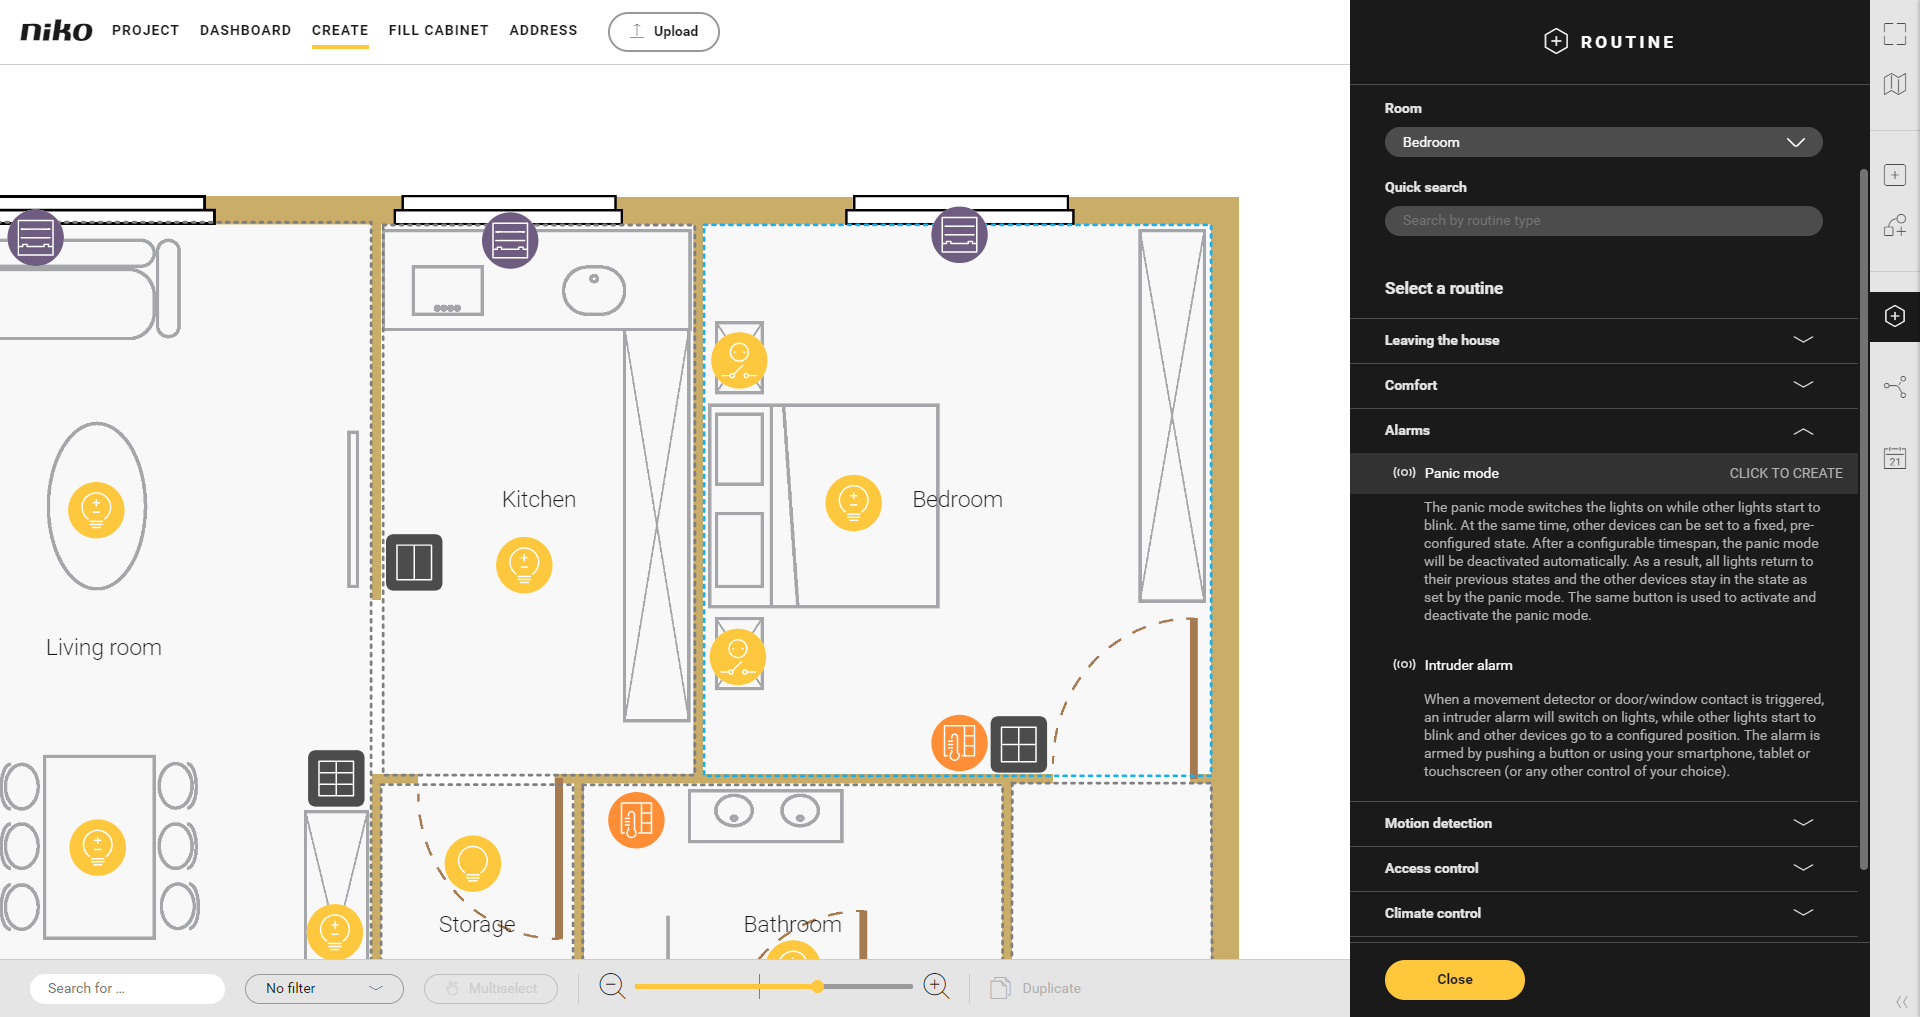
- Cliquez sur la flèche à côté de la catégorie Alarmes.
 - Cliquez sur Mode panique.
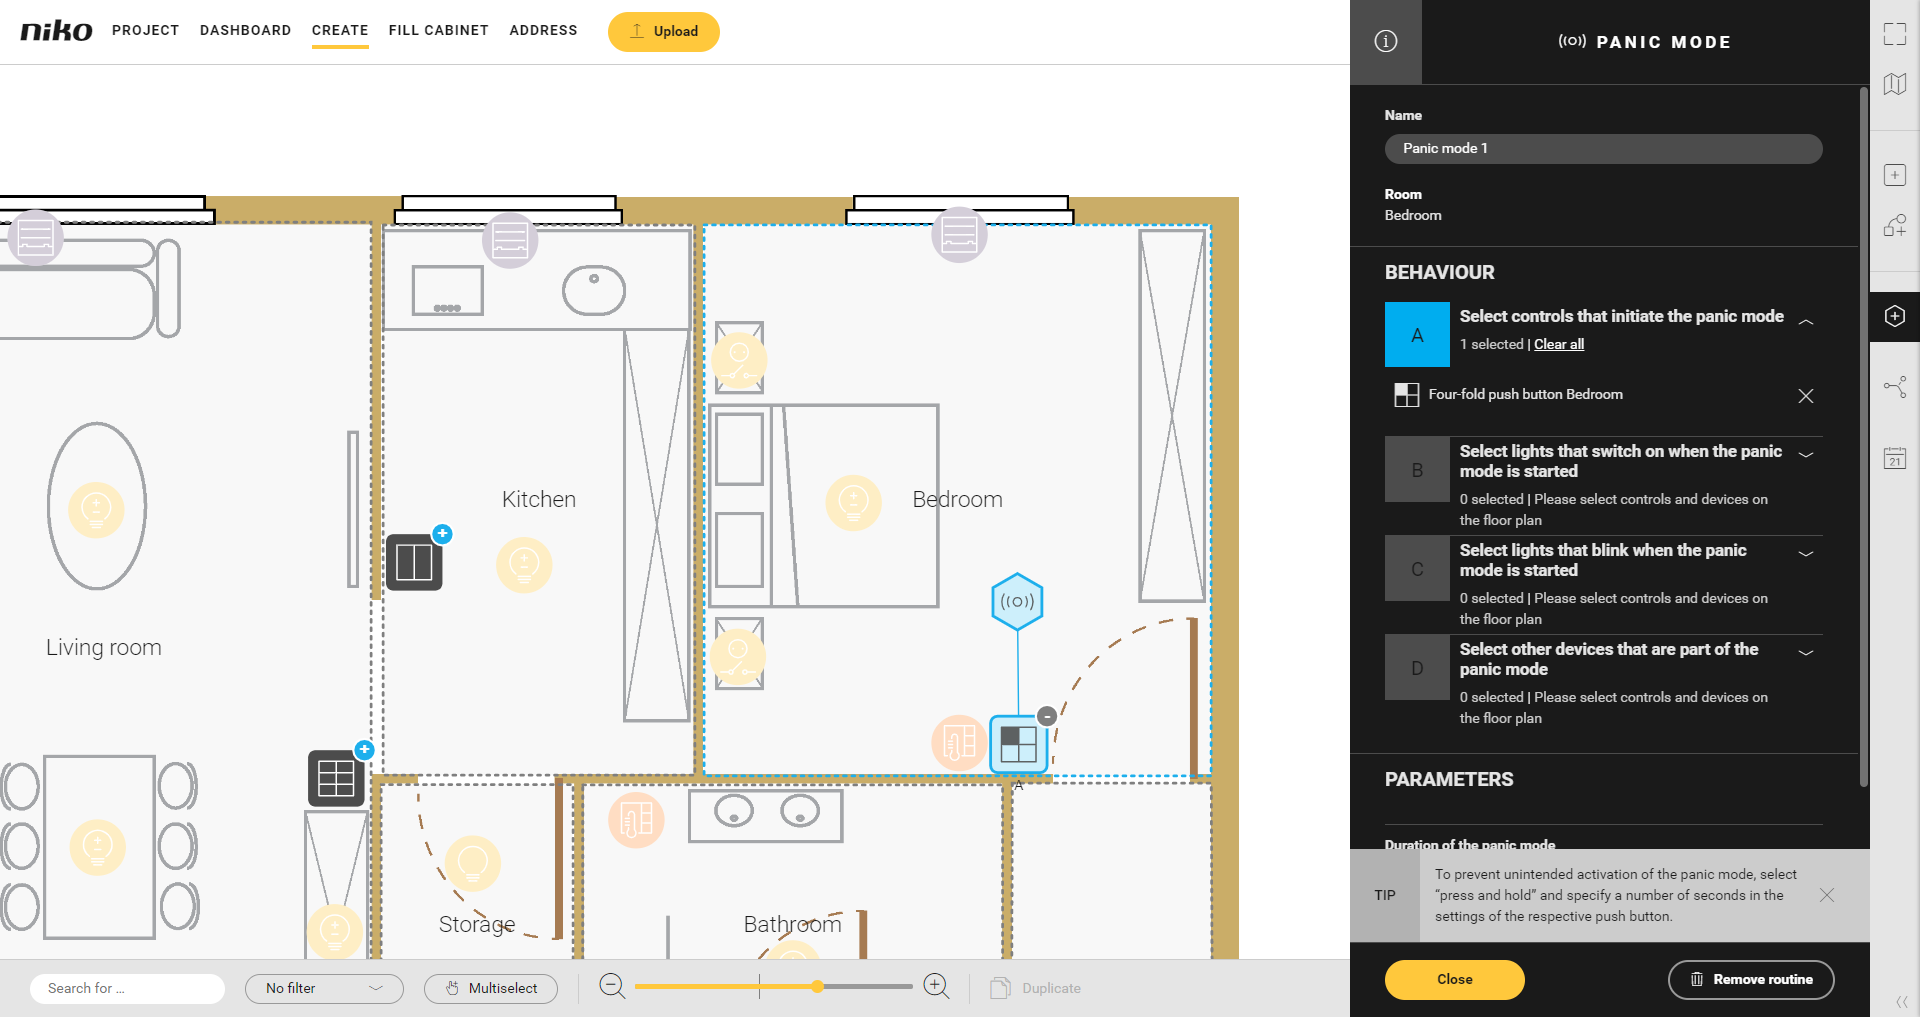
- Donnez un nom à la routine.
Réglez le comportement comme suit : | Comportement | Quoi ? | Comment ? |
|---|
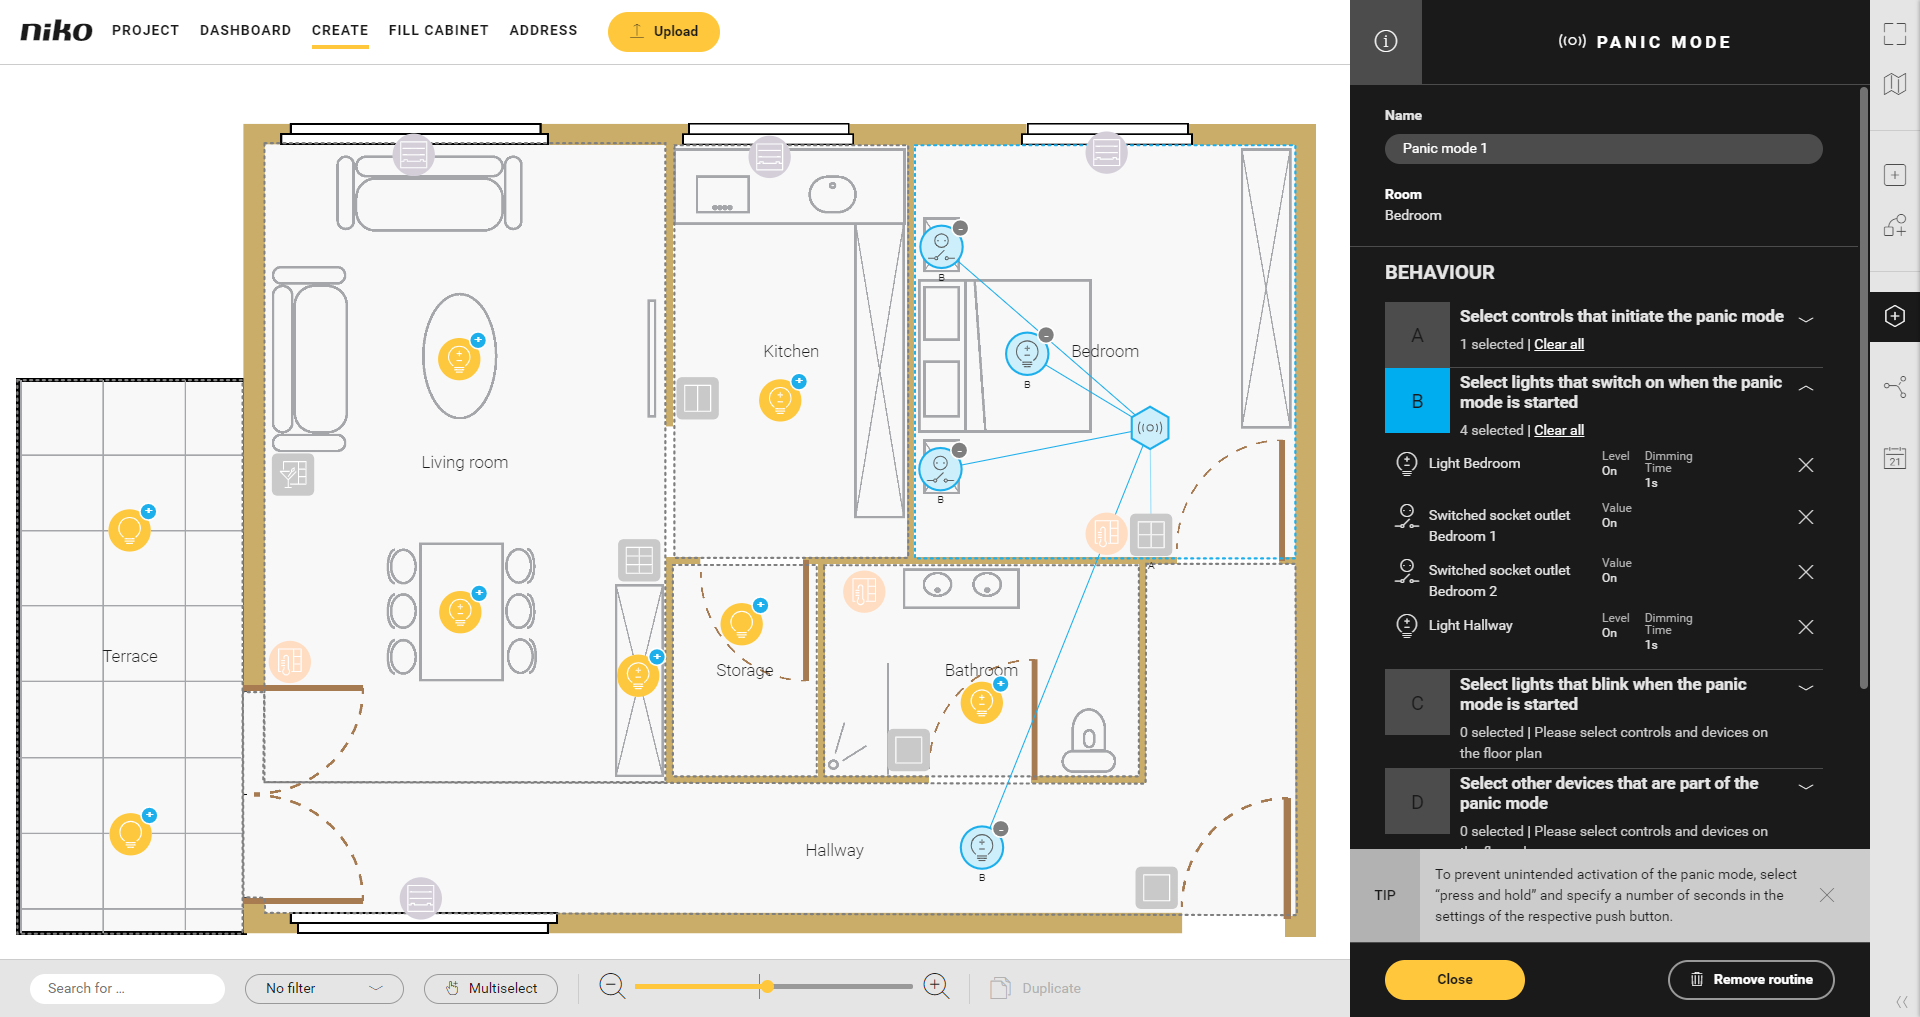
| A | Choisissez la (les) commande(s) qui active(nt) la routine. | 1 Cliquez sur le signe plus des commandes que vous voulez lier à la routine.
 2 Réglez le temps de commande sur Appuyer longuement, afin de ne pas activer le Mode panique de manière intempestive. | | B | Choisissez les appareils qui doivent s'allumer après que vous ayez activé la routine. | 1 Cliquez sur le signe plus des appareils.

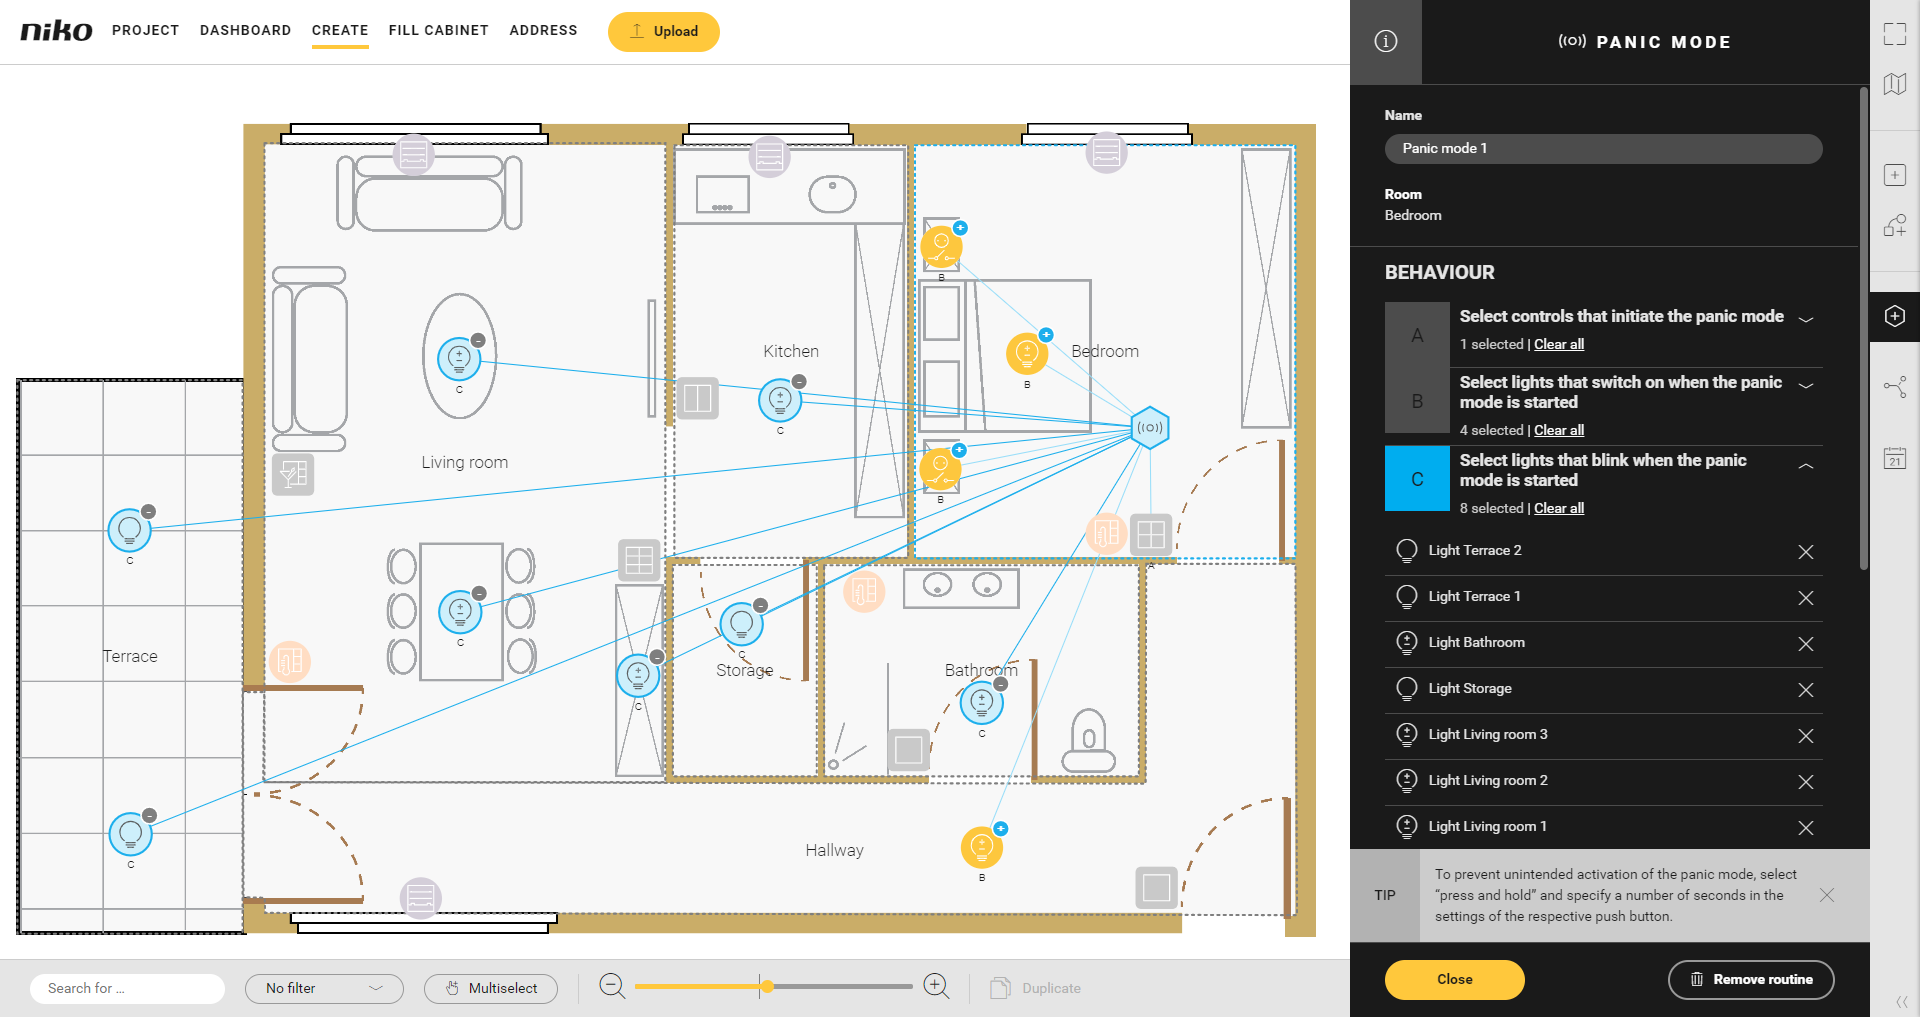
2 Dans Paramètres, définissez combien de temps les lampes doivent rester allumées. | | C | Choisissez les appareils qui doivent clignoter après que vous ayez activé la routine. | 1 Cliquez sur le signe plus des appareils. 
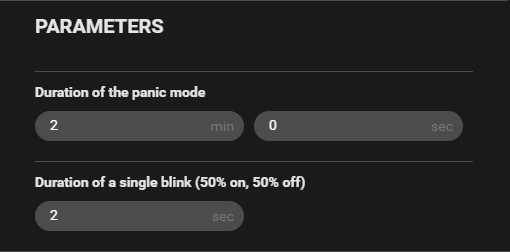
2 Dans Paramètres, définissez les éléments suivants : - combien de temps les lampes doivent rester allumées : standard 2 min - au maximum 59 min 59 sec
- la fréquence de clignotement : standard 2 sec - au maximum 59 sec.

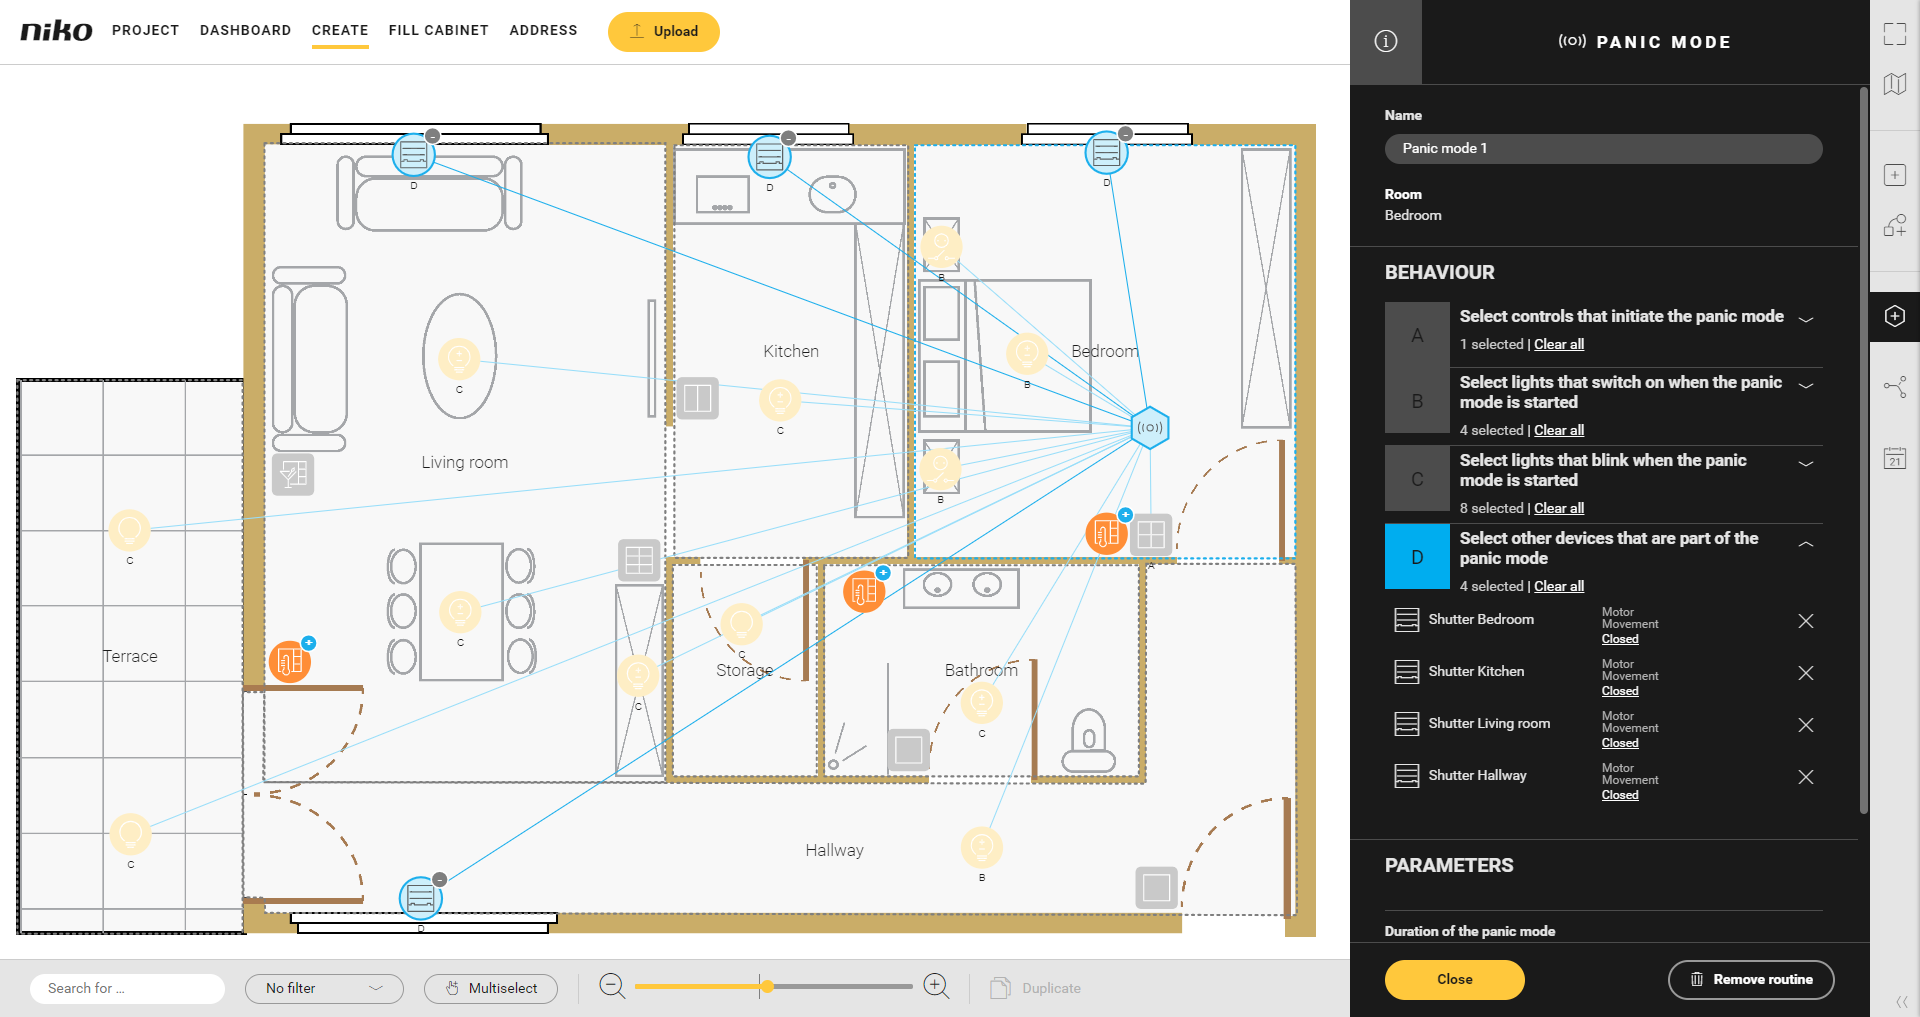
| | D | Choisissez d'autres appareils que vous voulez faire passer à un certain état, p.ex. les volets. | 1 Cliquez sur le signe plus des appareils.
 2 Saisissez éventuellement d'autres réglages de l'appareil. | Info |
|---|
En voici quelques exemples : ouvrir les volets, activer un contact que vous utilisez pour commander une sirène, etc. |
| - Cliquez sur le bouton Fermer pour revenir à la fenêtre partielle Routine.
- Cliquez sur le bouton Fermer pour revenir à la fenêtre récapitulative Créer.
VidéoVisionnez ici un exemple. Activez le son pour visionner la vidéo. | HTML |
|---|
<iframe width="900" height="525" src="https://youtube.com/embed/Ex8iQe-zR5w?rel=0&controls=0&showinfo=0" frameborder="0" allowfullscreen></iframe> |
|